Cost Optimization Report
To generate the Cost Optimization Report, I need access to at least 2 Data Exports from your Root Account.
The Cost Optimization Email Report provides a detailed and actionable summary of AWS cost-saving opportunities. Sent automatically on a monthly or bi-monthly cadence, it gives your team a clear picture of where money is being wasted, what has already been fixed, and what is new this month — without any manual effort.
What the Report Includes
Executive Summary: A single-sentence overview showing the total number of active findings, the total potential monthly savings in dollars, and what percentage of your monthly cloud spend that represents — so decision-makers get the headline immediately.
Summary by Account: A ranked table of all accounts with their number of findings, potential savings, estimated monthly spend, and a Savings Score. The Savings Score tells you at a glance how well-optimized each account is relative to its size. For Advanced Reports, you also get month-over-month comparison, Tagging and Allocation Scores.
Summary by Optimization Type: A breakdown of findings grouped by optimization category (e.g. EC2 weekend shutdown, RDS rightsizing, S3 storage classes), with difficulty rating and potential savings per category. Bonus opportunities are shown separately and not counted in the headline total — so the numbers you act on are always conservative and honest.
Cost Anomaly Detection: Two dedicated tables highlighting day-over-day cost spikes detected in the past 30 days — one at the service level, one at the individual resource level. Each anomaly shows the previous cost, current cost, delta, and percentage change, making unexpected billing surprises immediately visible.
Detailed Findings: A full breakdown organized by optimization type, listing every affected resource with its account, region, resource ID, current configuration, recommended configuration, estimated monthly savings, and current status. Each Optimization type is linked to a video walkthrough and written instructions for identification and resolution — so developers can start saving immediately.
Why This Report is Valuable
Honest numbers. Savings totals only count findings that are still open. Achieved wins and Exceptions are tracked and shown but never inflate the headline figure.
No manual work. The report runs automatically, queries your billing data directly, and arrives in your inbox — nothing to export, no dashboards to check, no data to filter.
Anomaly visibility. Day-over-day cost spikes are surfaced in the same report, so you catch billing surprises the day after they happen rather than at month-end.
Progress tracking. Status transitions from NEW → NOT ACTIONED → ACHIEVED give your team a clear record of what was found, what was ignored, and what was fixed over time.
The Status column is calculated over 3 months of data (previous, current and next month) for each finding, based on its resource ID (ARN). Statuses are evaluated in this order:
EXCEPTION: Resources tagged with the Exception label are automatically classified as such.
ONE TIME: Findings that appear only in the current month and are absent in both the previous and next month. Example: A resource created and terminated within the same month. Edge Case: If the current month is the most recent month in the dataset, and the finding has not appeared in the last 2 days, it is also classified as ONE TIME.
ACHIEVED: Findings present in the current month but absent in the next month. Interpretation: Represents true savings (e.g., a resolved issue). Edge Case: If the current month is the most recent month in the dataset, and the finding has not appeared in the last 2 days, it is classified as ACHIEVED.
NEW: Findings that did not exist in the previous month but are present in the current month.
NOT ACTIONED: Findings that are present in all three months (previous, current, and next). Interpretation: No action has been taken to address these findings.
BONUS: Non-mandatory cost optimizations, such as informational future costs or nice-to-have savings. Note: Check the Details Page for context on each finding.
- Savings Score: % of your cloud spend that is not sitting as open optimization opportunities (higher = less waste left on the table). The ×2 on the savings score means it hits 0 when just 50% of spend is optimizable — intentionally aggressive to push action.
- 100 − 2 × (remaining potential savings / total amortized cost) × 100
- Tagging Score: % of your taggable resources that have your required tags
- (tagged resources / taggable resources) × 100
- Allocation Score: % of your cloud spend that is attributed to your required tags
- (tag-allocated spend / total allocated spend) × 100
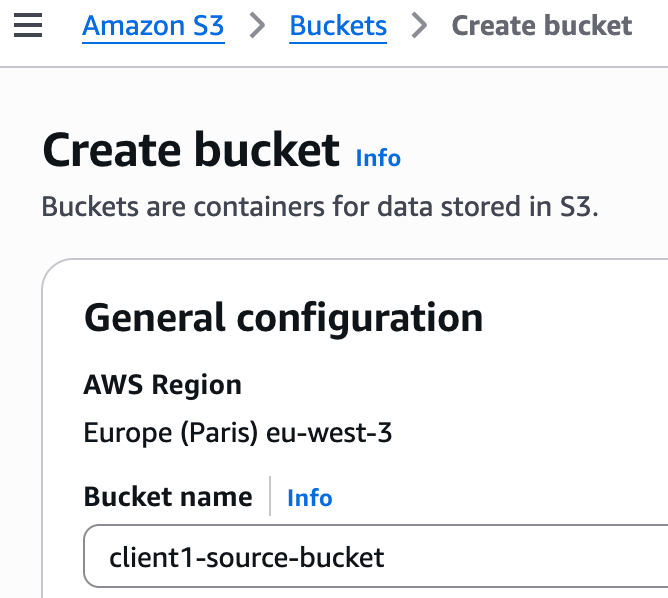
1. Creation of the S3 bucket
- From your Root Account, navigate to Amazon S3 service in AWS Console, then click on Create Bucket. Pick a name, leave default settings and click Create.
2. Creation of Data Exports
- Navigate to Billing and Cost Management service > Data Exports section and click on Create. You will create 2 exports:
- Select FOCUS with AWS columns in Settings, then the latest version (here FOCUS 1.2). Select a name for the export, like FOCUS 1_2, and choose Daily as Time granularity.
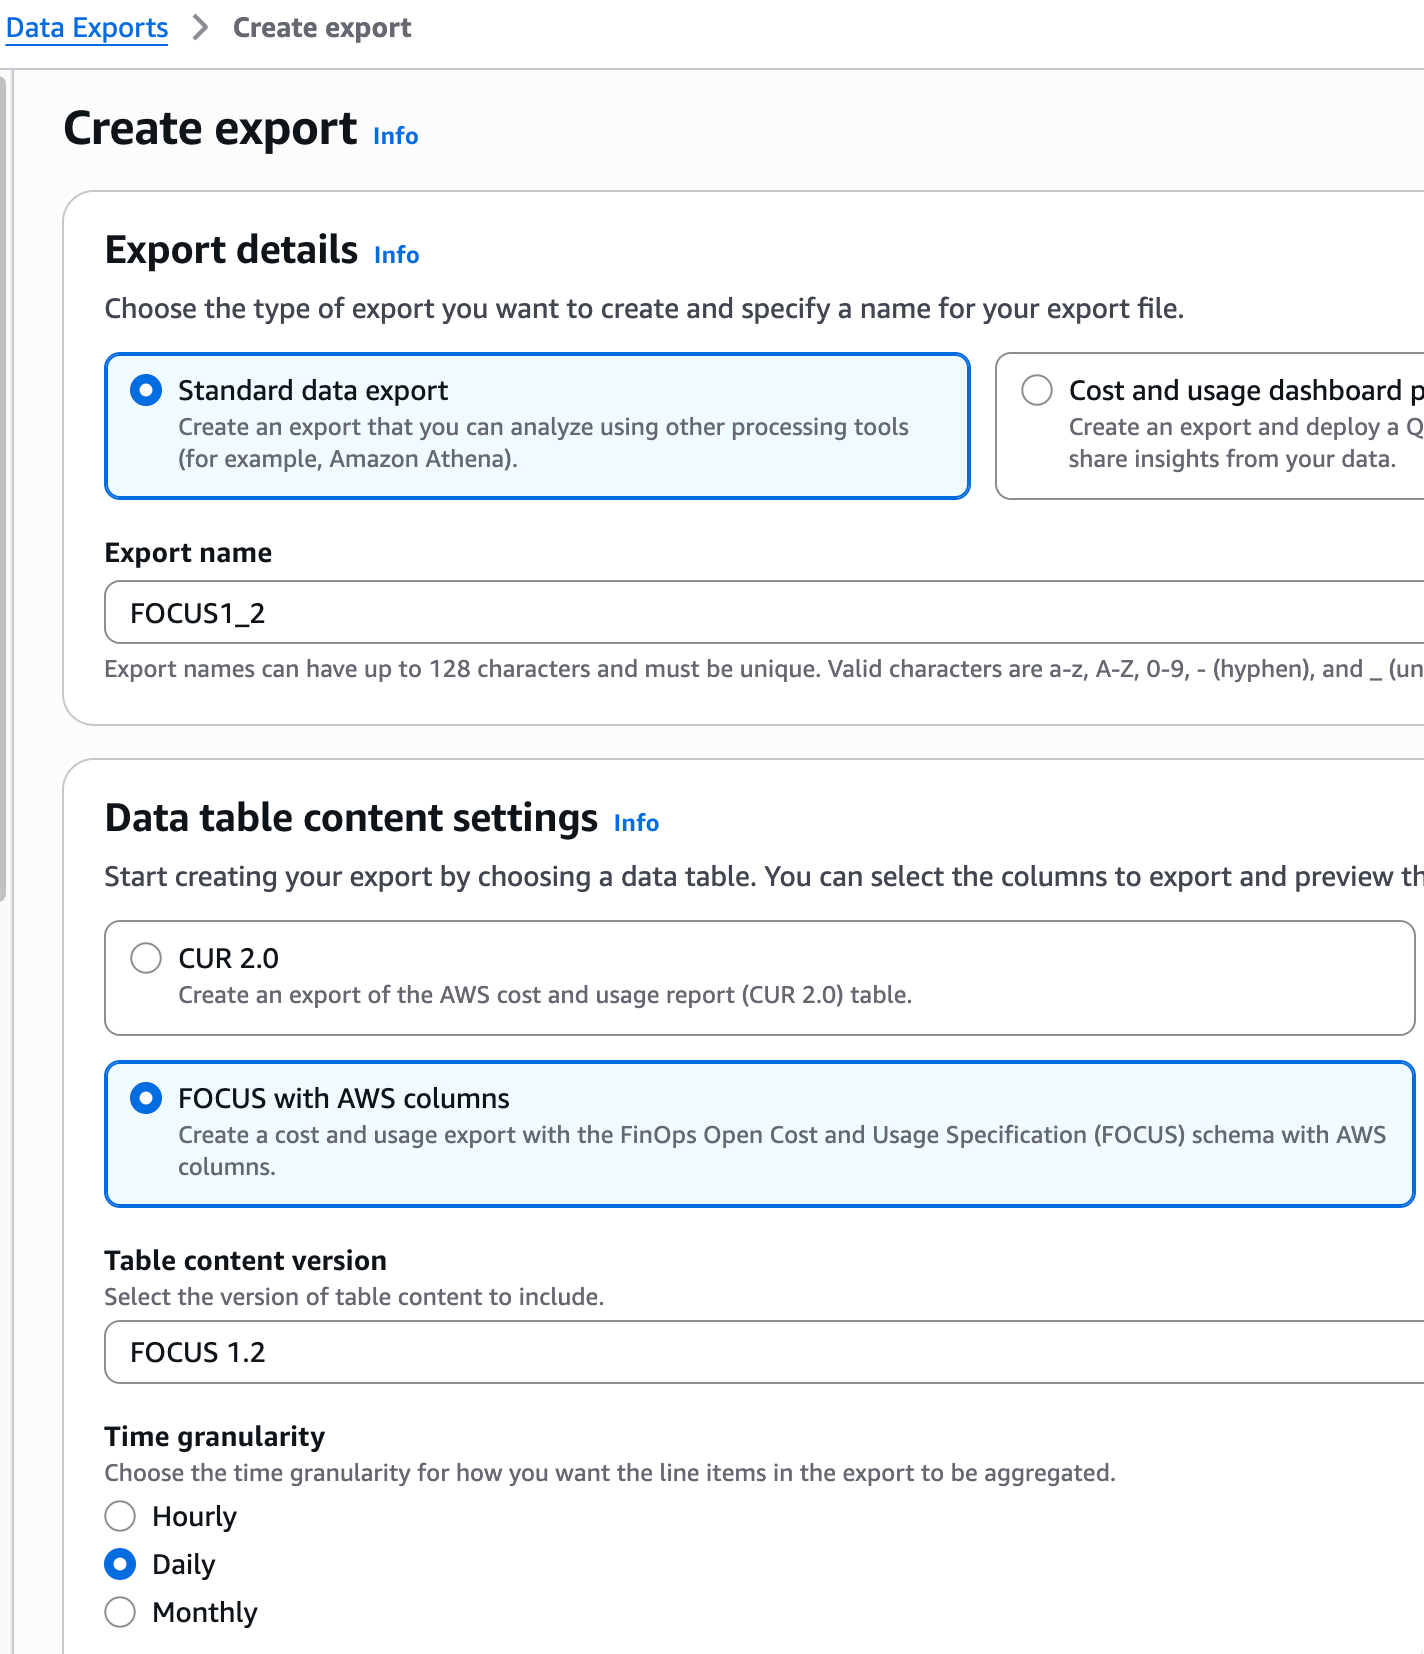
Leave the other options as default: Compression and file format = Parquet and File versioning = Overwrite existing data export file.
In Data export storage settings, select your new bucket and check "I agree to overwrite my S3 bucket policy" so that the Data Exports service has the necessary write permissions on your bucket. Click Select bucket.
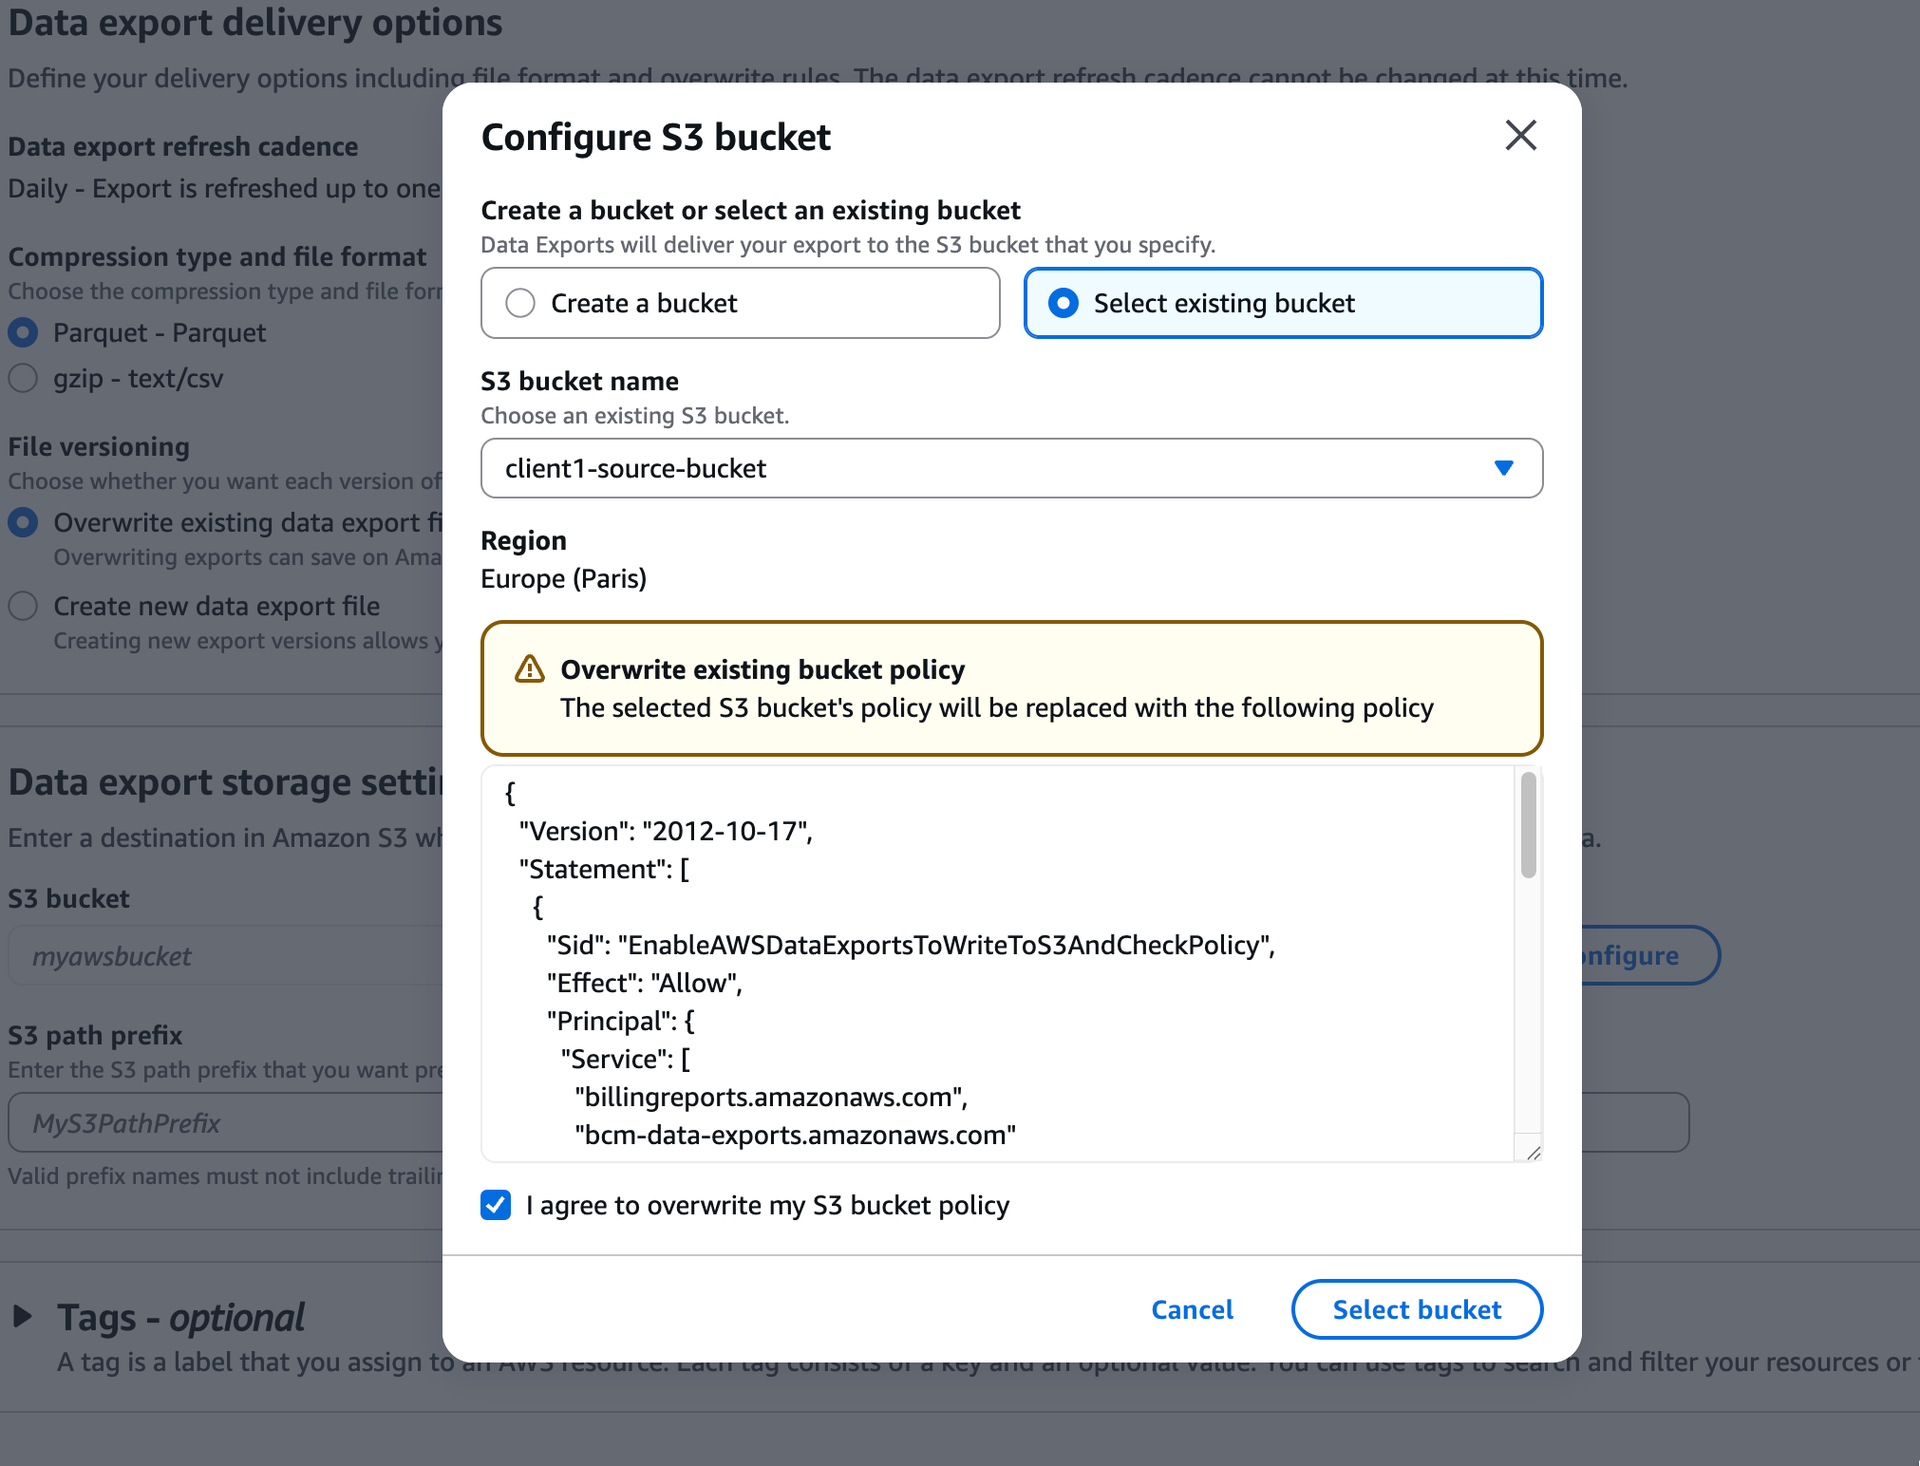
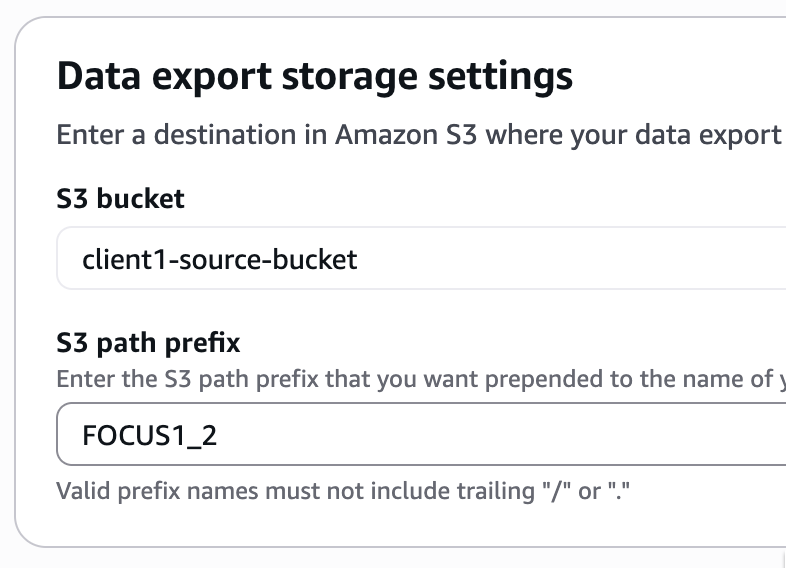
Then choose an S3 path prefix (here FOCUS1_2) and click Create.
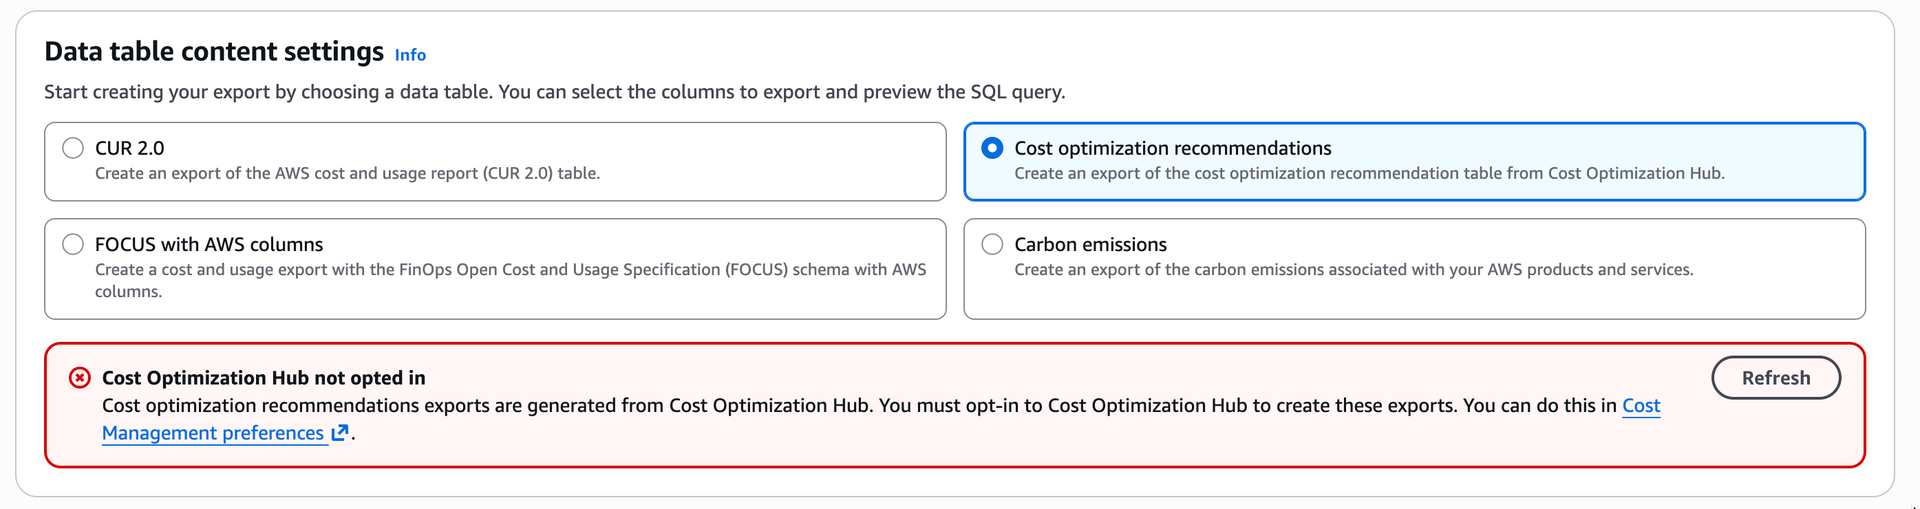
- 2. For the second export, select Cost optimization recommendations in Data table settings.
If you get the error message Cost Optimization Hub not opted in, click the link to opt in first.
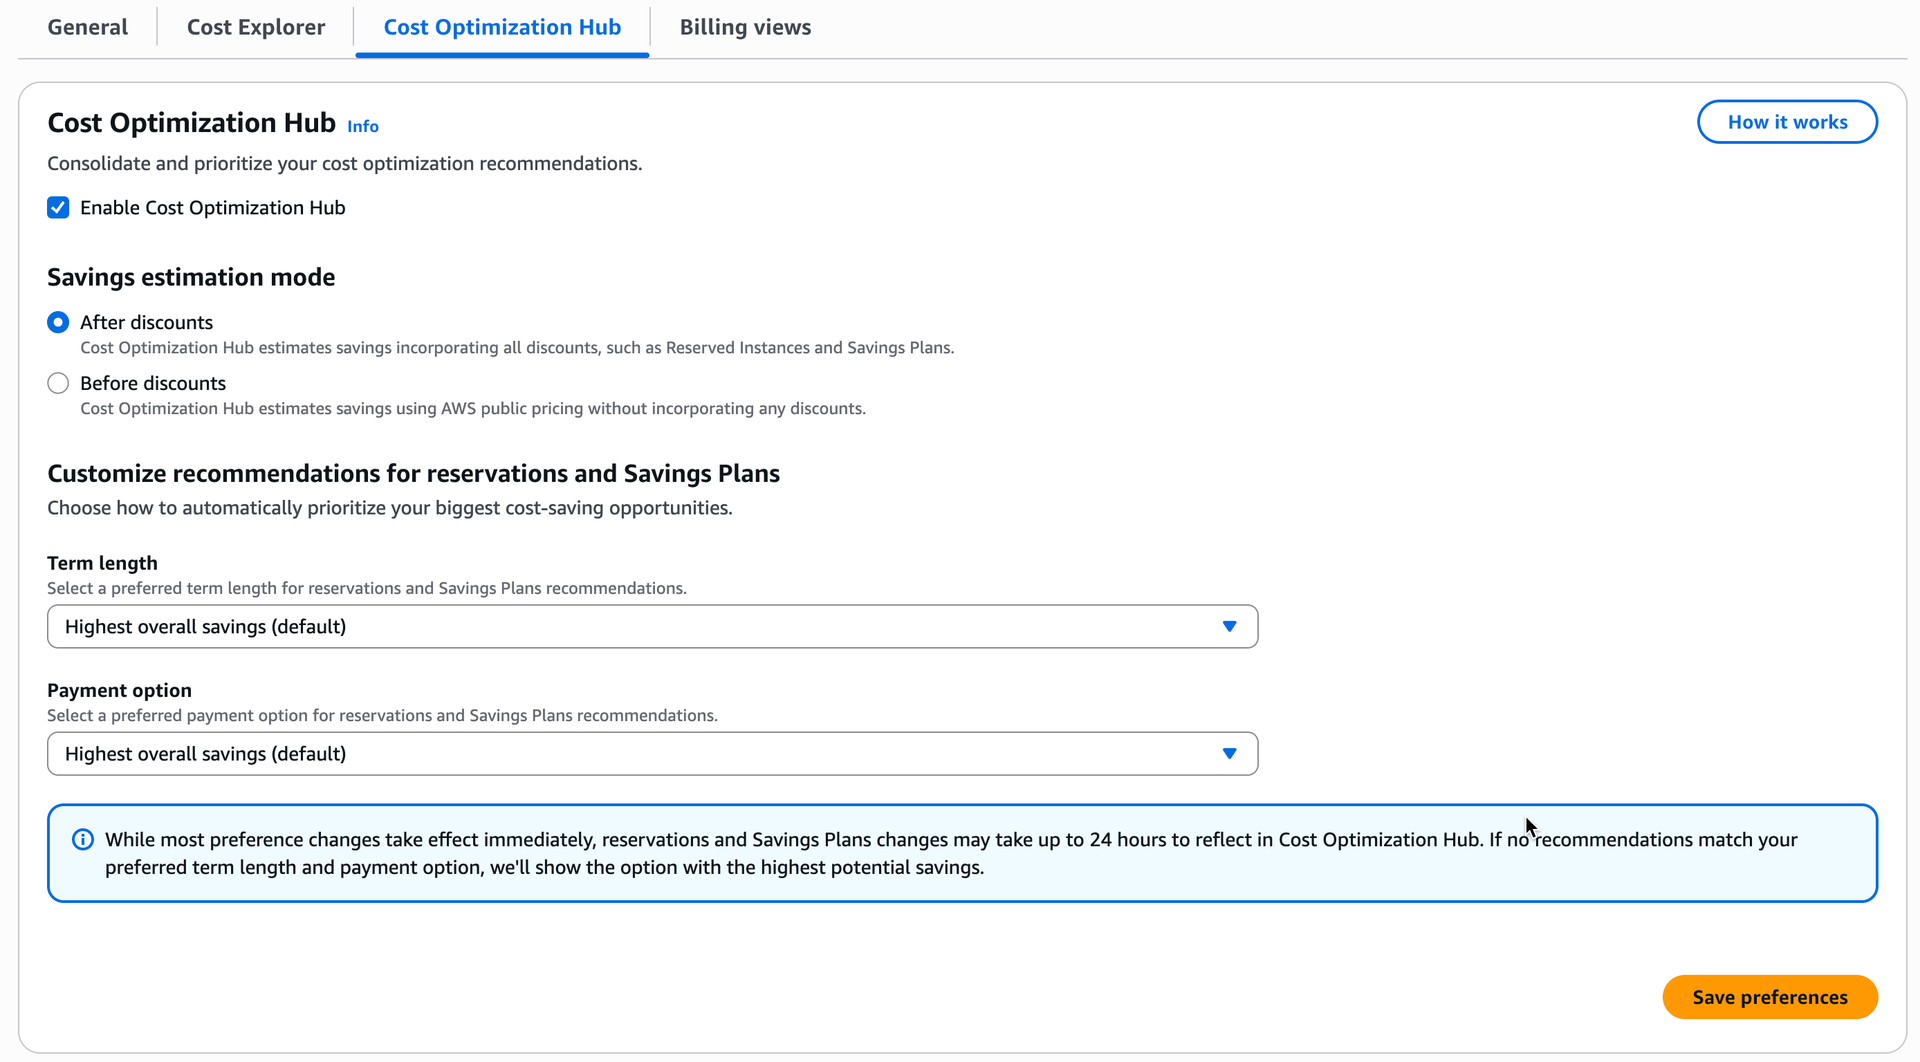
Then click on Enable Cost Optimization Hub and then Save preferences.
Go back to the previous tab and click Refresh. Now you need to create a service-linked role (SLR) to give necessary permissions.
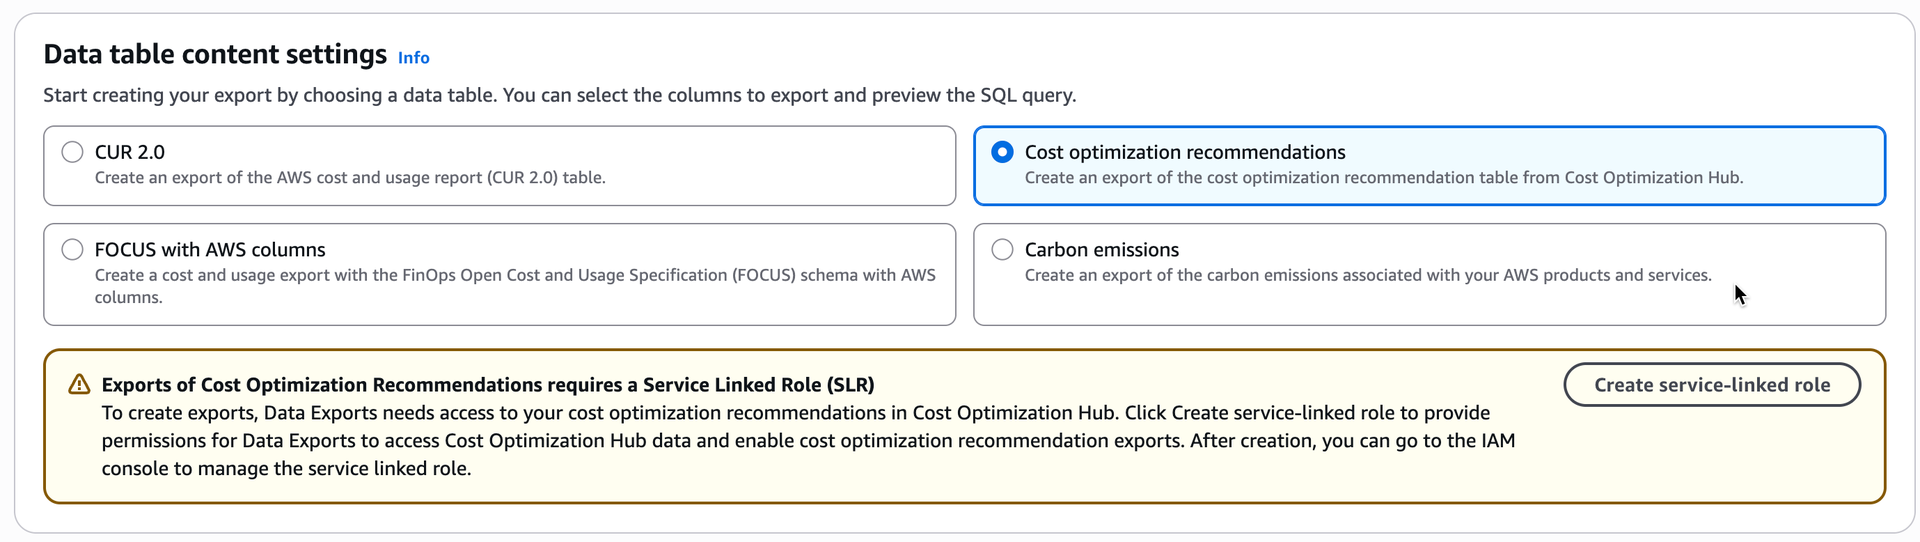
Just click on the button to get your role instantly created.

Choose a name for the export, like COH, then click Include all recommendations in Data table configurations.
As for the first export, leave the other options as default: Compression and file format = Parquet and File versioning = Overwrite existing data export file.
In Data export storage settings, select your new bucket and check "I agree to overwrite my S3 bucket policy" so that the Data Exports service has the necessary write permissions on your bucket. Click Select bucket.
Then choose an S3 path prefix (like COH) and click Create.
Your first export delivery to Amazon S3 will complete within the next 24 hours and then on a daily basis. You can leave the page and check back after 24 hours to access your first export delivery.
Additional reports are available, useful for comparative testing.
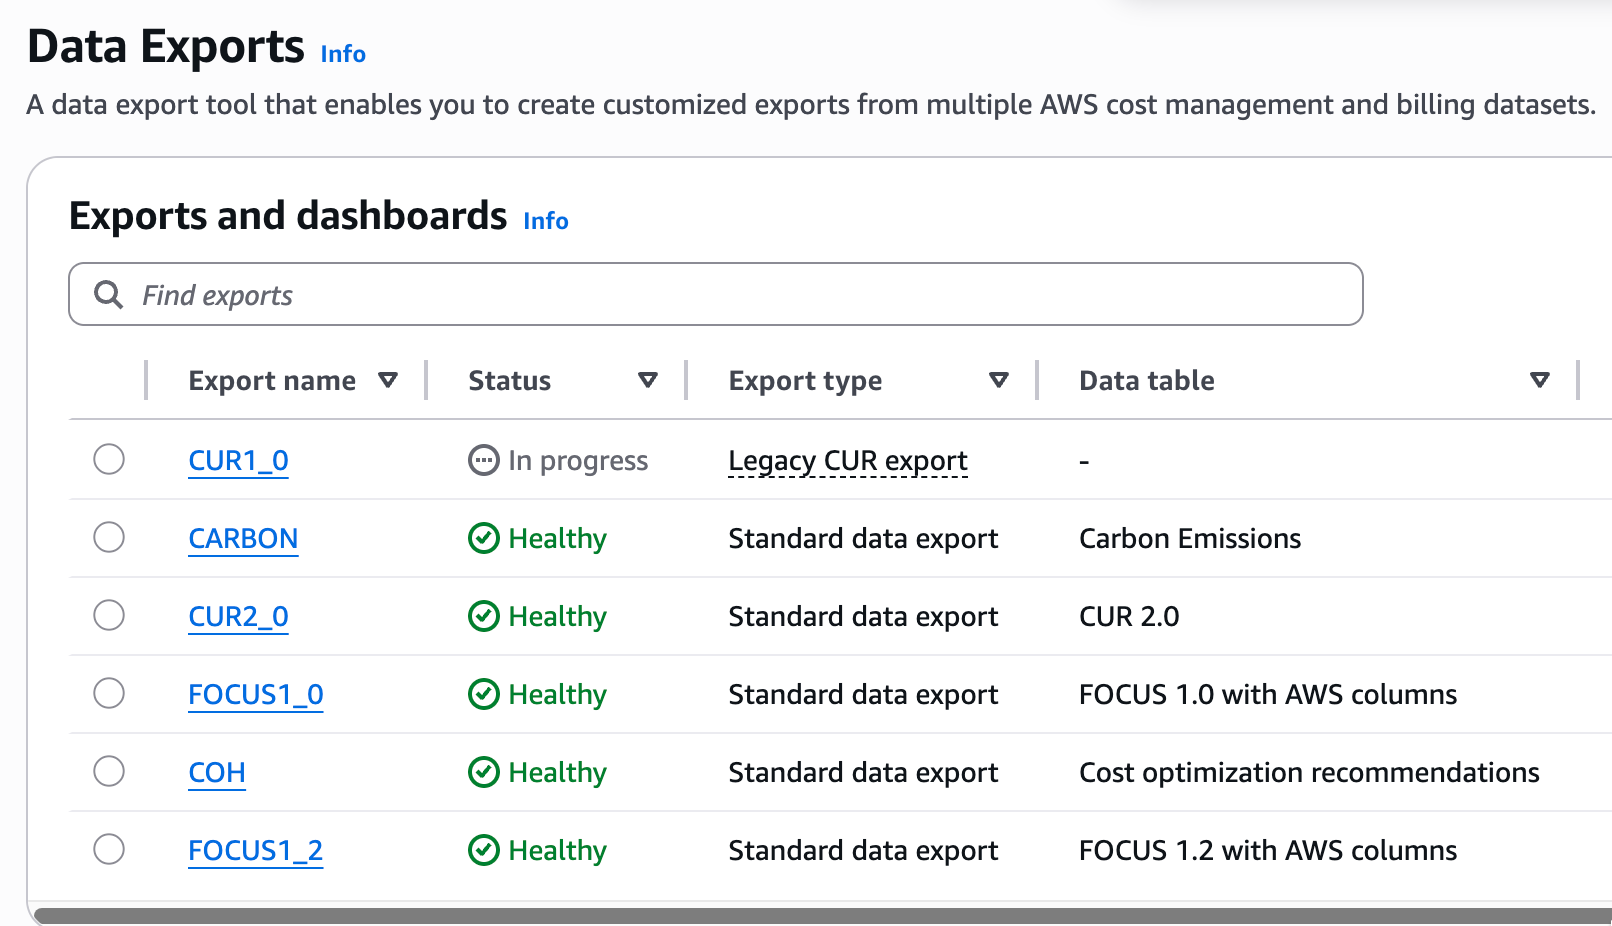
If you export CUR 2.0, select all additional export content.
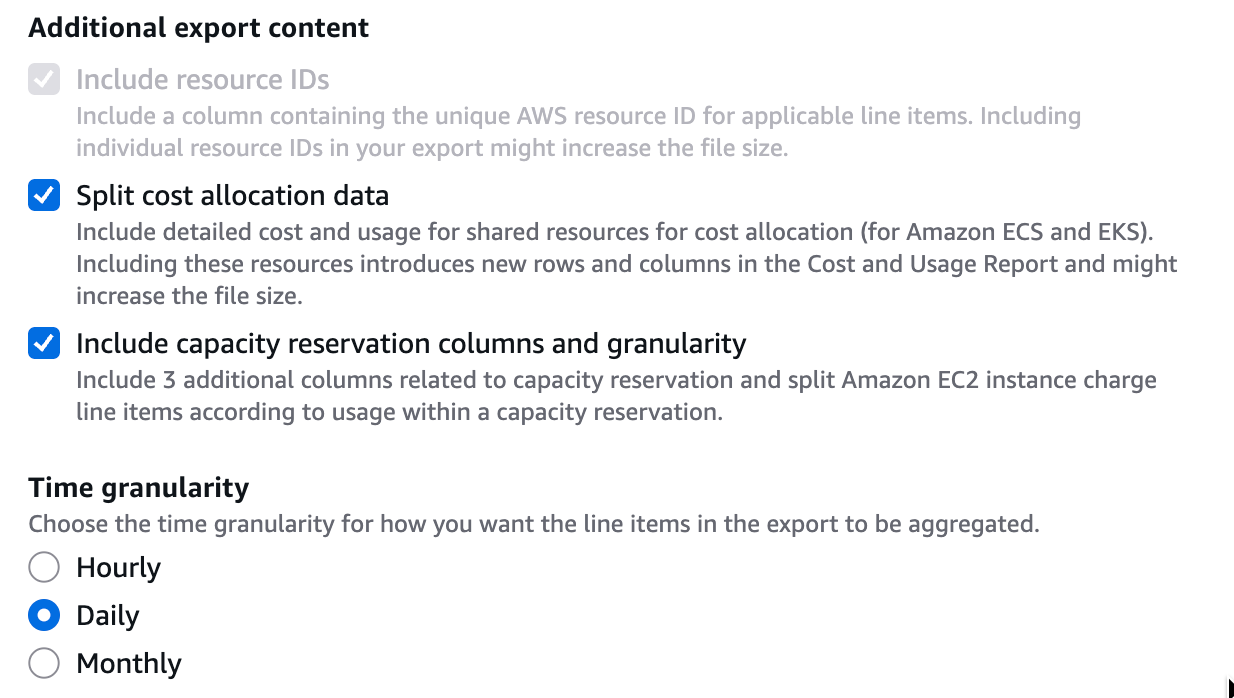
Note: First export will be available in S3 in 24 hours, then updated every day.
- Standard S3 replication only applies to new objects added after the rule is created.
- To copy existing objects, use S3 Batch Replication (optional for new exports).
a. Creating an IAM Role
- Go to IAM > Roles.
- Click "Create role".
- Select "Custom trust policy" and replace the content with:
{
"Version": "2012-10-17",
"Statement": [
{
"Effect": "Allow",
"Principal": {
"Service": "s3.amazonaws.com"
},
"Action": "sts:AssumeRole"
},
{
"Effect": "Allow",
"Principal": {
"Service": "batchoperations.s3.amazonaws.com"
},
"Action": "sts:AssumeRole"
}
]
}
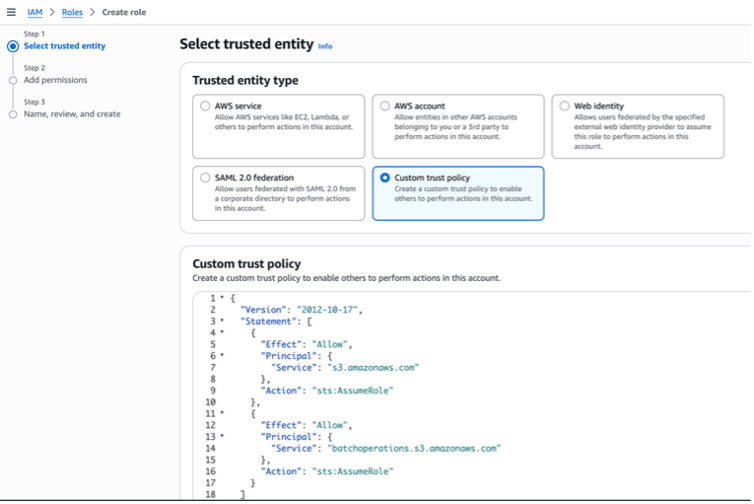
4. Click "Next" twice and add a name to the role, e.g., s3-replication-to-cost-optimization-report.
5. Click "Create", then click on the created role and note the ARN.
6. Click "Create policy", then select JSON and replace the content with:
{
 "Version": "2012-10-17",
 "Statement": [
  {
   "Sid": "PermissionsOnSourceBucket",
   "Effect": "Allow",
   "Action": [
    "s3:GetReplicationConfiguration",
    "s3:ListBucket",
    "s3:GetInventoryConfiguration",
    "s3:PutInventoryConfiguration"
   ],
   "Resource": "arn:aws:s3:::<YOUR_SOURCE_BUCKET>"
  },
  {
   "Sid": "PermissionsOnObjectsSource",
   "Effect": "Allow",
   "Action": [
    "s3:GetObjectVersionForReplication",
    "s3:GetObjectVersionAcl",
    "s3:GetObjectVersionTagging",
    "s3:GetObject",
    "s3:GetObjectVersion",
    "s3:InitiateReplication"
   ],
   "Resource": "arn:aws:s3:::<YOUR_SOURCE_BUCKET>/*"
  },
  {
   "Sid": "PermissionsBatchReports",
   "Effect": "Allow",
   "Action": [
    "s3:PutObject",
    "s3:PutObjectAcl"
   ],
   "Resource": "arn:aws:s3:::<YOUR_SOURCE_BUCKET>/completion-reports/*"
  },
  {
   "Sid": "PermissionsOnDestinationBucket",
   "Effect": "Allow",
   "Action": [
    "s3:ReplicateObject",
    "s3:ReplicateDelete",
    "s3:ReplicateTags",
    "s3:PutObject",
    "s3:InitiateReplication",
    "s3:ObjectOwnerOverrideToBucketOwner"
   ],
   "Resource": "arn:aws:s3:::<OUR_DESTINATION_BUCKET>/*"
  },
  {
   "Sid": "VersioningDestinationBucket",
   "Effect": "Allow",
   "Action": [
    "s3:GetBucketVersioning",
    "s3:PutBucketVersioning"
   ],
   "Resource": "arn:aws:s3:::<OUR_DESTINATION_BUCKET>"
  }
 ]
}
7. Replace <YOUR_SOURCE_BUCKET> with your source bucket name and <OUR_DESTINATION_BUCKET> with the destination bucket name provided.
8. Add a name to the policy, then click "Create policy".
b. Configuring S3 Replication
Enable versioning on your source bucket:
- Go to S3 > Select your bucket > Properties tab > Bucket Versioning > Edit > Enable.
Create the replication rule:
- Go to the "Management" tab, scroll down to "Replication" > "Create replication rule".
- Rule name: replicate-to-cost-optimization-report.
- Status: Enabled.
- Scope: Choose "Apply to all objects in the bucket" (or specify a prefix if needed).
Destination:
- Select "Specify a bucket in another AWS account".
- Destination account ID: As provided.
- Destination bucket: As provided.
- IAM role: Select the role you just created (s3-replication-to-cost-optimization-report or your chosen name).
- Storage class: Standard.
- Click "Save".
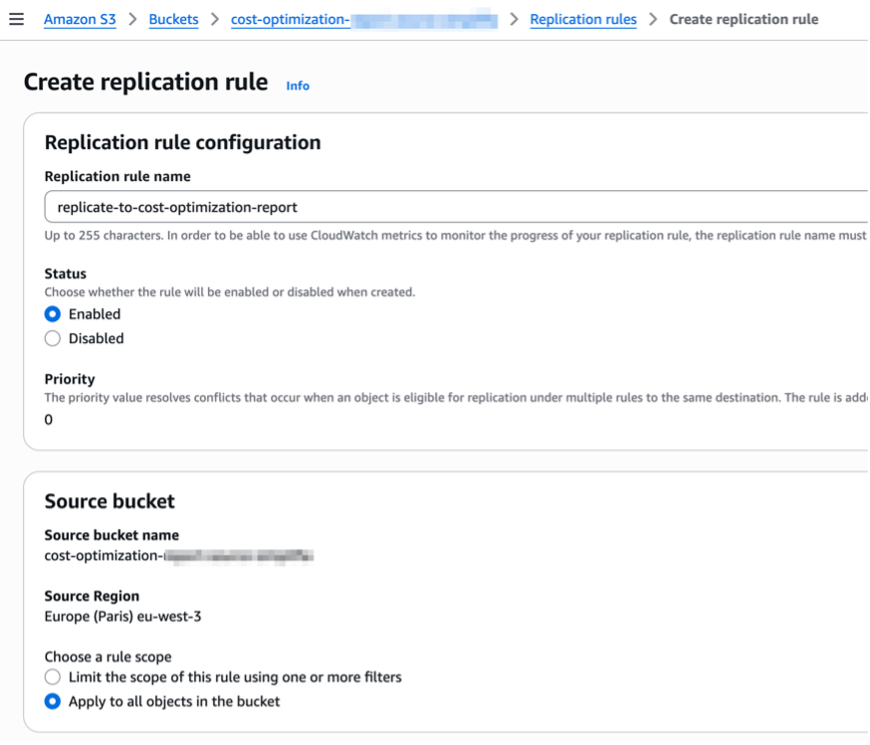
c. Replicating Existing Objects (Batch Replication – Only if Data Exports Already Exist)
Contact me for steps.
Please provide:
- Your AWS Root Account ID
- The ARN of the IAM role created
Feel free to contact me if you have any questions!
FinOps Notions
The shift to cloud computing has brought significant changes to how developers and organizations manage infrastructure, including how they handle pricing and resource allocation.
Subtitles are available in English, French and Spanish. Click here to get the full masterclass.
CapEx Model

Before Cloud Computing, Organizations typically followed a capital expenditure (CapEx) model, where they purchased and maintained their own hardware and software. This required upfront investments and long-term commitments.
Developers and IT teams had a clearer understanding of costs since they were directly involved in procurement and maintenance.
Costs were often tied to specific hardware and software licenses, and Developers had to work with a fixed set of resources.
The infrastructure was less flexible, making it difficult to quickly adapt to changing demands. This often led to either underutilization or overprovisioning of resources.
OpEx Model

Cloud computing follows an operational expenditure (OpEx) model, where organizations pay for resources on a subscription or pay-as-you-go basis. This reduces upfront costs and allows for more flexible spending.
Developers can easily scale resources up or down based on demand. This dynamic scaling helps in optimizing costs and ensuring that resources are used efficiently.
With the cloud, pricing can be complex. Developers may not always be aware of the exact costs associated with launching a server or using specific services.
The need for Financial Operations (FinOps) has emerged to manage and optimize cloud spending. FinOps practices help organizations gain visibility into cloud costs, optimize resource usage, and ensure financial accountability.
FinOps is an operational framework and cultural practice which maximizes the business value of cloud and technology, enables timely data-driven decision making, and creates financial accountability through collaboration between engineering, finance, and business teams.
Subtitles are available in English, French and Spanish. Click here to get the full masterclass.

FinOps Maturity Level
A “Crawl, Walk, Run” approach to performing FinOps enables organizations to start small, and grow in scale, scope, and complexity as business value warrants maturing a functional activity.


FinOps Benefits
Cost Optimization: Achieves maximum business value with optimized cloud spending.
Visibility: Provides a detailed view of cloud costs, budgets, forecasts and resource utilization.
Shared Responsibility: Promotes a culture where everyone is accountable for cloud spend.
Agility: Enables quick adjustments to cloud financial processes as needs evolve.
Data-Driven Decisions: Facilitates decisions based on quantifiable metrics and data.
Chargeback and Showback are two very different ways to manage costs within an organization.
Both methods have been used for decades to help organizations track costs and gain oversight over spending.
Showback merely reports the cost of cloud usage for transparency, while chargeback involves billing users or departments for their actual consumption.
Subtitles are available in English, French and Spanish. Click here to get the full masterclass.
Showback
Showback is the process of reporting the costs of cloud services to the actual users, without charging them.
It raises awareness about cloud spending and encourages more efficient use of resources.

Chargeback
Chargeback is the process of charging the actual costs of cloud services back to the users.
This approach treats internal departments or teams as customers, billing them for their consumption of AWS resources.

Supported by the FinOps Foundation, FOCUS™ reduces complexity for FinOps Practitioners so they can drive data-driven decision-making and maximize the business value of cloud.

FOCUS normalizes cost and usage billing data from different sources, reducing the amount of work needed to begin FinOps analysis, and enabling businesses to refocus that energy on activities that are more strategic and worthwhile.
Subtitles are available in English, French and Spanish. Click here to get the full masterclass.
FOCUS Adoption

Before FOCUS, Billing data from cloud providers, but also PaaS and SaaS vendors, employed unique terminology, taxonomy, and metrics in their billing file (like the CUR for AWS).
This complexity slowed FinOps practitioners down, as they had to spend valuable time ingesting and normalizing all this data before they can even begin analysis.
FOCUS 1.0 was announced in June 2024 and is now supported by all cloud providers. FOCUS 1.1 was ratified in November 2024 and FOCUS 1.2 in November 2025.
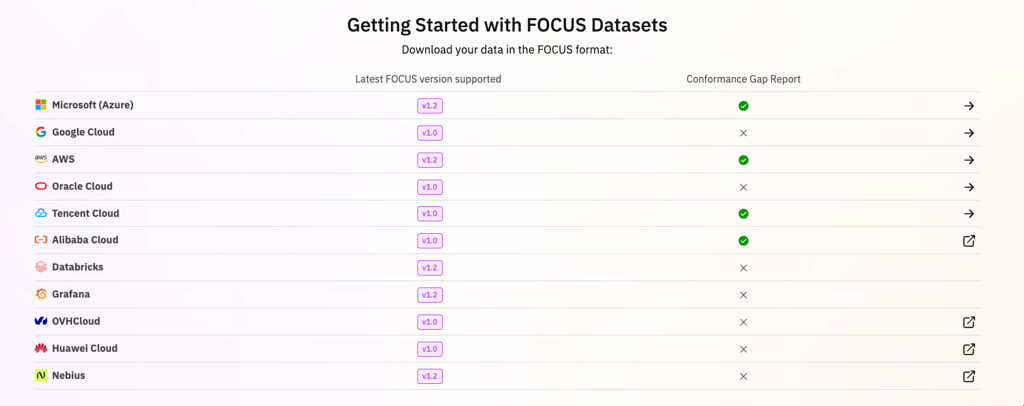
FOCUS Queries
You can query the same data as with the CUR file, but you have new columns as well, such as AWS Account Name.
The FOCUS 1.0 AWS export contains the CUR formatted with FOCUS 1.0, along with five additional columns from AWS that contain proprietary billing data: x_CostCategories, x_Discount, x_Operation, x_ServiceCode, and x_UsageType.
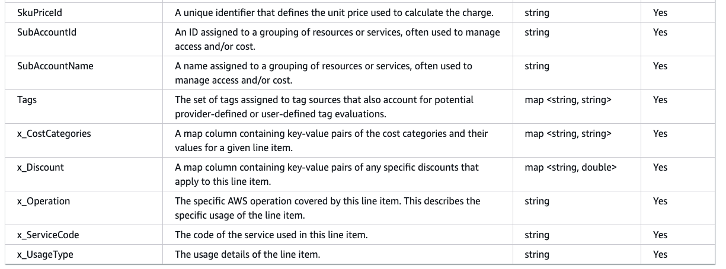
You can retrieve the full list here: FOCUS 1.0 with AWS columns - AWS Data Exports
FOCUS 1.2
AWS announced the general availability of data exports for FOCUS 1.2 in November 2025. This update to the FinOps Open Cost and Usage Specification introduces 14 new columns for improved invoice reconciliation, SaaS provider support, and capacity reservation tracking, allowing for more granular cost and usage reporting.
There are some breaking changes: Migrating from FOCUS 1.0 to FOCUS 1.2 - AWS Data Exports
FinOps Tools
AWS has a set of solutions to help you with cost management and optimization. This includes services, tools, and resources to organize and track cost and usage data, enhance control through consolidated billing and access permission. With that power, you can enable better planning through budgeting and forecasts, and further lower cost with resources and pricing optimizations.
AWS Bills allows you to…
Easily understand your AWS monthly charges, discounts, credits, refunds and taxes.
View and download invoice documents.
Track consolidated charges across all member accounts inside an AWS Organization, with account-level detail.
Detect idle resources, upgrade opportunities…
Detect anomalies (Costs from unused services / regions).

Subtitles are available in English, French and Spanish. Click here to get the full masterclass.
Compute Optimizer allows you to…
Get recommendations to optimize the performance and cost of your AWS resources, for both RightSizing savings and Idle savings.
Reduce cloud spend by cleaning up unused resources.
Optimize licensing cost through automated license optimization recommendations.

Subtitles are available in English, French and Spanish. Click here to get the full masterclass.
One Example: EC2 Instance


Cost Optimization Hub allows you to…
Identify over 15 types of AWS cost optimization recommendations.
Access a single dashboard and filter by AWS Account, Region, Resource Type, Recommended Action…

Prioritize optimization opportunities by quantifying estimated savings incorporating your AWS pricing and discounts.
Export the recommendations to S3.
Subtitles are available in English, French and Spanish. Click here to get the full masterclass.
List of Resource types and recommended actions:


Trusted Advisor allows you to…
Identify unused resources and opportunities to lower your costs → Cost Optimization.
Improve the speed and responsiveness of your applications → Performance.
Get recommendations that can improve the security of your AWS solution → Security.
Highlight redundancy shortfalls, current service limits, and overused resources → Fault Tolerance.
Get notified when your account approaches or exceeds your service limits → Service Limits.
Get Recommendations to help you operate your AWS environment effectively at scale → Operational Excellence.
Subtitles are available in English, French and Spanish. Click here to get the full masterclass.
Cost Optimization Checks List


One Example: Idle Load Balancers


Track your costs, usage, and RI and SP utilization and coverage with custom budgets. Get alerted when you exceed your budget. Create custom actions to prevent overages, inefficient resource use, or lack of coverage.
Subtitles are available in English, French and Spanish. Click here to get the full masterclass.

AWS Budgets allows you to…
Track your costs, usage, and RI and SP utilization and coverage with custom budgets.

Get alerted when you exceed your budget.

Create custom actions to prevent overages, inefficient resource use, or lack of coverage.

AWS Pricing Calculator allows you to…
Estimate the cost of AWS products and services.
Understand services pricing by configuring options.
Share and export your estimates.

Subtitles are available in English, French and Spanish. Click here to get the full masterclass.
4 Steps to start
Connect to https://calculator.aws.
Create Estimate and select your service.
Configure Options for your service.
Review the estimate and share / export.

Identify anomalous spend and root causes, create cost monitors and get alerted!
Subtitles are available in English, French and Spanish. Click here to get the full masterclass.
AWS Cost Anomaly Detection allows you to…
Reduce cost surprises with advanced Machine Learning technologies.
Identify anomalous spend and root causes, so you can quickly take action.

Create Cost Monitors by Service / Account / Cost Category / Cost allocation Tag.
Get alerted by email daily or weekly when any anomalous spend is detected


AWS Cost Explorer allows you to…
Visualize, understand, and manage your AWS costs and usage over time.
Create and save custom reports that analyze cost and usage data with preconfigured views.
Analyze your data at a high level or dive deeper into your cost and usage data to identify trends, pinpoint cost drivers, and detect anomalies.
Create a cost and usage forecast for a future time range for your report.
Subtitles are available in English, French and Spanish. Click here to get the full masterclass.
Saving by Committing
AWS Commitments are a pricing model that can help reduce your bill by up to 72% in exchange for a 1- or 3-year commitment.
AWS Commitments…
Are a pricing model that can help reduce your bill by up to 72% in exchange for a 1- or 3-year commitment.
Can be optimized by committing to a longer term (3 years), paying all upfront, and being specific in the definition of the services/resources covered.
Can be shared with a set of AWS accounts within the same organization.
Can be reviewed through AWS Billing in Savings and Commitments section.
Subtitles are available in English, French and Spanish. Click here to get the full masterclass.
Commitment Types and Impacted Services
- Reserved Instances (RIs): RDS, EC2 (old way), Redshift, ElastiCache, OpenSearch, MemoryDB, DynamoDB.
- Savings Plans (SPs): EC2, Fargate, Lambda, SageMaker.

Example of Savings for a 3-year Compute Savings Plan.

AWS Organizations…
Helps you centrally govern your environment as you grow and scale your workloads on AWS.
Centrally provision accounts and resources.
Secure and audit their environment for compliance by applying common policies.
Control access to accounts, regions, and services.
Optimize costs and simplify billing from the Management account with Consolidated billing.

Subtitles are available in English, French and Spanish. Click here to get the full masterclass.
Consolidated Billing
You can use the consolidated billing feature in AWS Organizations to consolidate billing and payment for multiple AWS accounts, with the following benefits:
- One bill – You get one bill for multiple accounts in the same organization.
- Easy tracking – You can track the charges across multiple accounts and download the combined cost and usage data.
- Combined usage – You can combine the usage across all accounts in the organization to share the volume pricing discounts, Reserved Instance discounts, and Savings Plans.

How Commitments apply to your usage?
In a Consolidated Billing Family, Commitments are applied first to the owner account's usage, and then to other accounts' usage. This occurs only if you have sharing enabled.
Savings Plans are applied first to the usage with the highest savings percentage.
If there are multiple usages with equal savings percentages, Savings Plans are applied to the first usage with the lowest Savings Plans rate.
Savings Plans continue to apply until there are no more remaining usages, or your commitment is exhausted.

AWS offers you a pay-as-you-go approach for pricing for the vast majority of our cloud services. With AWS you pay only for the individual services you need, for as long as you use them, and without requiring long-term contracts or complex licensing. AWS pricing is similar to how you pay for utilities like water and electricity. You only pay for the services you consume, and once you stop using them, there are no additional costs or termination fees.
Subtitles are available in English, French and Spanish. Click here to get the full masterclass.

Savings Plans
For AWS Compute and AWS Machine Learning, Savings Plans offer savings over On-Demand in exchange for a commitment to use a specific amount (measured in $/hour) of an AWS service or a category of services, for a one- or three-year period.
Reserved Instances
With Reserved Instances, you can save up to 75% over equivalent on-demand capacity. Reserved Instances are available in 3 options – All up-front (AURI), partial up-front (PURI) or no upfront payments (NURI).
Spot Instances
Amazon EC2 Spot Instances let you take advantage of unused EC2 capacity in the AWS cloud and are available at up to a 90% discount compared to On-Demand prices. You can use Spot Instances for various stateless, fault-tolerant, or flexible applications such as big data, containerized workloads, CI/CD, web servers, high-performance computing (HPC), and test & development workloads.

Free Tier
- With New Free Tier (accounts created after 15/07/2025), new AWS customers can get started at no cost with the AWS Free Tier. Gain $100 USD credits at sign-up and up to $100 USD more to earn as you explore key AWS services. Test drive AWS services with the Free Plan for up to 6 months. You won't be charged unless you choose the Paid Plan, which allows you to scale your operations and gain access to over 150 AWS services.

- Legacy Free Tier (accounts created before 15/07/2025) is an opportunity to try new services. Available for 1 year only to new AWS customers. More than 100 AWS products are available on AWS Free Tier today. Three different types of free offers are available depending on the product used.

Savings Plans…
Is a flexible pricing model that provides savings of up to 72% compared to On-Demand prices.
Include Compute SPs, EC2 Instance SPs and SageMaker SPs.
Offers significant savings in exchange for a commitment to use a specific amount of compute power measured in $/hour.


Subtitles are available in English, French and Spanish. Click here to get the full masterclass.
Difference between Savings Plans
|
Feature |
AWS Compute Savings Plan |
EC2 Instance Savings Plan |
SageMaker Savings Plan |
|
Scope |
EC2, Lambda, Fargate |
EC2 |
Machine Learning Service |
|
Cost Savings |
Up to 66% |
Up to 72% |
Up to 64% |
|
Flexible Across |
Family, Size, Region, OS, Tenancy |
Size, OS, Tenancy |
Family, Size, Region, OS, Tenancy |
|
Commitment |
1 or 3 years |
1 or 3 years
|
1 or 3 years
|
|
Best For |
Dynamic, evolving workloads |
Predictable EC2 Instance Usage |
Machine Learning workflows |
Compute SPs offer the greatest flexibility.
EC2 Instance SPs provide the deepest discounts, but you need to specify a Region and an Instance family (e.g. c5).
Utilization and Coverage Report
Go in Billing Service > Savings and Commitments > Savings Plans.
The utilization report shows the percentage of your Savings Plans commitments that you are using across your applicable AWS usage.
Ideally, you want this to be at 100% to ensure you are not wasting any of your committed spend.

The coverage report indicates what percentage of your eligible AWS usage costs are being covered by your SPs during your selected time period.
Ideally, you want this to be around 80 to 100% to ensure you are covering most of the potential savings.

Recommendations

Purchase a Savings Plan
- Look at the uncovered services in the Coverage Report.

- Confirm your instances are needed and rightsized.
- Look at recommendations and Compute pricing Savings Plans rate.
- Purchase the Savings Plan: In Billing Service, click on Purchase Savings Plans, Choose a type, term, payment option and hourly commitment (+ Region and Family for EC2 Instance SPs). Click Add to Cart, then Submit order.

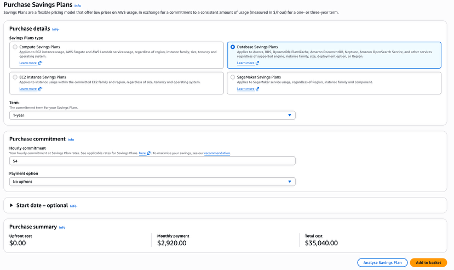
Database Savings Plans…
A flexible pricing model that reduces your database costs by up to 35% compared to On-Demand prices
Were introduced in December 2025 and Include Many Services
Currently only available for a 1-year term and no upfront payment
Offer less savings than Reserved Instances but apply to eligible serverless and provisioned instance usage regardless of engine, instance family, size, deployment option, or AWS Region

Subtitles are available in English, French and Spanish. Click here to get the full masterclass.
Key Scenarios for Database Savings Plans
You cannot combine a Reserved Instance with a Database Savings Plan
Need for Flexibility: You plan to change instance families (e.g., moving from R5 to R7g), change database engines (e.g., MySQL to Aurora), or regions.
Modernization: You are adopting Serverless configurations or shifting from provisioned to serverless.
Reduced Operational Overhead: You want to avoid the manual effort of modifying or managing RIs.
Utilization and Coverage Report
Go in Billing Service > Savings and Commitments > Savings Plans > Utilization Report. Select Savings Plans type = Database
The utilization report shows the percentage of your Savings Plans commitments that you are using across your applicable AWS usage.
Ideally, you want this to be at 100% to ensure you are not wasting any of your committed spend.
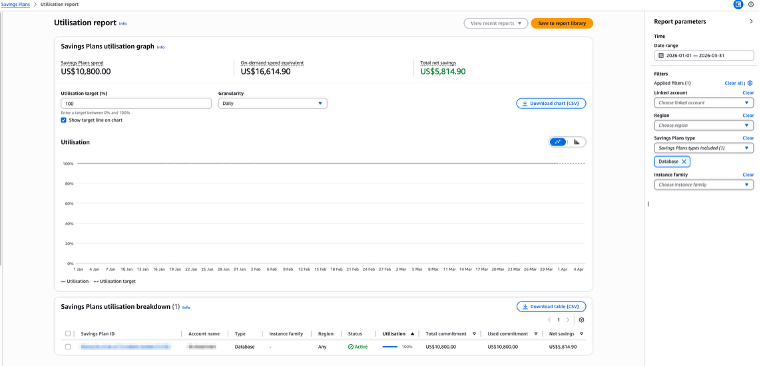
Coverage: Go in Billing Service > Savings and Commitments > Savings Plans > Coverage Report. Exclude all Services included in classic Savings Plans (EC2, ECS, EKS, Lambda, SageMaker)
The coverage report indicates what percentage of your eligible AWS usage costs are being covered by your SPs during your selected time period.
Ideally, you want this to be around 80 to 100% to ensure you are covering most of the potential savings.
Recommendations
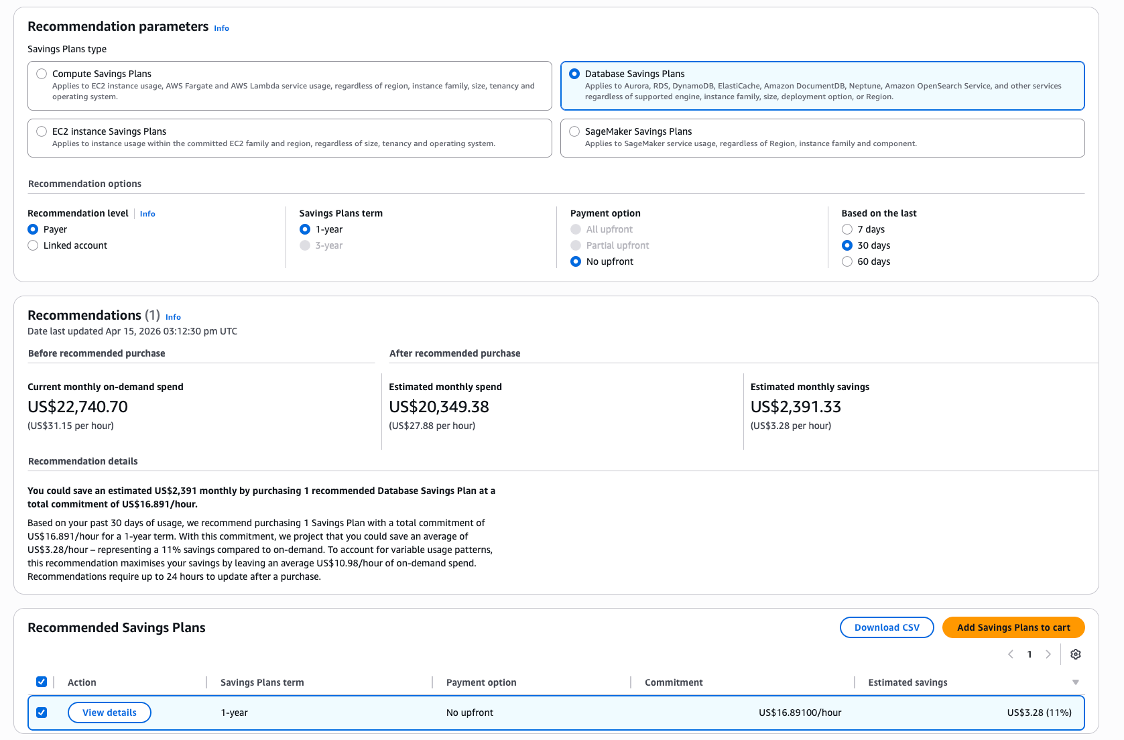
Go in Billing Service > Savings and Commitments > Savings Plans > Recommendations.
Select Database Savings Plans.
Look at the recommended Savings Plans and lower the recommended Commitment rate.
Do not over-commit by having coverage > 100%.
Navigate to Purchase Analyzer.
Select Database Savings Plans and configure Lookback period and Hourly commitment to simulate alternative commitment levels and see the projected impact on Cost, Coverage, and Utilization.
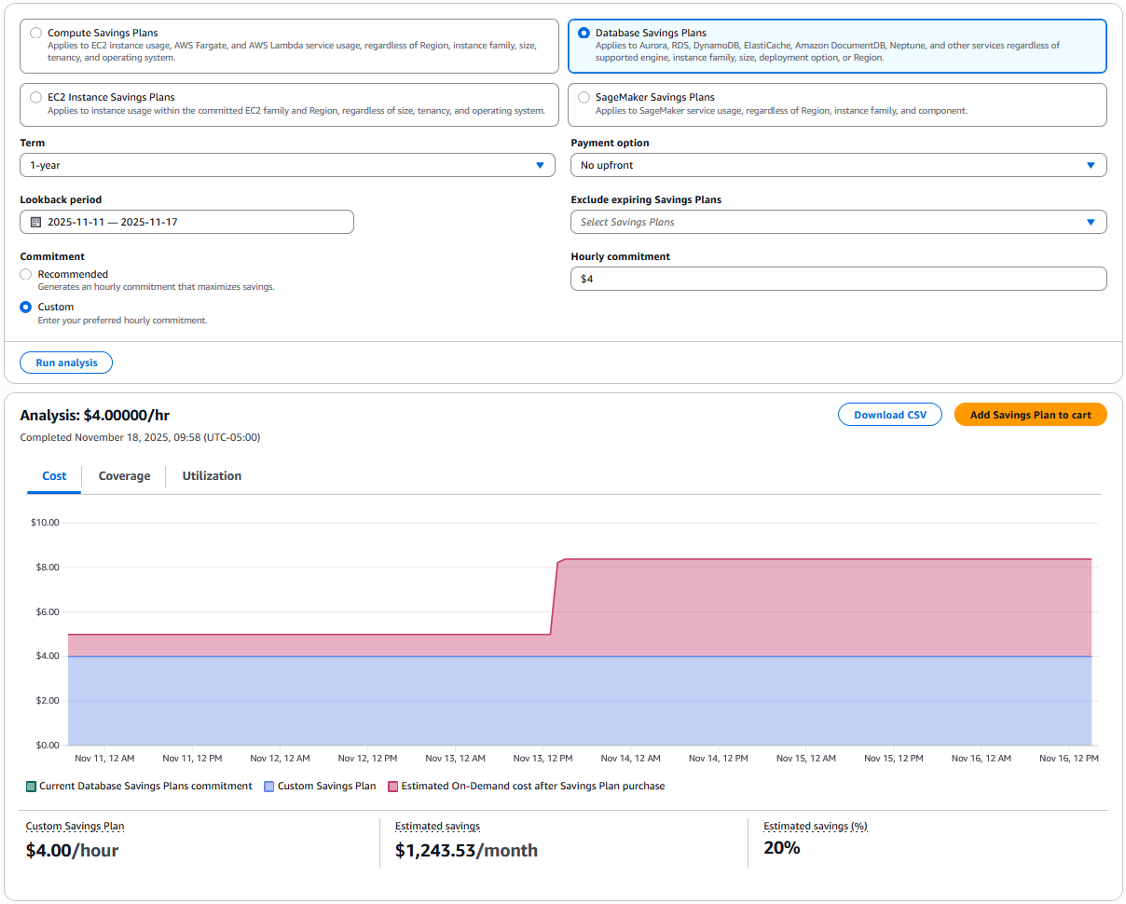
Purchase a Savings Plan
- Look at the uncovered services in the Coverage Report.
- Confirm your instances are needed and rightsized.
- Look at recommendation and choose a lower hourly commitment, e.g., 50%.
- Purchase the Savings plan.
Reservations…
Is a pricing model that provides savings of up to 75% compared to On-Demand prices.
Is available in 3 options – All upfront, partial upfront or no upfront payments.
Offers significant savings in exchange for a 1- or 3-year commitment to use a specific product.


Subtitles are available in English, French and Spanish. Click here to get the full masterclass.
Which RIs give greater discount?

RDS Reserved Instances
•Can save you up to 69% over On-Demand rates when used in steady state (available 24x7).
•Require no change to how you use Amazon RDS.
•Are available for all supported DB Engines.
•Offer instance size flexibility for the MySQL, MariaDB, PostgreSQL, and Amazon Aurora database engines as well as the “Bring your own license” (BYOL) edition of the Oracle database engine.
Example for MySQL pricing in Paris Region.

Instance Size Flexibility
When you purchase a reserved DB instance, one thing that you specify is the instance class, e.g., db.r5.large, but also a size, e.g., large.
Most RDS platforms offer size-flexibility. Size-flexible reserved DB instances are available for DB instances with the same AWS Region and database engine; and can only scale in their instance class type.
For example, a reserved DB instance for a db.t2.medium can apply to a db.t2.large, but not to a db.r6g.large.


How Billing Works
During billing, running DB instance usage is first compared to your active Reserved Instances to minimize costs.
Each hour, if the amount of running instances is less than or equal to the total Reserved Instances you have purchased, all running DB instances will be charged at the Reserved Instance rate.
Any usage of running DB instances that exceeds the amount of applicable Reserved Instances you have purchased will be charged the On-Demand rate.

Utilization and Coverage Report
Go in Billing Service > Savings and Commitments > Reservations.
The utilization report shows the percentage of your Reservations commitments that you are using across your applicable AWS usage.
Ideally, you want this to be at 100% to ensure you are not wasting any of your committed spend.

The coverage report indicates what percentage of your eligible AWS usage costs are being covered by your RIs during your selected time period.
Ideally, you want this to be around 80 to 100% for each service to ensure you are covering most of the potential savings.

How to purchase a Reserved Instance?
- In each dedicated service (e.g. RDS, ElastiCache, MemoryDB, OpenSearch, …), click on Reserved Instances or Reservation section, then Purchase.
- Choose an engine type, term, instance class, payment option and hourly commitment in your current region.
- Click Purchase Reserved Instance.

Diversify commitments
Mix EC2 and Compute SPs.

Always Rightsize and Upgrade before committing.
Purchase multiple commitments over time (every quarter) instead of a single monolithic purchase.

Subtitles are available in English, French and Spanish. Click here to get the full masterclass.
Measure Risk VS Discounts
The financial risks of committing to an AWS Savings Plan can be significant if usage predictions are inaccurate.
Do not purchase a 3-year commitment for old instance types.
Do not overcommit – give security space for rightsizing.
Don’t buy in advance – always be a little behind.
Linux M5.large EC2 Instance

Other Best Practices…
Save more when you purchase from the Management account.
Monitor regularly the coverage and utilization reports (last day is crucial).
If utilization is <100%, look at uncovered instances and see if you can change instance type to match the unused commitment.
Get alerted when Commitments expire. They can be renewed automatically.
If you purchase a wrong commitment, contact immediately AWS Support.

Saving by Deleting Idle Resources
Idle resources can be Unassociated / Unallocated / Unattached / Unused / Inactive resources, are a total waste (deletion = 100% savings), usually represent between 5 and 20% of your total opportunities and are easy to fix (minimal effort).
 Unused EBS Volumes
— whether in an idle state (less than 1 IOPS operation per day) or unattached/available — incur a monthly cost. Always confirm that a volume is no longer needed before deleting it.
Unused EBS Volumes
— whether in an idle state (less than 1 IOPS operation per day) or unattached/available — incur a monthly cost. Always confirm that a volume is no longer needed before deleting it.

Subtitles are available in English, French and Spanish. Click here to get the full masterclass.
How to identify?
You can identify unused EBS Volumes using the following methods:
- From our Cost Optimization Report , look at the section EBS - Idle Volumes.
In AWS Console, navigate to the EC2 service, then select the Volumes section. Filter by Volume state to identify unattached or idle volumes. Larger volumes typically incur higher costs.

An Idle state volume is also an attached volume with less than 1 IOPS/day. In AWS Console, go to EC2 service, then Volume section. Click on one volume ID, then Monitoring section. Check read and write operations as well as Time spent idle diagrams over last month.

In AWS Console, visit the Cost Optimization Hub and filter findings by EBS Volume to identify idle resources.

How to fix?
Before deleting an EBS Volume, ensure it is no longer required. Check the creation date to assess its relevance.
If in doubt, create a snapshot of the volume as a precaution.
In AWS Console, go to the EC2 service and select the Volumes section.
Filter by Volume type, select the volume you want to remove, and click Actions > Delete Volume. Confirm the deletion.
If the resource is provisioned automatically via IaC (such as CloudFormation or Terraform), update the corresponding code to reflect the changes.
 Amazon EBS Snapshots
cost 50% less than EBS Volumes, but costs can accumulate quickly—especially with automatic snapshots. We recommend archiving or deleting snapshots older than 1 year. Archived snapshots cost 75% less, but retrieval incurs an additional cost.
Amazon EBS Snapshots
cost 50% less than EBS Volumes, but costs can accumulate quickly—especially with automatic snapshots. We recommend archiving or deleting snapshots older than 1 year. Archived snapshots cost 75% less, but retrieval incurs an additional cost.
Subtitles are available in English, French and Spanish. Click here to get the full masterclass.
How to identify?
From our Cost Optimization Report , look at the section EBS - Old Snapshots.
In AWS Console, navigate to the EC2 service, then select the Snapshots section. Filter by Started to identify the oldest snapshots. Filter by Volume size to prioritize larger snapshots (cost: $5/month per 100GB stored).
In AWS Console, go to Billing and Cost Management, then select the Bills section. Click on Elastic Compute Cloud (EC2), choose your region, then EBS, and search for "snapshot". If snapshots exist, you will see a line item like this:

In the example above, approximately $800 was spent on snapshots for the selected period and region. Deleting all snapshots (if appropriate) could save 100% of this cost—$800—with just a few clicks.
How to fix?
For Archiving:
If you want to retain the snapshot, consider archiving it. Refer to the official guide: Archive Amazon EBS snapshots - Amazon EBS.
Minimum archive period: 90 days.
Restoration time: Up to 72 hours, depending on snapshot size.
Note: Do not archive daily incremental snapshots.

In AWS Console, go to the EC2 service, then select the Snapshots section. Filter by Started to find the oldest snapshots. Select the snapshots you want to archive, then click Actions > Archiving > Archive Snapshot.

Go to Lifecycle Manager to review your lifecycle policies for automatic snapshots.

For Deletion:
Ensure the snapshot is no longer needed before deletion. In AWS Console, go to the EC2 service, then select the Snapshots section. Filter by Started, select one or more snapshots, and click Actions > Delete Snapshot. Confirm the deletion in the popup.

Note: If snapshots are provisioned automatically (e.g., via CloudFormation or Terraform), update your infrastructure-as-code (IaC) to reflect these changes.
 EC2 Idle Instances have a CPU Usage below 2% and are recommended to be deleted.
Subtitles are available in English, French and Spanish. Click here to get the full masterclass.
How to identify?
- From our Cost Optimization Report , check the EC2 - Idle Instances section.
In AWS Console, go to the EC2 service, then select the Instances section.
Click on an instance, then go to Monitoring. Set the data range to at least last 4 weeks (6 months recommended).
- Confirm the CPU Utilization (%) diagram is very low.

Check other metrics like Memory Utilization to help determine if the instance should be deleted. Consult your team before any deletion.
In Cost Optimization Hub, view the graph per resource type.

Click on View opportunities, filter by EC2 Instance, and check the Top recommended action = Stop.

How to fix?
Ensure the EC2 instance is no longer needed before deleting it.
In AWS Console, go to the EC2 service, then select the Instances section.
If unsure, click Instance state > Hibernate instance or Stop instance to pause the instance temporarily.
If you are certain, click Instance state > Terminate instance. Consider deleting the attached EBS volume if it is no longer needed.
If termination protection is enabled, disable it via Actions > Instance settings > Change termination protection and uncheck the Enable box.
If the resource is provisioned automatically via IaC (such as CloudFormation or Terraform), update the corresponding code to reflect the changes.

Idle RDS Instances — those without active connections or sessions — still incur monthly costs.
Subtitles are available in English, French and Spanish.
Click here to get the full masterclass.
How to identify?

You can identify idle RDS Instances using the following methods:
From our Cost Optimization Report , check the RDS - Idle Instances section.
In AWS Console, navigate to the Cost Optimization Hub and filter by RDS DB Instance with the recommended action set to Stop:

In AWS Console, go to Trusted Advisor, then select the Cost Optimization section. Click on Amazon RDS Idle DB Instances to view the list:

In AWS Console, go to the RDS service, then select the Databases section. Look for instances with Current Activity = 0 sessions or connections (this information may not always be visible). Click on Monitoring and review data for at least the last 4 weeks (6 months recommended). Confirm that the DatabaseConnections diagram is empty, as shown in the example below:

Review other monitoring diagrams to determine if the RDS Database can be deleted. Consult your team before proceeding with any deletion.
How to fix?
Temporarily Stop the Database:
Ensure the RDS Database is no longer needed before deletion. In AWS Console, go to the RDS service, then select the Databases section. Choose the database you want to stop.
If unsure, click Actions > Stop Temporarily. This will stop the database for 7 days and automatically restart it, allowing your team to verify if the database is still required.

Permanently Delete the Database:
If you are certain the database is no longer needed, click Actions > Delete. Keep the default options to create a final snapshot, which you can delete later if unnecessary.
Note: If the RDS Instances are provisioned automatically (e.g., via CloudFormation or Terraform), update your infrastructure-as-code (IaC) to reflect these changes.
A running DocumentDB cluster incurs instance-hour charges, even when no application uses it. Stopping it avoids those charges, but storage and backup charges continue. Confirm application dependencies and backup requirements before stopping it, and delete it only when it is no longer required.
How to identify?
You can identify idle DocumentDB Clusters using the following methods:
From our Cost Optimization Report, check the DocumentDB - Idle Clusters section.
In AWS Console, navigate to the Cost Optimization Hub and filter by resource type DocumentDBCluster with the recommended action set to Stop.
In AWS Console, go to the Amazon DocumentDB service, then select the Clusters section. Review the cluster’s applications, connections, backup requirements and disaster-recovery purpose before taking action.
How to fix?
Ensure the DocumentDB cluster is no longer needed by an application, an integration or a disaster-recovery process.
For temporary non-production environments: in AWS Console, go to the Amazon DocumentDB service, select the cluster, then click Actions > Stop.
For a permanently unused cluster, keep an appropriate backup (final snapshot), then delete it following your approved deletion process.
Note: DocumentDB automatically restarts stopped clusters after 7 days. While stopped, instance charges stop, but storage and backup charges remain. More information in the AWS documentation.
Note: If the DocumentDB Clusters are provisioned automatically (e.g., via CloudFormation or Terraform), update your infrastructure-as-code (IaC) so they are not recreated.
An idle DynamoDB table no longer serves any workload but may still incur storage, provisioned-capacity or index charges. Check recent read/write activity and application dependencies, and keep a backup if needed before deleting it.
How to identify?
You can identify idle DynamoDB Tables using the following methods:
From our Cost Optimization Report, check the DynamoDB - Idle Tables section.
In AWS Console, navigate to the Cost Optimization Hub and filter by resource type DynamoDBTable with the recommended action set to Delete.
In AWS Console, go to the DynamoDB service, then select the Tables section. Review the applications, streams, global secondary indexes (GSIs), backups and infrastructure-as-code references.
How to fix?
Ensure the DynamoDB table is no longer needed: no application, Lambda function, ETL job, EventBridge rule or downstream consumer uses it.
Create an on-demand backup, or confirm that the table is covered by point-in-time recovery (PITR) or AWS Backup.
In AWS Console, go to the DynamoDB service, then select the Tables section. Choose the table, click Delete, then confirm the deletion.
Note: If the DynamoDB Tables are provisioned automatically (e.g., via CloudFormation or Terraform), update your infrastructure-as-code (IaC) so they are not recreated.
More information on DynamoDB backup and restore.
A MemoryDB cluster incurs charges as long as it is available, even when no workload uses it. Check recent client connections and activity, application dependencies and data-retention requirements before deleting it.
How to identify?
You can identify idle MemoryDB Clusters using the following methods:
From our Cost Optimization Report, check the MemoryDB - Idle Clusters section.
In AWS Console, navigate to the Cost Optimization Hub and filter by resource type MemoryDBCluster with the recommended action set to Delete.
In AWS Console, go to the MemoryDB service, then select the Clusters section. Review the endpoint consumers, applications, multi-Region configuration and snapshot requirements.
How to fix?
Ensure no application depends on the MemoryDB cluster or its endpoint.
If recovery may be needed, create a final snapshot before deletion.
In AWS Console, go to the MemoryDB service, then select the Clusters section. Choose the cluster, click Actions > Delete, choose whether to create a final snapshot, then enter delete to confirm.
Note: deleting a MemoryDB cluster stops its charges. Automatic snapshots are deleted with the cluster; manual snapshots are retained. More information in the AWS documentation.
Note: If the MemoryDB Clusters are provisioned automatically (e.g., via CloudFormation or Terraform), update your infrastructure-as-code (IaC) so they are not recreated.
An available ElastiCache cluster incurs charges even when it has no active workload. Check recent connections and cache activity, application dependencies and backup requirements before deleting it. Existing reservations (reserved nodes) may remain payable.
How to identify?
You can identify idle ElastiCache Clusters using the following methods:
From our Cost Optimization Report, check the ElastiCache - Idle Clusters section.
In AWS Console, navigate to the Cost Optimization Hub and filter by resource type ElastiCacheCluster with the recommended action set to Delete.
In AWS Console, go to the ElastiCache service and select the relevant Valkey, Redis OSS or Memcached cache. Check the recent CloudWatch connection and cache activity metrics, identify the applications using its endpoints, and verify any replication group or serverless cache dependencies.
How to fix?
Ensure no application depends on the cache or its endpoints.
For Valkey or Redis OSS, create a final snapshot if the data may be needed for recovery.
In AWS Console, go to the ElastiCache service, select the cache or replication group, click Actions > Delete, review the final snapshot option if available, then confirm the deletion.
Note: charges stop once the cache is no longer listed. Automatic snapshots are not retained after deletion; manual snapshots are retained. Existing reservations may continue to incur charges. See the AWS documentation on deleting a cache and creating manual backups.
Note: If the ElastiCache Clusters are provisioned automatically (e.g., via CloudFormation or Terraform), update your infrastructure-as-code (IaC) so they are not recreated.
 A VPC Endpoint is considered idle when it has no or minimal traffic, yet continues to incur hourly charges. Such endpoints should be deleted to avoid unnecessary costs.
Subtitles are available in English, French and Spanish. Click here to get the full masterclass.
How to identify?
You can identify idle VPC Endpoints using the following methods:
From our Cost Optimization Report, check the VPC_Idle_Endpoints section.
In AWS Console, go to Trusted Advisor, then select the Cost Optimization section. Click on Inactive VPC Interface Endpoints:

In AWS Console, navigate to the VPC service, then select the Endpoints section. Click on a VPC Endpoint of type Interface, then go to the Monitoring tab. Review data for at least the last 4 weeks (12 months recommended). If you see "No data available", the endpoint is unused.

In AWS Console, go to Billing and Cost Management, then select the Bills section. Click on Virtual Private Cloud (VPC), followed by your region. If you have idle VPC Endpoints, you will see a line for VPC Endpoint Hours but no line for Data Processed. In the example below, VPC Endpoints were actively used in Ohio, while 7 idle endpoints in Oregon resulted in $149 of unnecessary costs:

How to fix?
Ensure the VPC Endpoint is no longer needed before deletion. It may be idle for a specific reason, such as a failover strategy.
In AWS Console, go to the VPC service, then select the Endpoints section. Choose the endpoint you want to delete, then click Actions > Delete VPC Endpoint. Confirm the deletion.
If you cannot see the endpoints, use the EC2 Global View service:


Note: If the VPC Endpoints are provisioned automatically (e.g., via CloudFormation or Terraform), update your infrastructure-as-code (IaC) to reflect these changes.

A Load Balancer is considered idle when it processes no traffic yet continues to incur hourly charges. An unused load balancer costs $18 per month and is recommended for deletion to avoid unnecessary expenses.
Subtitles are available in English, French and Spanish. Click here to get the full masterclass.
How to identify?
You can identify idle Load Balancers using the following methods:
From our Cost Optimization Report , check the ELB_Idle_Load_Balancers section.
In AWS Console, navigate to the EC2 service, then select the Load Balancers section. Click on each load balancer to view its details:
For Classic Load Balancers, check the Status. If you see a 0, the load balancer is not connected to an Auto Scaling Group (ASG) or instance.

For other types, go to the Monitoring section and review the diagrams over a long period (e.g., 6 months) to confirm inactivity:

In AWS Console, go to Billing and Cost Management, then select the Bills section. Click on Elastic Load Balancing, followed by your region, to review billing details for all load balancer types (Application, Classic, Network):

How to fix?
Ensure the Load Balancer is no longer needed before deletion.
In AWS Console, go to the EC2 service, then select the Load Balancers section. Choose the load balancer you want to delete, then click Actions > Delete Load Balancer.
Note: If the Load Balancers are provisioned automatically (e.g., via CloudFormation or Terraform), update your infrastructure-as-code (IaC) to reflect these changes.

When you delete an EC2 Instance, its Elastic IP Address may remain allocated. Each unused Elastic IP costs $0.005 per hour, or $3.60 per month. Always verify that an Elastic IP is not in use before releasing it.

Subtitles are available in English, French and Spanish. Click here to get the full masterclass.
How to identify?
You can identify idle Elastic IP Addresses using the following methods:
From our Cost Optimization Report , check the VPC_Idle_Elastic_Ips section.
In AWS Console, navigate to the EC2 service, then select the Elastic IPs section. Filter by Association ID. Elastic IPs with no Association ID, no associated Instance ID, no private IP address, and no Network Interface Owner Account ID are considered idle.

In AWS Console, go to Billing and Cost Management, then select the Bills section. Click on Virtual Private Cloud, followed by your region, then Amazon Virtual Private Cloud Public IPv4 Addresses. If you have idle IPs, you will see a line item for the cost. In the example below, approximately $25 was spent on idle IPs for the selected period and region. Compare this cost to in-use IPs to estimate the number of idle addresses:

In AWS Console, go to Trusted Advisor, then select the Cost Optimization section. Click on Unassociated Elastic IP Addresses to view the list:

How to fix?
Ensure you are releasing the correct Elastic IPs. Do not disassociate IPs that are in use.
In AWS Console, go to the EC2 service, then select the Elastic IPs section. Filter by Association ID. Select an Elastic IP with no association, then click Actions > Release Elastic IP Addresses. Click Release. If you receive a warning, the IP may still be in use — do not release it.
Note: If Elastic IPs are provisioned automatically (e.g., via CloudFormation or Terraform), update your infrastructure-as-code (IaC) to reflect these changes.

A Kinesis Data Stream is considered idle when it has no traffic yet continues to incur hourly charges. Such streams should be deleted to avoid unnecessary costs.
Subtitles are available in English, French and Spanish. Click here to get the full masterclass.
How to identify?
You can identify idle Kinesis Data Streams using the following methods:
From our Cost Optimization Report , check the KINESIS_Idle_Data_Streams section.
In AWS Console, navigate to the Kinesis service, then select the Data Streams section. Click on each stream to view its details, then go to the Monitoring tab. Review the diagrams over a long period (e.g., 6 months). If you see "No data available", the stream is unused:

How to fix?
Ensure the Kinesis Data Stream is no longer needed before deletion.
In AWS Console, go to the Kinesis service, then select the Data Streams section. Choose the stream you want to delete, then click Actions > Delete.

Note: If the Kinesis Data Streams are provisioned automatically (e.g., via CloudFormation or Terraform), update your infrastructure-as-code (IaC) to reflect these changes.

Unused NAT Gateways incur significant costs and should be deleted when no longer needed.
Subtitles are available in English, French and Spanish. Click here to get the full masterclass.
How to identify?
To determine if you are impacted by unused NAT Gateways, use the following methods:
In AWS Console, navigate to the VPC service, then select the NAT Gateways section. Click on each NAT Gateway to view its details, then go to the Monitoring tab. Review the diagrams over a long period (e.g., 6 months). An unused NAT Gateway will show minimal or no activity, as illustrated below:

In AWS Console, go to Billing and Cost Management, then select the Bills section. Click on Elastic Compute Cloud (EC2), followed by your region, to review billing details related to your NAT Gateways.

In AWS Console, open Trusted Advisor and navigate to the Cost Optimization section. Look for Inactive NAT Gateways to identify any unused resources.

How to fix?
Ensure the NAT Gateway is no longer required before deletion.
In AWS Console, go to the VPC service and select the NAT Gateways section. Choose the NAT Gateway you want to remove, then click Actions > Delete NAT Gateway.
Note: If the NAT Gateways are provisioned automatically (e.g., via CloudFormation or Terraform), update your infrastructure-as-code (IaC) to prevent future recreations.

AWS CloudTrail supports multiple trails, including trails that monitor the same events. Security team usually creates a Management Events trail in every AWS account for audit purposes— this trail is free. However, creating additional Management Events trails that duplicate recorded events will incur fees.


Subtitles are available in English, French and Spanish. Click here to get the full masterclass.
How to identify?
You can identify duplicate CloudTrail trails using the following methods:
From our Cost Optimization Report , check the CLOUDTRAIL_Duplicate_Trails section.
In AWS Console, navigate to the Cost Explorer service. Filter by Usage Type = <Region>-PaidEventsRecorded. This indicates duplicate events being recorded.
In AWS Console, go to Billing and Cost Management, then select the Bills section. Click on CloudTrail, followed by your region. If you see PaidEventsRecorded, you have duplicate trails:

How to fix?
Review your CloudTrail trails to identify and avoid duplicate Management Events trails. Analyze API activity to confirm redundancy:

In AWS Console, go to the CloudTrail service, then select the Trails section. Choose the trail you want to remove and click Delete, or stop logging if the trail is no longer needed.
Note: If CloudTrail trails are provisioned automatically (e.g., via CloudFormation or Terraform), update your infrastructure-as-code (IaC) to reflect these changes.

A secret in AWS Secrets Manager is considered unused when it is no longer needed but continues to incur monthly charges. Deleting unused secrets helps reduce costs and improve security.
Subtitles are available in English, French and Spanish. Click here to get the full masterclass.
How to identify?
You can identify unused Secrets Manager secrets using the following methods:
- From our Cost Optimization Report, check the Unused_Secrets section.
In AWS Console, navigate to the Secrets Manager service. Check the Last Retrieved column for each secret. Secrets with no recent retrieval activity may be unused:

In AWS Console, go to Billing and Cost Management, then select the Bills section. Click on Secrets Manager, followed by your region. If there are no API requests in a region for a given month, the secrets in that region were not used:

In AWS Config or Security Hub, create the managed rule secretsmanager-secret-unused. Modify the unusedForDays parameter to specify the number of days a secret can remain unused (default: 90 days):


How to fix?
Ensure the secret will not be needed in the future before deletion.
In AWS Console, go to the Secrets Manager service. Click on the secret you want to delete, then select Actions > Delete Secret:

Set the waiting period to 7 days and click Schedule Deletion:

Note: If secrets are provisioned automatically (e.g., via CloudFormation or Terraform), update your infrastructure-as-code (IaC) to reflect these changes.
Automated Snapshots are preferred over Manual Snapshots for multiple reasons:
Free Backup Storage Allowance: AWS provides free backup storage equivalent to 100% of your total database storage for each region. If your database is 100 GB, you get 100 GB of automated backup storage for free. Manual snapshots, by contrast, are billed based on their total size ($0.095 per GB-month in most regions), regardless of this allowance.
Automatic Lifecycle Management: Automated snapshots are deleted once they fall outside the retention period (1–35 days), preventing "snapshot bloat" where old, forgotten snapshots pile up and incur charges. Manual snapshots are kept indefinitely until you explicitly delete them.
Incremental Efficiency: Both automated and manual snapshots are incremental, meaning they only store data changes. However, because automated backups are managed system-wide for the instance, they are more efficient at maintaining only necessary data within the retention window, avoiding the costs associated with redundant full-backup manual snapshots.
No Cost for Transaction Logs: Automated backups include transaction logs, which enable point-in-time recovery (PITR) at no extra cost, whereas replicating this level of recovery with manual snapshots would require taking them very frequently, leading to higher storage costs.
Reduced Costs Upon Deletion: When a database is deleted, you can choose to delete its automated snapshots, whereas manual snapshots often remain and continue to accrue storage charges until manually cleaned up.
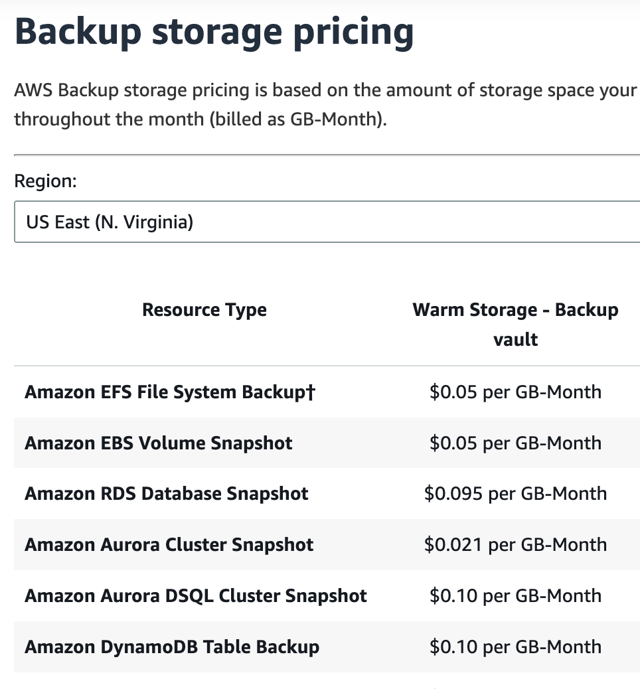
How to identify?
You can identify unused RDS Manual Snapshots using the following methods:
From our Cost Optimization Report, check the RDS_Manual_Snapshots section.
In AWS Console, navigate to the Aurora and RDS service, then select the Snapshots section and Manual section. Filter by Snapshot creation time to identify the oldest snapshots. Filter by Storage to prioritize larger snapshots.
AWS Console, go to Billing and Cost Management, then select the Bills section. Click on Relational Database Service, choose your region, then search for "backup storage exceeding free allocation". If snapshots exist, you will see a line item like this:

In the example above, approximately $530 was spent on snapshots for the selected period and region. Deleting all snapshots (if appropriate) could save 100% of this cost—$530—with just a few clicks.
How to fix?
For Archiving:
You can archive RDS Manual snapshots to an S3 Bucket in Apache Parquet format, which is efficient for storage and allows querying via Athena. But in that case, you cannot directly restore an RDS database from an exported Parquet file in S3: it’s only for archival data access.
For Deletion:
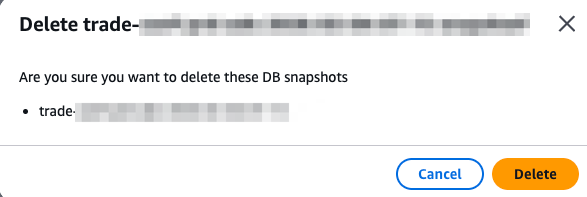
Ensure the snapshot is no longer needed before deletion. In AWS Console, go to the Aurora and RDS service, then select the Snapshots section. Filter by Started, select one or more snapshots, and click Actions > Delete Snapshot. Confirm the deletion in the popup.
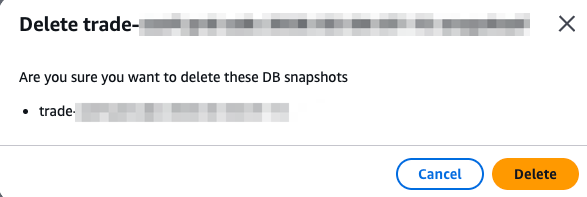
Note: If snapshots are provisioned automatically (e.g., via CloudFormation or Terraform), update your infrastructure-as-code (IaC) to reflect these changes.
Saving by Upgrading
Upgrading means changing the generation of an instance / database engine / OS / application / service to a higher number. Newer versions can provide better performance and potentially lower costs. They usually represents between 5 and 20% of your total opportunities, and requires minimal or intermediate effort.

The AWS cost of supporting old Kubernetes clusters is six times higher than the standard price. Kubernetes evolves rapidly, with new features, design updates, and bug fixes released every 4 months on average.
Subtitles are available in English, French and Spanish. Click here to get the full masterclass.
Standard Support: 14 months from the release date in Amazon EKS.
Extended Support: 12 months after standard support ends, but at a higher cost ($0.60 per cluster per hour vs. $0.10).
|
Kubernetes version |
Upstream release |
Amazon EKS release |
End of standard support |
End of extended support |
|---|---|---|---|---|
|
1.32 |
December 11, 2024 |
January 23, 2025 |
March 23, 2026 |
March 23, 2027 |
|
1.31 |
August 13, 2024 |
September 26, 2024 |
November 26, 2025 |
November 26, 2026 |
|
1.30 |
April 17, 2024 |
May 23, 2024 |
July 23, 2025 |
July 23, 2026 |
|
1.29 |
December 13, 2023 |
January 23, 2024 |
March 23, 2025 |
March 23, 2026 |
|
1.28 |
August 15, 2023 |
September 26, 2023 |
November 26, 2024 |
November 26, 2025 |
|
1.27 |
April 11, 2023 |
May 24, 2023 |
July 24, 2024 |
July 24, 2025 |
|
1.26 |
December 9, 2022 |
April 11, 2023 |
June 11, 2024 |
June 11, 2025 |
|
1.25 |
August 23, 2022 |
February 22, 2023 |
May 1, 2024 |
May 1, 2025 |
|
1.24 |
May 3, 2022 |
November 15, 2022 |
January 31, 2024 |
January 31, 2025 |
The cost to run an Amazon EKS cluster is based on the Kubernetes minor version of the cluster control plane. Extended Support is running by default.
Regular upgrades are strongly recommended to avoid unnecessary expenses and ensure access to the latest features and security patches.
|
Support type |
Duration |
Price (per cluster per hour) |
|
Standard |
14 months starting from the date a version is generally available on Amazon EKS |
$0.10 |
|
Extended |
12 months starting from the date a version reaches the end of standard support in Amazon EKS |
$0.60 |
You can find more information on that AWS documentation or that AWS blog post .
How to identify?
You can identify clusters running on Extended Support using the following methods:
From our Cost Optimization Report , check the EKS_Extended_Support or Future_EKS_Extended_Support section.
In AWS Console, navigate to the EKS service, then select the Clusters section. Review the Kubernetes version of each cluster and compare it with the support timeline above.
In AWS Console, go to Billing and Cost Management, then select the Bills section. Click on Elastic Container Service for Kubernetes, followed by your region. Search for "ExtendedSupport". If you see a line item for this cost, your cluster is on extended support:

How to fix?
Upgrade your clusters to a supported minor version.
Note: You cannot downgrade the Kubernetes version.
In AWS Console, go to the EKS service, then select the Clusters section. Click Upgrade Now next to the Kubernetes version for the cluster you want to update.
Upgrade versions one by one to ensure compatibility and stability.


Note: If your EKS clusters are provisioned automatically (e.g., via CloudFormation or Terraform), update your infrastructure-as-code (IaC) to reflect the new version.

The AWS cost of supporting old database versions can be significantly higher compared to the compute price. Regular upgrades are essential to avoid unnecessary expenses, ensure security, and access the latest features.

For release calendars, refer to:
Subtitles are available in English, French and Spanish. Click here to get the full masterclass.
How to identify?
You can identify databases approaching or on extended support using the following methods:
From our Cost Optimization Report , check the RDS_Extended_Support or Future_RDS_Extended_Support section.
In AWS Console, navigate to the RDS service, then select the Databases section. Go to the settings (⚙️) and add the Engine Version and RDS Extended Support columns:
The RDS Extended Support column indicates whether a database is enrolled in extended support, but not necessarily incurring the cost yet. Compare the engine version with the release calendars above to determine if an upgrade is needed:

In AWS Console, go to Billing and Cost Management, then select the Bills section. Click on Relational Database Service (RDS), followed by your region. Search for "Extended Support". If you see a line item for this cost, your database is on extended support:


How to fix?
Upgrade your databases before extended support begins. Upgrades can be complex and time-consuming, especially if legacy code requires updates for compatibility.
In AWS Console, go to the RDS service, then select the Databases section.

Choose the database you want to upgrade, then click Actions > Upgrade Now or Upgrade at Next Window:

Note: If your RDS databases are provisioned automatically (e.g., via CloudFormation or Terraform), update your infrastructure-as-code (IaC) to reflect the new version.
With ElastiCache Extended Support, you can continue running your cache on a major engine version past the end of standard support date for an additional cost. If you don't upgrade after the end of standard support date, you will be charged.
Extended Support provides the following updates and technical support:
Security updates for critical and high CVEs for your cache and cache engine
Bug fixes and patches for critical issues
The ability to open support cases and receive troubleshooting help within the standard ElastiCache service level agreement
Subtitles are available in English, French and Spanish. Click here to get the full masterclass.
For provisioned instances on ElastiCache for Redis OSS, the pricing of Extended Support is:
An additionnal 80% for Year 1 and Year 2
An additional 160% for Year 3.
Extended Support pricing is also dependent on the AWS Region and calendar date:
|
Major Engine Version |
End of Standard Support |
Start of Extended Support Y1 Premium |
Start of Extended Support Y2 Premium |
Start of Extended Support Y3 Premium |
End of Extended Support and version EOL |
|---|---|---|---|---|---|
|
Redis OSS v4 |
1/31/2026 |
2/1/2026 |
2/1/2027 |
2/1/2028 |
1/31/2029 |
|
Redis OSS v5 |
1/31/2026 |
2/1/2026 |
2/1/2027 |
2/1/2028 |
1/31/2029 |
|
Redis OSS v6 |
1/31/2027 |
2/1/2027 |
2/1/2028 |
2/1/2029 |
1/31/2030 |
You can find more information on that AWS documentation.
How to identify?
You can identify Redis clusters approaching or on extended support using the following methods:
From our Cost Optimization Report , check the Redis_Extended_Support or Future_Redis_Extended_Support section.
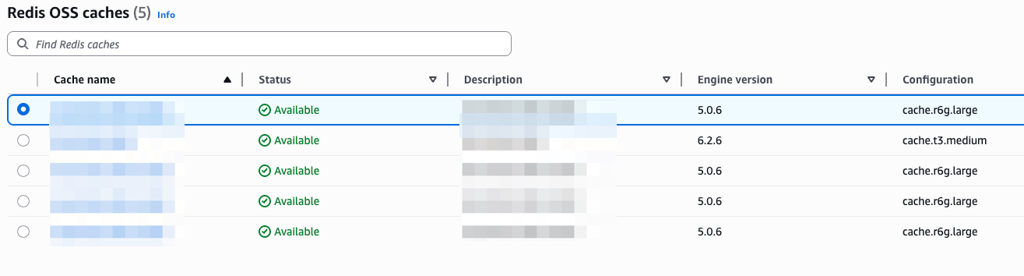
- In AWS Console, navigate to the ElastiCache service, then Redis OSS section. Review the Engine version of each cache and compare it with the support timeline above.
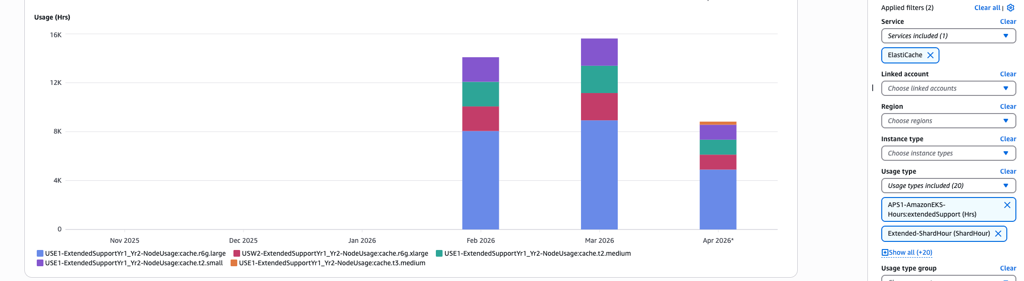
- In AWS Console, navigate to Billing and Cost Management, then select the Cost Explorer section. Filter by Service = ElastiCache and Usage type = all types containing ‘Extended’. Group by Usage Type or Linked Account.
In AWS Console, go to Billing and Cost Management, then select the Bills section. Click on Elasticache, followed by your region. Search for "ExtendedSupport". If you see a line item for this cost, your cluster is on extended support:

How to fix?
Upgrade your clusters to a supported version. Upgrades are generally straightforward, but always review the AWS Upgrade Documentation for guidance.
In AWS Console, go to the ElastiCache service, then Redis section. Select one Engine, Click Actions > Modify to change the engine.
Upgrade versions one by one to ensure compatibility and stability.
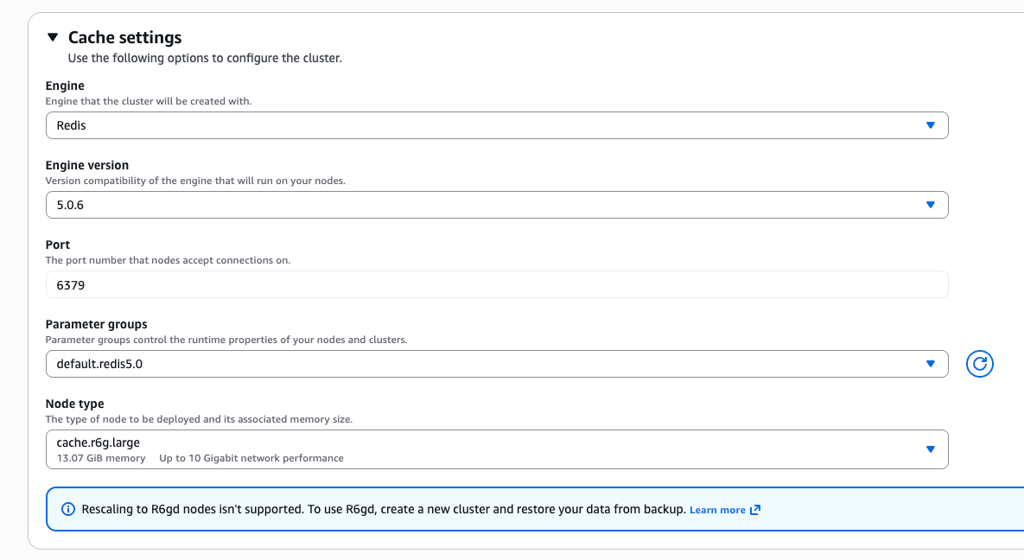
Note: If your Redis engines are provisioned automatically (e.g., via CloudFormation or Terraform), update your infrastructure-as-code (IaC) to reflect the new version.
Calculation Example:
If you are running a cache.m5.large instance on ElastiCache version 5 for Redis OSS in the US East (Ohio) region, it reached end of support on January 31, 2026.
For the first two years of Extended Support (from February 1, 2026 to January 31, 2028), your hourly charges will consist of the On-Demand price of $0.1560 plus an Extended Support premium of 80% (calculated as $0.1560 × 80% = $0.1248), totaling $0.2808 per instance hour.
For the third year of Extended Support (from February 1, 2028 to January 31, 2029), while the On-Demand price remains at $0.1560, the Extended Support premium increases to 160% (calculated as $0.1560 × 160% = $0.2496), bringing the total hourly cost to $0.4056 per instance hour.
- Amazon OpenSearch Service is a managed service that makes it easy to deploy, operate, and scale OpenSearch clusters in the AWS Cloud.
- When you are running a version in Extended Support, you will be charged a flat fee/Normalized instance hour (NIH) in addition to the standard instance cost.
|
Software Version |
End of Standard Support |
End of Extended Support |
|---|---|---|
|
OpenSearch versions 1.0 through 1.2 |
November 7, 2025 |
November 7, 2026 |
|
OpenSearch versions 1.3 |
Not announced |
Not announced |
|
OpenSearch versions 2.3 to 2.9 |
November 7, 2025 |
November 7, 2026 |
|
OpenSearch versions 2.11 and higher versions |
Not announced |
Not announced |
NIH is computed as a factor of the instance size (e.g. medium, large), and number of instance hours.
Subtitles are available in English, French and Spanish. Click here to get the full masterclass.
You can find more information on that AWS documentation.
How to identify?
You can identify Redis clusters approaching or on extended support using the following methods:
From our Cost Optimization Report , check the OpenSearch_Extended_Support or Future_OpenSearch_Extended_Support section.
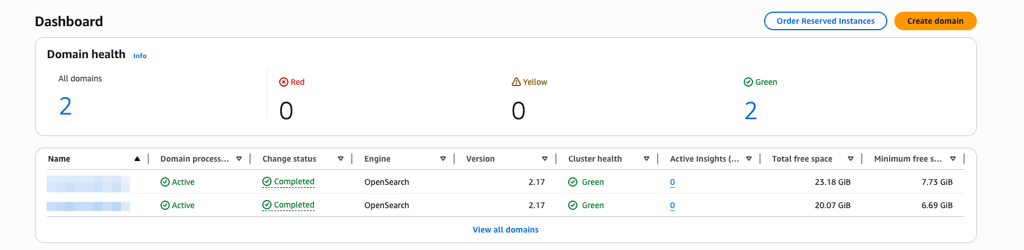
In AWS Console, navigate to the OpenSearch service, then Managed Clusters dashboard. Review the version of each cluster and compare it with the support timeline above.
In AWS Console, navigate to Billing and Cost Management, then select the Cost Explorer section. Filter by Service = OpenSearch and Usage type = all types containing ‘Extended’. Group by Usage Type or Linked Account.
In AWS Console, go to Billing and Cost Management, then select the Bills section. Click on OpenSearch, followed by your region. Search for "ExtendedSupport". If you see a line item for this cost, your cluster is on extended support.
How to fix?
Upgrade your clusters to a supported version. Upgrades are generally straightforward, but always review the AWS Upgrade Documentation for guidance.
In AWS Console, go to the OpenSearch service, then Managed Clusters dashboard. Select one Engine, Click Actions > Upgrade to modify the engine.
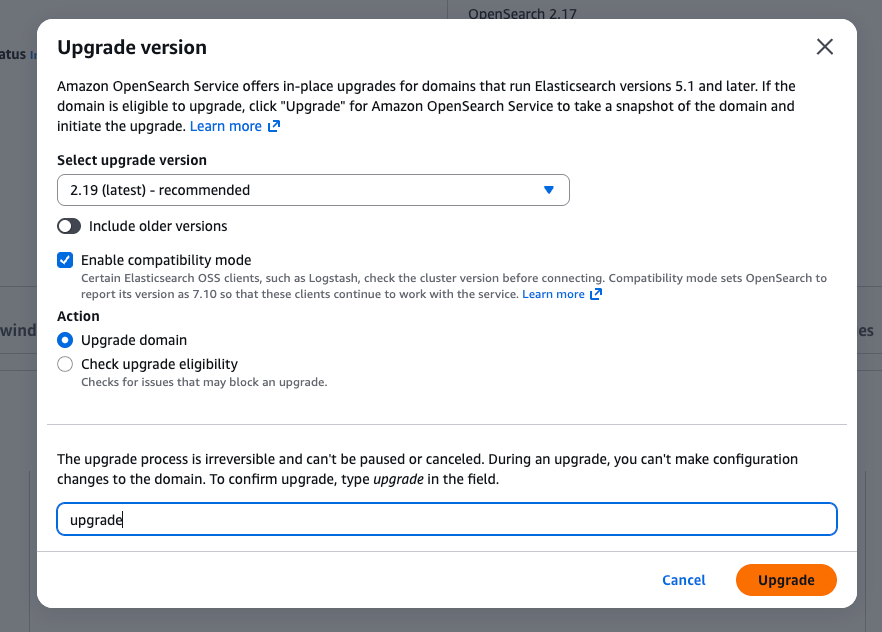
Note: If your OpenSearch engines are provisioned automatically (e.g., via CloudFormation or Terraform), update your infrastructure-as-code (IaC) to reflect the new version.
Calculation Example:
For example, if you are running an m7g.medium.search instance for 24 hours in the US East (North Virginia) Region, which is priced at $0.068/Instance hour (on-demand), you will typically pay $1.632 ($0.068x24).
If you are running a version that is in extended support, you will pay an additional $0.0065/NIH, which is computed as $0.0065 x 24 (number of instance hours) x 2 (size normalization factor; 2 for medium-sized instances), which comes to $0.312 for extended support for 24 hours. The total amount you will pay for 24 hours will be a sum of the standard instance usage cost and the extended support cost, which is $1.944 ($1.632+$0.312) [19,12% more].

The AWS cost of supporting previous-generation EC2 instances can be significantly higher compared to newer, more efficient, and cost-effective options. Previous-generation instances include older families and types that have been phased out:
t1, t2
m1, m2, m3, m4
c1, c2, c3, c4
r1, r2, r3, r4
i2
a1
d2
Previous Generation Instances Documentation
You can upgrade to newer generations (e.g., t4g, m7, c7, r7): See all instance types and should always consider migrating to Graviton instances at the first opportunity.


Subtitles are available in English, French and Spanish. Click here to get the full masterclass.
How to identify?
You can identify previous-generation instances using the following methods:
From our Cost Optimization Report , check the EC2_Rightsize section.
In AWS Console, navigate to the EC2 service, then select the Instances section. Filter by Instance Type and compare with the list above.
In AWS Console, go to the Cost Optimization Hub and filter by EC2 Instance with the recommended action set to Upgrade:

In AWS Console, go to Billing and Cost Management, then select the Bills section. Click on Elastic Compute Cloud (EC2), followed by your region, then "Amazon Elastic Compute Cloud running [Instance Type]" and search for instance types to compare with the list.
To estimate savings, use the https://calculator.aws/. For example, upgrading 1 EC2 Instance (c4.4xlarge to c5.4xlarge in Oregon) can save you $85 per month, or 15%:

How to fix?
Upgrade your instances to newer generations. The process can be straightforward or complex, depending on compatibility with legacy code.
Stop the instance before changing its type. For production environments, consider using EC2 Auto Scaling or creating a new instance and migrating the data.
In AWS Console, go to the EC2 service, then select the Instances section. Choose a stopped instance, then click Actions > Instance Settings > Change Instance Type:

Note: If your EC2 instances are provisioned automatically (e.g., via CloudFormation or Terraform), update your infrastructure-as-code (IaC) to reflect the new instance type.

GP2 volumes should be upgraded to GP3 volumes to save up to 20% on costs. GP3 also allows you to provision IOPS and throughput independently of volume size, offering better performance flexibility.

Subtitles are available in English, French and Spanish. Click here to get the full masterclass.


How to identify?
You can identify GP2 volumes eligible for upgrade using the following methods:
From our Cost Optimization Report , check the EBS_Upgrades section.
In AWS Console, navigate to the Cost Optimization Hub and filter by EBS Volume with the recommended action set to Upgrade:

In AWS Console, go to Compute Optimizer for additional recommendations.
In AWS Console, go to the EC2 service, then select the Volumes section. Filter by Volume type to identify GP2 volumes.

In AWS Console, go to Billing and Cost Management, then select the Bills section. Click on Elastic Compute Cloud (EC2), followed by your region, then EBS, and search for "gp2". If you have GP2 volumes, you will see a line item for the cost. In the example below, approximately $2000 was spent on GP2 volumes for the selected period and region. Upgrading to GP3 could save 20%, or $400, with minimal effort:


How to fix?
Upgrade GP2 volumes to GP3 without interruption—no downtime is required, and the risk is minimal.
In AWS Console, go to the EC2 service, then select the Volumes section. Filter by Volume type, select a GP2 volume, then click Actions > Modify Volume. Change the volume type to GP3 and click Modify:

You can also upgrade io1 volumes to io2 to potentially save on IOPS costs.

Notes:
If the EBS volumes are provisioned automatically (e.g., via CloudFormation or Terraform), update your infrastructure-as-code (IaC) to reflect the new volume type.
If a volume is in the "Available" state and no longer needed, consider deleting it.
EBS Volumes are not only used by EC2, check out here with an RDS example:


The AWS cost of supporting previous-generation database instances can be significantly higher compared to newer, more efficient, and cost-effective options. Previous-generation instances include older families and types that have been phased out across multiple services:
RDS - ElastiCache - Redshift - DocumentDB - Neptune
Previous-generation instance types include:
t1, t2
m1, m2, m3, m4
c1, c2, c3, c4
r1, r2, r3, r4
ds
dw
dc1
You can upgrade to newer generations (e.g., t4g, m7, c7, r7) : See all instance types
Always consider migrating your instances to Graviton in first opportunity.
Subtitles are available in English, French and Spanish. Click here to get the full masterclass.
How to identify?
You can identify previous-generation database instances using the following methods:
From our Cost Optimization Report , check the RDS_Rightsize section.
In AWS Console, navigate to the dedicated service (e.g., RDS, ElastiCache). Filter by Instance Type and compare with the list above.
In AWS Console, go to the Cost Optimization Hub and filter by RDS Instance with the recommended action set to Upgrade or Migrate to Graviton:

In AWS Console, go to Billing and Cost Management, then select the Bills section. Click on your service (e.g., RDS), followed by your region, and search for instance types to compare with the list.
- To estimate savings, go to https://calculator.aws/ . For example, upgrading 1 RDS Instance (m1.large to m5.large in Oregon) can save you $86 per month, or 22%.

How to fix?
Upgrading instance families is relatively easy. However, you must stop the database instance before changing its type.
Changing the instance type requires a restart and will cause brief downtime for Single-AZ deployments. This downtime is reduced with Multi-AZ, but still exists. For production environments, take extra precautions.
In AWS Console, go to your dedicated service (e.g., RDS). Select the instance, then click Actions to change the instance type. Click Continue, then Apply Immediately.

What about moving from intel (m6i, m7i) to ARM/graviton (r6g, r7g, r8g)?
The benefit of RDS is that as a managed service, AWS takes care of all the driver and architecture differences between x86 & ARM, so that you do not have to deal with any incompatibility.
If your database instances are provisioned automatically (e.g., via CloudFormation or Terraform), update your infrastructure-as-code (IaC) to reflect the new instance type.

AWS Graviton instances are EC2 instances powered by AWS-designed ARM-based processors. They offer better price-performance compared to traditional x86-based instances (Intel & AMD), with potential savings of 15–19%.


Using Graviton with RDS is simple, more efficient, and a better price/performance.

Subtitles are available in English, French and Spanish. Click here to get the full masterclass.
How to identify?
You can identify opportunities to migrate to Graviton using the following methods:
From our Cost Optimization Report , check the EC2 or RDS Upgrade or RightSize sections.
In AWS Console, navigate to the Cost Optimization Hub and filter for the recommended action Migrate to Graviton:

In AWS Compute Optimizer, compare multiple instance options for Graviton compatibility and performance:

How to fix?
EC2:
Do not switch if your software doesn’t support ARM (e.g., legacy x86 applications) or if your application is Windows-based.
Check compatibility: Ensure your application supports ARM on test servers (e.g., t4g).
Use Multi-Arch Docker images if running containers.
RDS:
RDS is a managed service, so AWS handles all compatibility issues related to the ARM architecture. You don’t need to worry about low-level driver issues.
Note: changing RDS instance types will incur downtime. Plan this change during your maintenance window budget 30 minutes for the instance switch.
RDS (Console)
Login to the Console.
Choose Databases, then choose the DB instance that you want to modify.
Choose Modify. The Modify DB instance page appears.
Change the instance size to a graviton (i.e., db.m6g.large) instance, following whatever Compute Optimizer or Trusted Advisor advises.
Choose Continue.
Choose Apply immediately to apply the changes immediately (For more information, see Using the Apply Immediately setting ).
On the confirmation page, choose Modify DB instance.
The instance should go to a Modifying state. Wait for the instance to become available, then validate and start your applications. There should be no other impact.


RDS (Terraform)
In your terraform configuration, find your RDS resource aws_db_instance.
Modify the instance_class parameter to your desired Graviton instance class (e.g., db.m6g.large):
Run your terraform plan and confirm.
Run the Terraform apply through your CICD system. Ensure dev/lower environments first.
Graviton - History
In 2018, AWS released the first Graviton (A1 instance family).
In 2020, the second generation, Graviton2, was released, with AWS promising 40% improved price/performance over 5th generation Intel and AMD instances and an average of 72% reduction in power consumption (M6g, C6g, R6g, T4g, X2gd, G5g, Im4gn, Is4gen, I4g).
In 2022, AWS made available Graviton3 processors as part of its 7th generation EC2 instances, offering a further 25% better compute performance over Graviton2.
EC2 instances: C7g, M7g, R7g.
RDS instances: db.r7g, db.m7g.
In 2024, AWS released Graviton4 and claims it is 40% faster for databases, 30% faster for web applications, and 45% faster for large Java applications than Graviton3.
EC2 instances: R8g, X8g, C8g, M8g, I8g.
RDS instances: db.r8g, db.m8g.
When creating an ElastiCache cluster in AWS, you have 2 primary deployment options — Serverless or Node-based (Provisioned) — and 3 engine options — Redis OSS, Memcached or Valkey released late 2024.
ElastiCache for Valkey introduces significant enhancements to Redis while retaining its core functionality, making it more powerful and versatile.
On-Demand ElastiCache for Valkey Serverless is priced 33% lower compared to Redis OSS Serverless.
On-Demand ElastiCache for Valkey node-based is priced 20% lower compared to Redis node-based.
Subtitles are available in English, French and Spanish. Click here to get the full masterclass.
Secondary Cost Optimization Levers
Lower Storage Minimums: ElastiCache Serverless for Valkey has a minimum data storage of 100 MB, which is 90% lower than the 1 GB minimum for Redis OSS.
Memory Efficiency & Rightsizing: Valkey 8.x versions reduce memory usage by approximately 20-40% per key compared to Redis OSS. This improvement often allows you to downsize your node types (e.g., from r7g.xlarge to r7g.large), potentially yielding up to 60% total savings.
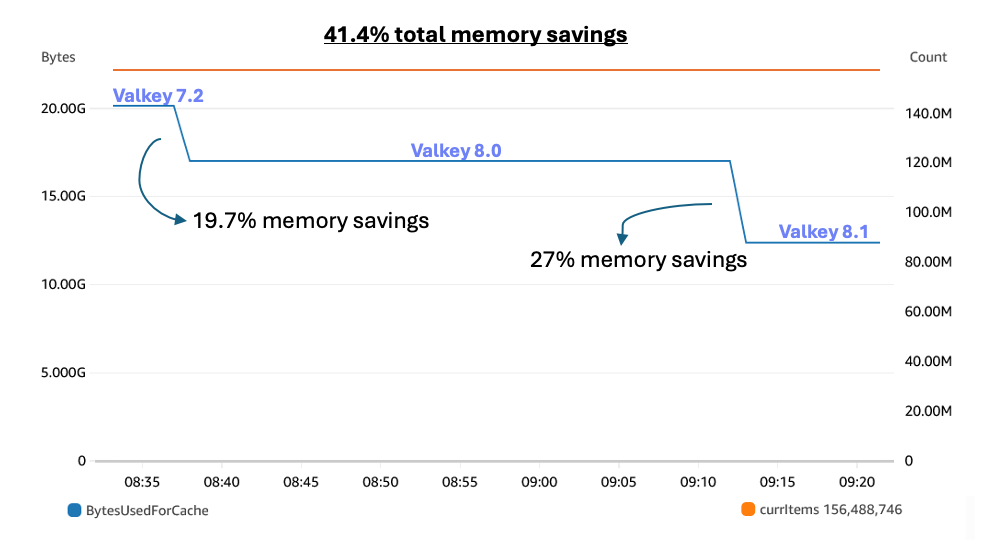
Reserved Instance (RI) Portability: Existing Redis OSS Reserved Nodes automatically apply to Valkey nodes within the same instance family and region.
How to identify?
You can identify opportunities to migrate to Valkey using the following methods:
From our Cost Optimization Report , check at ELASTICACHE_Redis_To_Valkey section.
- In AWS Console, go to ElastiCache to see which engine you’re currently using.
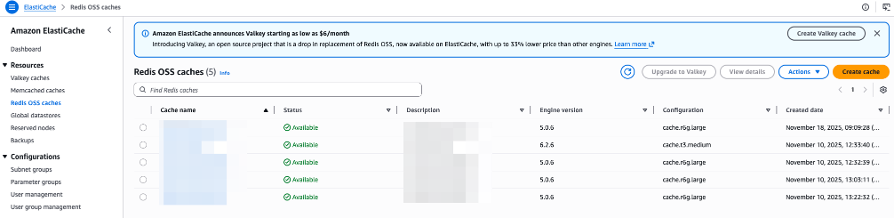
How to fix?
Step 1: Create a Valkey Cluster
Go to the AWS ElastiCache Console.
Click Create cluster.
Select Valkey as the engine.
Configure the cluster with the same settings as your Redis cluster (node type, number of nodes, etc.).
Click Create.
Step 2: Migrate Data
Use Redis Replication (if both clusters are in the same region):
redis-cli -h <REDIS_ENDPOINT> --replicaof <VALKEY_ENDPOINT> <VALKEY_PORT>
Wait for synchronization to complete.
Verify data integrity by comparing keys between Redis and Valkey.
Step 3: Update Application Configuration
Update your application to point to the Valkey endpoint instead of Redis.
Test thoroughly to ensure compatibility.
Step 4: Delete the Old Redis Cluster
Once confirmed that Valkey is working correctly, you can delete the old Redis cluster to avoid double billing.
Saving by Rightsizing
Rightsizing is the process of matching instance types and sizes to your workload's performance and capacity requirements at the lowest possible cost. It typically represents 30% to 60% of your total cost optimization opportunities.

Over-provisioned EC2 instances have a high cost and may not need the amount of resources provisioned to run the workload. You can rightsize it (reduce CPU/RAM) without breaking the normal usage.
Rightsizing involves adjusting the instance type to better match your workload’s requirements. For example, you might downgrade from a 4xlarge to an xlarge instance.
Opting for the latest instance technologies, such as AWS Graviton, can also reduce costs, though compatibility checks may be required.
Subtitles are available in English, French and Spanish. Click here to get the full masterclass.
How to identify?
From our Cost Optimization Report , check the EC2_Rightsize section.
In AWS Console: Go to the EC2 service, then select the Instances section. Click on an instance, then go to the Monitoring tab. Adjust the data range to at least the last 4 weeks (6 months is recommended). Confirm that the CPU Utilization (%) graph is low, for example:

If the maximum CPU usage is 15% during this period, you could safely reduce the provisioned CPU by a factor of 4. However, you must also check Memory. If mem_used_percent peaks at 90%, you cannot reduce Memory, but you might still optimize CPU by switching to a different instance class with the same Memory allocation.
To do this, check your instance type or class, then refer to https://aws.amazon.com/ec2/instance-types/ to compare your current vCPU and Memory with other classes.
Ensure that rightsizing will not impact network performance. If necessary, review your instance’s network metrics.
- In AWS Console, navigate to the AWS Compute Optimizer service, then select the EC2 Instances section for tailored recommendations.

- In AWS, go to Cost Optimization Hub and filter savings opportunities by EC2 Instance with the recommended action set to Rightsize.

Note: These recommendations are based on the last 10 days. Always confirm with a longer period in AWS Console. However, this provides a good overview of the recommended instance type and its impact on CPU.
Memory metrics are often not reported by default in AWS. Since Memory is critical for rightsizing, either connect to the instance to check Memory usage or enable EC2 Memory Metrics in CloudWatch.
Use the AWS Pricing Calculator to estimate savings. https://calculator.aws/, Select EC2 Service and compare generation prices. For example, rightsizing a c6a.8xlarge instance to an r6g.2xlarge could save $602 per month (67% reduction).

How to fix?
If the servers are in production, schedule a maintenance window and take a snapshot as a precaution. You must stop the instance before changing its type. For production environments, consider using EC2 Auto Scaling or creating a new instance and migrating data.
In AWS Console:
Go to the EC2 service, then select the Instances section.
Choose an instance, then click Instance state > Stop instance.
Once stopped, go to Actions > Instance settings > Change instance type.
Select the new instance type, review the comparison, and click Apply.


If the resources are created automatically (e.g., via CloudFormation or Terraform), update your code to reflect the new instance type.

Over-provisioned ECS instances have a high cost and may not need the amount of resources provisioned to run the workload. You can rightsize (reduce CPU/RAM) without breaking normal usage.
Rightsizing means changing the instance type to meet actual needs. For example, you could downgrade from a 4xlarge to an xlarge instance.
Switching to the latest instance technologies, such as AWS Graviton, can also reduce costs, though you may need to ensure compatibility.
Subtitles are available in English, French and Spanish. Click here to get the full masterclass.
ECS Launch Types

EC2:
You manage the underlying EC2 Instances in your ECS Cluster.
Rightsize your instance types and sizes based on CPU, memory, network performance, and storage needs.
Fargate:
AWS handles the provisioning and scaling of the compute resources.
You pay for the exact amount of vCPU and memory resources that your containerized applications use.
You can rightsize your task definitions.
To determine your launch type:
Navigate to ECS, select a cluster, and go to the Tasks section. Look at the Launch type column.

Fargate Deployment
By default, ECS uses a rolling update deployment strategy.
It replaces one task at a time, waiting for the new task to become healthy before replacing the next one.
This ensures zero downtime, and if the deployment fails, ECS can automatically roll back to the previous stable version.

How to identify?
You can identify over-provisioned ECS instances using the following methods:
From our Cost Optimization Report , check the ECS_Rightsize section.
In AWS Console:
Go to the ECS service. Click on a service and check the Health section to determine if it is over-provisioned.

Check your instance type or class, then refer to Cloud Compute Instances – Amazon EC2 Instance Types – AWS to compare your current vCPU and Memory with other classes.
Ensure that the network won’t be impacted when rightsized. If necessary, review your instance’s network metrics.
Navigate to the AWS Compute Optimizer service, then select the EC2 Instances section for tailored recommendations.

Go to Cost Optimization Hub and filter savings opportunities by Resource type = ECS service and Recommended action = Rightsize.

Note: Estimated monthly savings may show as 0% / $0 if covered by Compute Savings Plans. You will still save money by rightsizing, as those savings plans will cover other services.
- To estimate savings, go to AWS Pricing Calculator , Select ECS Service and compare generation prices. For example, rightsizing an EC2 Instance c6a.8xlarge to r6g.2xlarge could save $602 per month (67% reduction).

How to fix?
For Launch Type = EC2, go to Rightsize EC2.
For Launch Type = Fargate:
In AWS Console, go to the ECS service, then select the Task definitions section.
Choose a task, then click Create new revision.

Modify the launch type, OS/Architecture, CPU, and memory sizes of the task.

By default, there is no downtime.
If the resource is provisioned automatically via IaC (such as CloudFormation or Terraform), update the corresponding code to reflect the changes.

When you create a volume, it might be over-provisioned.
In GP3 and IO1/IO2 volume types, you are charged for IOPS and/or Throughput if they exceed the minimum values (3000 IOPS / 125 MB/s).
IOPS (Input/Output Operations Per Second) measures the speed at which data can be read and written to the storage device. Higher IOPS indicates faster performance.
Throughput refers to the amount of data (measured in Megabytes per second) that can be transferred to or from a storage device in a given amount of time.


Subtitles are available in English, French and Spanish. Click here to get the full masterclass.
How to identify?
You can identify over-provisioned EBS volumes using the following methods:
From our Cost Optimization Report , check the EBS_Rightsize section.
In AWS Console: Go to the EC2 service, then select the Volumes section. Select volumes of type gp3 or io1 or io2. Click on a volume and go to the Monitoring section. Look at the IOPS (often set to 3000) and compare it to the Read and Write Operations graphs over a timeline of 6 months.

In Cost Optimization Hub, you can see a graph per resource type.

If you see an EBS volume, click on View opportunities.
Filter by EBS volume and check the Top recommended action = Rightsize

In Compute Optimizer, look at EBS Upgrade recommendations.

How to fix?
In AWS Console, go to EC2 service, then select the Volumes section. Select a volume, then click Edit. Change the volume IOPS. Confirm the modification.

Note: Downtime does not occur during this change; migration is managed in the background.
If the resource is provisioned automatically via IaC (such as CloudFormation or Terraform), update the corresponding code to reflect the changes.

When you create a Lambda function, it might be over-provisioned. You can easily modify the memory allocated.
AWS Lambda is a serverless compute service that lets you run code without provisioning or managing servers.
You are mainly charged based on the number of requests for your functions and the duration it takes for your code to execute.
Memory and ephemeral storage can also be rightsized.

Subtitles are available in English, French and Spanish. Click here to get the full masterclass.
How to identify?
You can identify over-provisioned Lambda functions using the following methods:
From our Cost Optimization Report , check the Lambda_Rightsize section.
In AWS Console, go to the Lambda service, then select the Functions section. Select a function and go to the Monitor section. Look at the CloudWatch Logs, focusing on recent invocations. Compare MemorySetInMB and MemoryUsedInMB.

In AWS Console, go to Cost Optimization Hub. You can see a graph per resource type.

If you see a Lambda function, click on View opportunities. Filter by Lambda function and check the Top recommended action = Rightsize.

In AWS Console, go to Compute Optimizer. Click on Lambda rightsize for recommendations.

How to fix?
In AWS Console, go to the Lambda service, then select the Functions section. Choose a function, navigate to the Configuration section, and click Edit. Modify Memory, ephemeral storage, and Timeout settings.

If the resource is provisioned automatically via IaC (such as CloudFormation or Terraform), update the corresponding code to reflect the changes.

If over-provisioned, RDS instances can cost a lot. Let’s see how to reduce costs without breaking normal usage.
Rightsizing means changing the instance type to meet actual needs. For example, you could downgrade from a 4xlarge to an xlarge instance.
Match instance types and sizes to your workload at the lowest cost without compromising performance.
Before rightsizing: Consider upgrading the engine type:
- PostgreSQL Releases
- MySQL Releases
Consider also upgrading RDS GP2 volumes to GP3 for more IOPS at no extra cost.
Subtitles are available in English, French and Spanish. Click here to get the full masterclass.
How to identify?
You can identify over-provisioned RDS instances using the following methods:
From our Cost Optimization Report , check the RDS_Rightsize section.
In AWS Console, go to the RDS service, then select the Databases section. Click on the Settings logo and filter by CPU. Select a database with low CPU usage. Go to the Monitoring tab and adjust the timeline to at least the last 4 weeks (6 months is recommended). Confirm that the CPU Utilization (%) graph is low.

By having 15% max CPU in that period, you could safely reduce by 4 the provisioned CPU.
Check Freeable Memory as well.

Then, check your instance type or class and compare your current vCPU and Memory with other classes.
Ensure that the network won’t be impacted when rightsized. If necessary, review your instance’s network metrics.
In AWS Console, go to AWS Compute Optimizer, then select the RDS DB Instances section for tailored recommendations.

In AWS Console, go to Cost Optimization Hub. Filter savings opportunities by RDS DB Instance and Recommended action = Rightsize.

How to fix?
Note: There will be a brief downtime when the instance class is changed. Consider creating a backup or snapshot beforehand.
In AWS Console, go to the RDS service, then select the Databases section.
Choose a database, then click Modify.
Go to Instance configuration and change the DB Instance class.
In Storage, modify gp2 to gp3.
Click Continue. If you want to apply changes immediately, select Apply immediately, then click Modify DB instance.

If the resource is provisioned automatically via IaC (such as CloudFormation or Terraform), update the corresponding code to reflect the changes.

We recommend applying a lifecycle policy (including Intelligent Tiering) for S3 buckets to limit costs. Act with caution and ensure you implement the correct lifecycle policies.
Subtitles are available in English, French and Spanish. Click here to get the full masterclass.
How to identify?
You can identify S3 buckets that need lifecycle policies using the following methods:
From our Cost Optimization Report , check at the S3_Storage_Classes section. The buckets listed are over 1 TB and primarily use the most expensive Standard tier.
In AWS Console, go to the S3 service, then select the Buckets section. Click on "View Storage Lens dashboard" at the top.

Go to the Top N overview at the bottom and modify the number to 10.

Review the list of your buckets, their total storage, and trends.

Every S3 bucket over 1 TB should be investigated.
In AWS Console, go to the Billing service, then select the Bills section. Choose Simple Storage Service and a region. Search for the requests line.

How to fix?
In AWS Console, go to the S3 service, then select the Buckets section.
Click on a bucket name.
Recognize the data in each folder and filter by the Last modified column.
Go to Properties to check if Bucket Versioning is enabled.
Go to Metrics to see the trend of your bucket (bucket size and number of objects).
Go to Management to review existing Lifecycle rules and Replication rules.
Ask yourself the following questions:
1. Do I need that data?
If the bucket is totally or partially useless, deletion is necessary.
Total Deletion:
To delete an entire bucket, empty it first. On the Buckets list, select the bucket, click Empty, and confirm.
Return to the Buckets list, select the bucket, click Delete, and confirm.
If deletion takes too long due to many objects, create a Lifecycle Policy:
Click the bucket name, go to Management, and click Create lifecycle rule.
Configure the rule as shown below and click Create rule.
Deletion will take 1-2 days. Monitor progress in the Metrics section.


Partial Deletion:
To delete specific folders or objects, select them and click Delete.
If deletion takes too long, create a Lifecycle Policy with a prefix (e.g., logs/2012/).

This example will delete all data in the folder 2012 in the folder logs of your bucket. Please create one Lifecycle policy per prefix. But one prefix can be used to delete multiple folders. If you put logs/201 as the prefix, it should delete logs from 2010 to 2019 (every folder starting with 201 in the logs folder).
If you just want to delete all other versions of objects, you can also add 1 in Number of newer versions to retain.
You can also automate these policies through CloudFormation, Terraform, etc.
It should take 1-2 days to delete all objects. You should see the progress in Metrics section.

2. If I need that data, then how long?
Determine the data retention period with your team (e.g., 10 days, 3 months, 3 years). For example, logs bucket must have an expiring policy that will depend on your data retention policy. Could be 10 days, 3 months, 3 years?
Create a Lifecycle Policy and adjust the Days section accordingly. For 1 year retention, you should put that :

3. If I need permanently that data, then how frequently do I need to access it?
If retaining data for archival purposes, consider storage classes based on access frequency.
Please only archive objects that you are not supposed to retrieve frequently, otherwise it will be more expensive and you might need to wait to get your data.
You have many different classes, but the classic transition would be this :

Transition objects to cost-effective storage classes, ensuring a minimum object size to avoid unnecessary transition costs.
Apply the same transitions to noncurrent versions.
If unsure about data usage, use Intelligent-Tiering to automatically move objects to the correct storage type.


S3 Storage Classes
S3 provides different levels of reliability and availability through its storage classes.
Each storage class has a different cost structure and guarantees about how quickly you can access your data. Some of them even have minimal storage duration.
S3 Standard: Designed for frequently accessed data.
S3 Intelligent-Tiering: Data with changing or unknown access patterns.
S3 Standard-IA: Designed for long-lived, infrequently accessed data.
S3 One Zone-IA: Designed for long-lived, infrequently accessed, non-critical data.
S3 Reduced redundancy: Frequently accessed, non-critical data.
S3 Glacier Instant Retrieval: Designed for archive data accessed once a quarter with instant retrieval in milliseconds.
S3 Glacier Flexible Retrieval (formerly Glacier): Designed for infrequently accessed, archived critical data.
S3 Glacier Deep Archive: Long-term data archiving with retrieval times within 12 hours.


You can also analyze all your bucket with S3 analytics.
If the resource is provisioned automatically via IaC (such as CloudFormation or Terraform), update the corresponding code to reflect the changes.

Amazon EFS Infrequent Access (IA) and EFS Archive storage classes provide cost-optimized options for files that are not accessed daily or frequently.
EFS Standard-IA and EFS One Zone-IA offer up to 85% lower storage prices compared to EFS Standard and EFS One Zone, making them ideal for files accessed less frequently. Check Amazon EFS Infrequent Access .
EFS Archive is designed for long-lived file data accessed a few times a year or less, delivering up to 50% lower storage prices than EFS IA and up to 97% lower than EFS Standard. Note that the request charge is 3x higher than EFS IA, so it is best suited for archive use cases where instant access is occasionally needed.
EFS Intelligent-Tiering uses Lifecycle Management to automatically transition files that are not accessed for a specified duration (e.g., 30 days) from EFS Standard or EFS One Zone to their corresponding IA storage class. If access patterns change, files are automatically moved back to the original storage class.

Subtitles are available in English, French and Spanish. Click here to get the full masterclass.
EFS Pricing Page: EFS Pricing

Tips: Workshop Studio
How to identify?
From our Cost Optimization Report , check the EFS_Storage_Classes section.
In AWS Console, navigate to Cost Explorer > Filter by Service → Elastic File System, Usage Type → Search for "TimedStorage-" and select all options, Group by → Usage Type.

In AWS Console, navigate to Amazon EFS > View Details on a specific file system > Metered size. Review the percentage of Standard, IA, and Archive storage.

How to fix?
To change your Amazon EFS file system from Standard to Infrequent Access (IA) or Archive, enable Amazon EFS Lifecycle Management:
In AWS Console, Navigate to Amazon EFS > Edit to view lifecycle management.
Set a Transition Policy: Choose a policy that specifies after how many days of inactivity (e.g., 1, 7, 14, 30, 60, 90, 180, 270 or 365 days) files should be automatically moved from Standard to Infrequent Access or Archive.

Automatic Transition: Once enabled, EFS will automatically and transparently move files that haven’t been accessed for the specified period to the new storage class. This process is seamless and doesn’t require any changes to your applications or workflows.
Note: If the resources are provisioned automatically (e.g., via CloudFormation or Terraform), update your infrastructure-as-code (IaC) to reflect these changes.
Bonus: If your file system is Multi-AZ, consider converting it to Single-AZ for non-production accounts to further reduce costs.
DynamoDB offers two table classes designed to help you optimize for cost:
The default table class is Standard, which balances storage costs and provisioned throughput.
Standard-IA (Infrequent Access) can reduce your total storage cost by 60% while retaining all your data in DynamoDB, with no performance trade-offs. Both classes offer the same durability, availability, performance, and scalability.
Subtitles are available in English, French and Spanish. Click here to get the full masterclass.
When to Use Each Class:
DynamoDB Standard
Higher storage pricing, lower throughput pricing.
Best for tables where throughput is the dominant cost.
A good choice if Standard-IA storage costs are under 13% of total Standard-IA throughput costs.
DynamoDB Standard-IA
Lower storage pricing (60% less), higher throughput pricing (25% more).
Best for tables where storage is the dominant cost.
A good choice if Standard storage costs exceed 42% of total Standard throughput costs.
Documentation: Workshop Studio
How to identify?
From our Cost Optimization Report , check the DYNAMODB_Storage_Classes section.
In AWS Console, go to Billing and Cost Management, then select the Cost Explorer section.
Filter by Usage type to determine whether throughput or storage is your dominant DynamoDB cost.
How to fix?
Confirm your usage type will not change in the future.
In AWS, navigate to DynamoDB service. Click on one DynamoDB Table, then go to Actions > Update Table class, select DynamoDB Standard-IA and click Save changes.
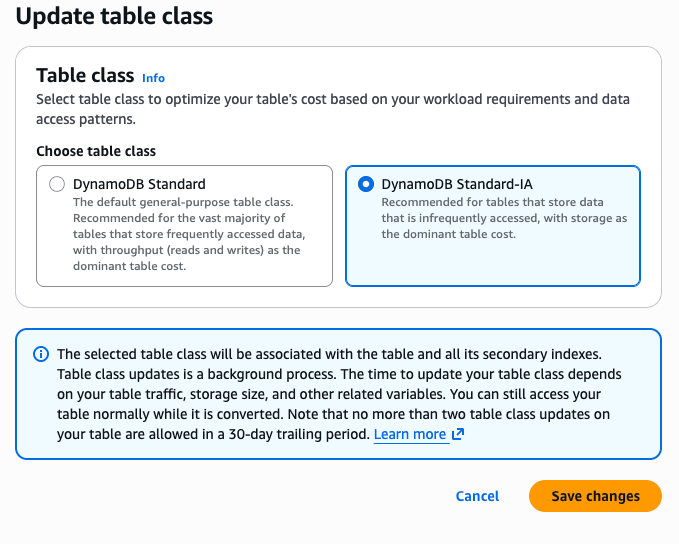
If the resource is provisioned automatically via IaC (such as CloudFormation or Terraform), update the corresponding code to reflect the changes.
Aurora I/O-Optimized offers up to 40% cost savings for I/O-intensive applications where I/O charges exceed 25% of the total Aurora database spend.
There are 2 available configurations:
Aurora Standard: Cost-effective for applications with low-to-moderate I/O.
Aurora I/O-Optimized: Ideal for applications with high I/O, providing:
Improved performance
Increased throughput
Reduced latency for demanding workloads
Predictable pricing
Up to 40% cost savings
With Aurora I/O-Optimized, there are zero charges for read and write I/O operations—you only pay for your database instances and storage usage.
Subtitles are available in English, French and Spanish. Click here to get the full masterclass.
How to identify?
From our Cost Optimization Report , check the Aurora_Storage_Classes section.
In AWS Console, go to Aurora and RDS service, then navigate to Configuration tab.
Check the Cluster storage configuration
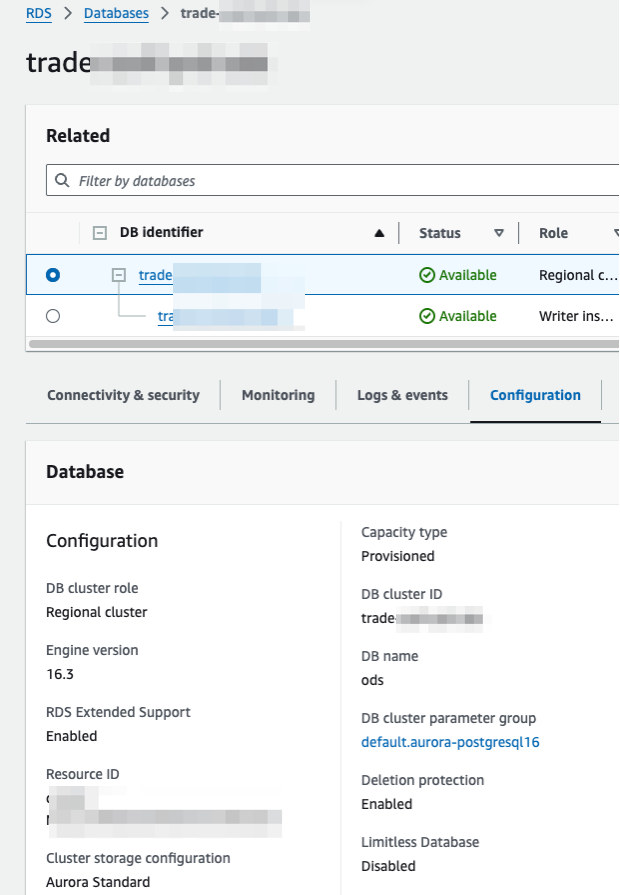
- In AWS Console, go to Compute Optimizer, then select the Aurora and RDS databases section. Click on the Storage section and select your Aurora database to check if it’s optimized or not.
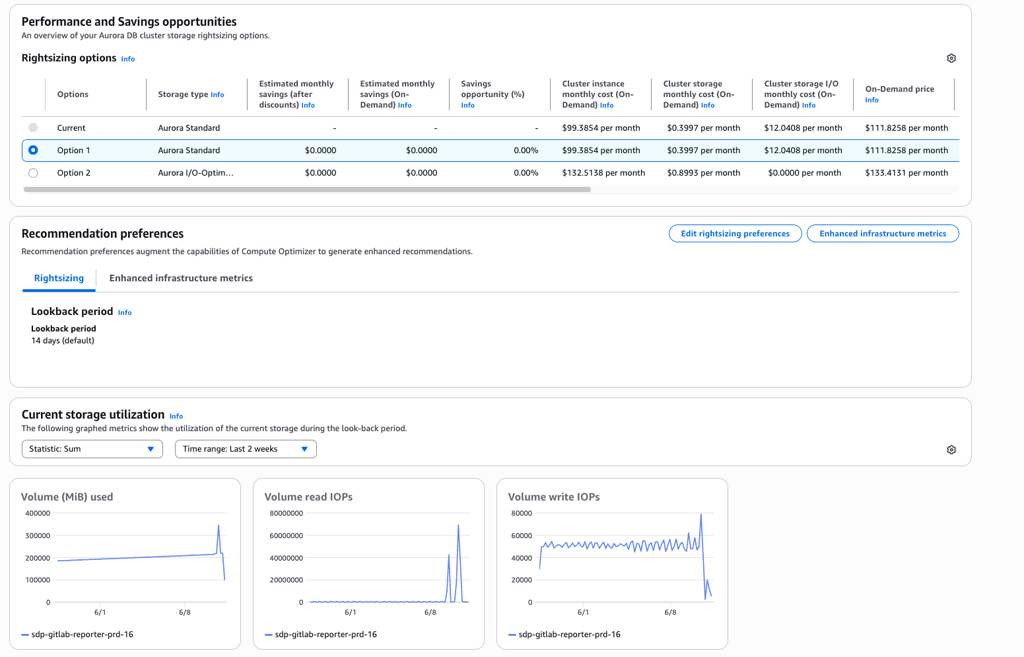
In AWS Console, go to Billing and Cost Management, then select the Bills section. Click on Relational Database Service, then your region. Compare your Amazon Aurora Storage and I/O amount with the rest of the costs.
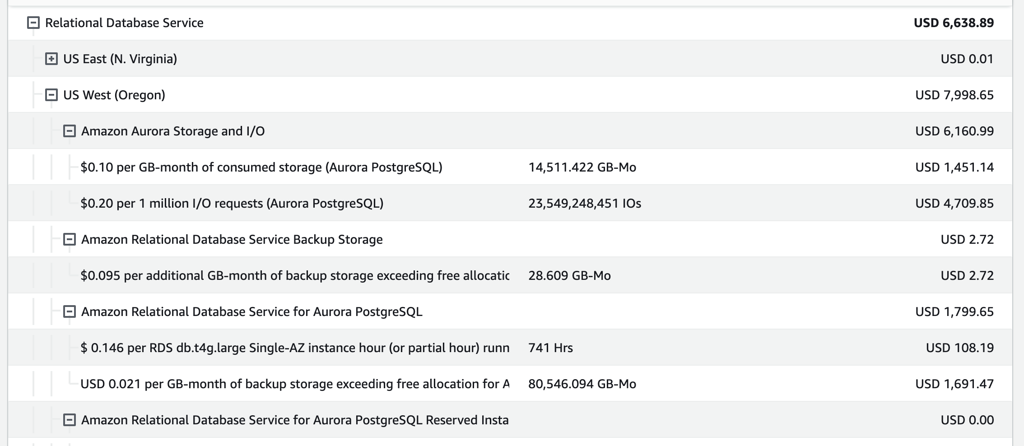
Example: If you have $6,160.99 in I/O costs from a total of $7,998.65, I/O costs exceed 25%, making Aurora I/O-Optimized a cost-effective choice.
Use the Monitoring section of the RDS service to verify which cluster to change.
In Cost Explorer, filter by service RDS and group by Dimension = Usage Type to compare the percentage of I/O costs.
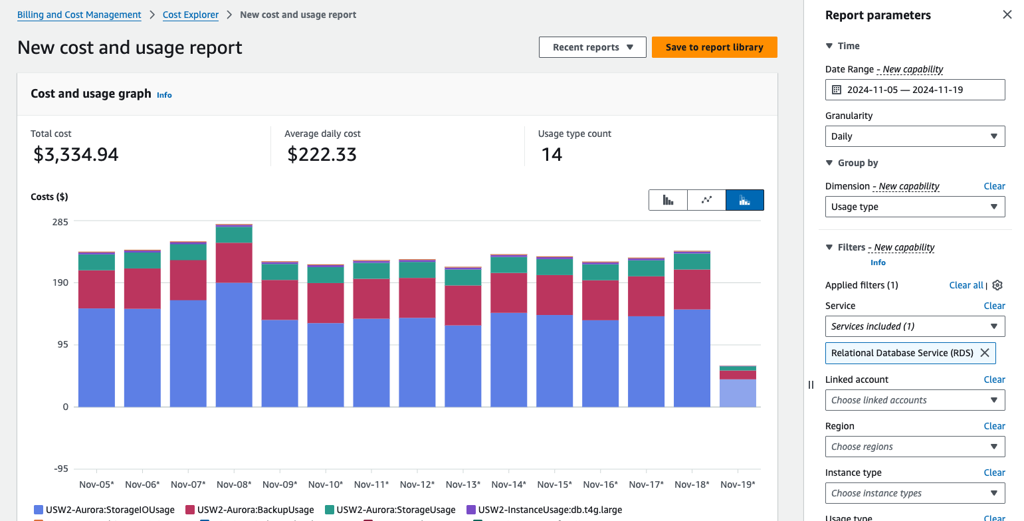
How to fix?
Ensure you only switch high I/O applications to Aurora I/O-Optimized.
In AWS Console, go to the RDS service, then select the Databases section.
Choose the Aurora cluster to switch and click Modify.
Select Aurora I/O-Optimized, then click Continue.
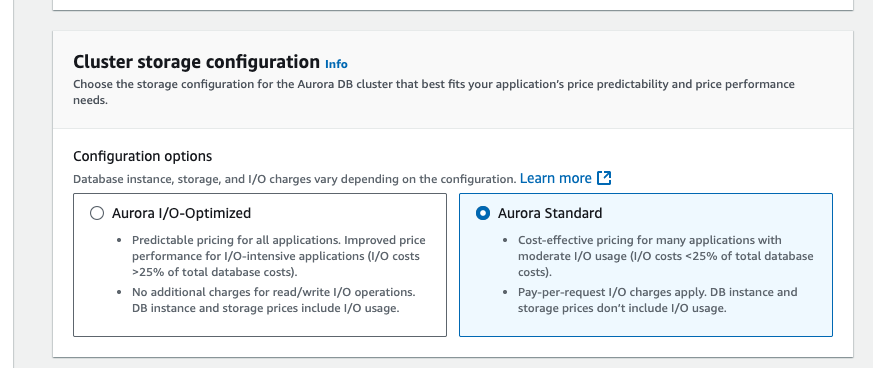
If the resource is provisioned automatically via IaC (such as CloudFormation or Terraform), update the corresponding code to reflect the changes.
After a few days, review the results in Cost Explorer to confirm the cost savings.
One way to save costs with ECR is to automate the cleanup of images by using lifecycle policies.
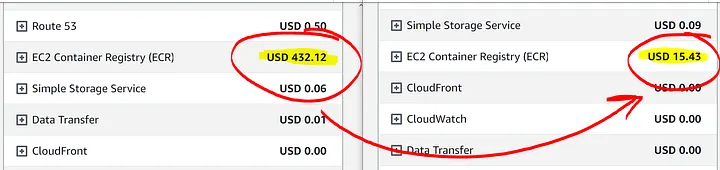
Subtitles are available in English, French and Spanish. Click here to get the full masterclass.
Amazon ECR lifecycle policies provide more control over the lifecycle management of images in a private repository. A lifecycle policy contains one or more rules, and each rule defines an action for Amazon ECR. Based on the expiration criteria in the lifecycle policy, images can be archived (30% Savings over 150 TB / month - 90 days minimum period) or expired (100% Savings) based on the criteria specified in the lifecycle policy within 24 hours.
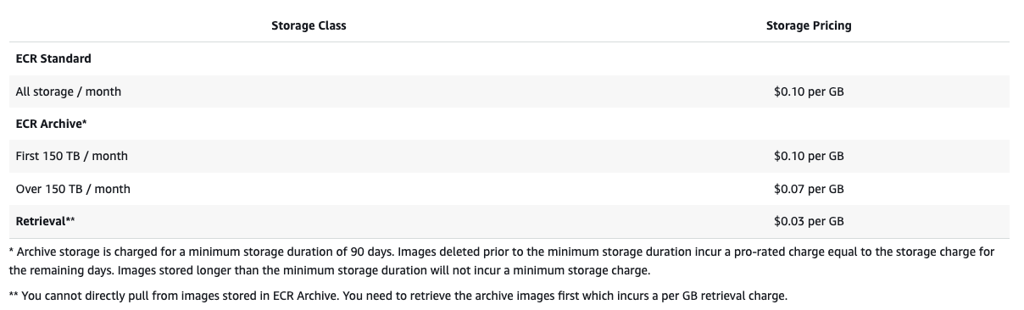
How lifecycle policies work
The following diagram shows the lifecycle policy workflow.

Create one or more test rules.
Save the test rules and run the preview.
The lifecycle policy evaluator goes through all of the rules and marks the images that each rule affects.
The lifecycle policy evaluator then applies the rules, based on rule priority, and displays which images in the repository are set to be expired or archived. A lower rule priority number means higher priority. For example, a rule with priority 1 takes precedence over a rule with priority 2.
Review the results of the test, ensuring that the images that are marked to be expired or archived are what you intended.
Apply the test rules as the lifecycle policy for the repository.
Once the lifecycle policy is created, you should expect that images are expired or archived within 24 hours after they meet the expiration criteria.
How to identify?
From our Cost Optimization Report , check the ECR_Storage_Classes section.
- In AWS Console, go to the ECR service, then click on one ECR. Click on Lifecycle policy tab to check your existing rules and events
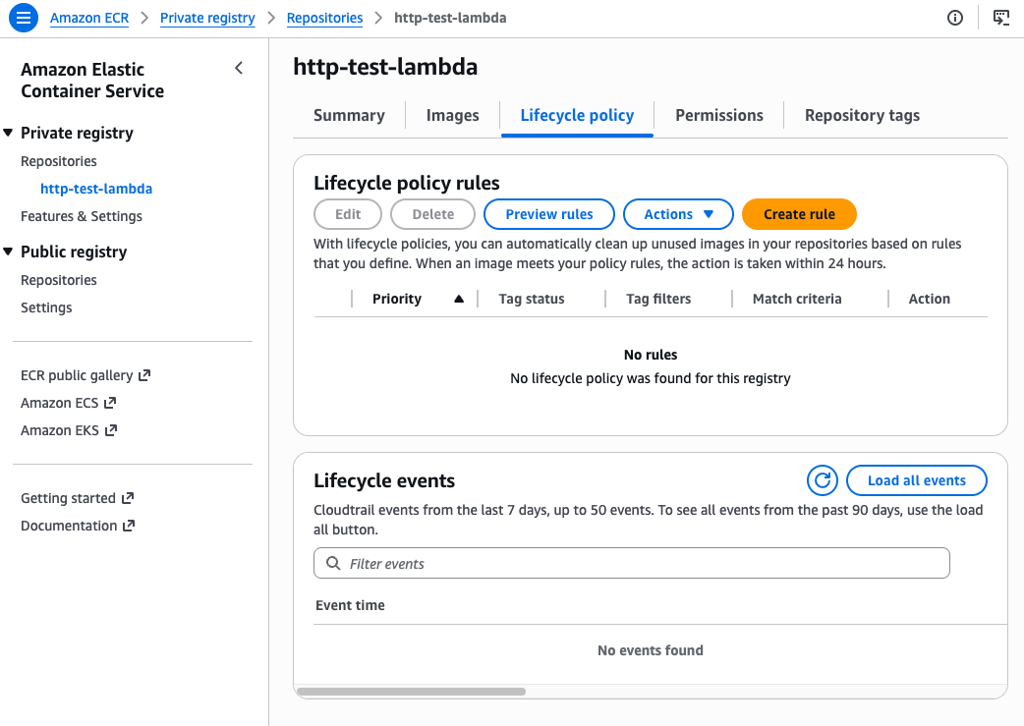
How to fix?
In AWS Console, go to the ECR service, then click on one ECR. Click on Lifecycle policy tab to create rule
- See Examples of lifecycle policies in Amazon ECR - Amazon ECR
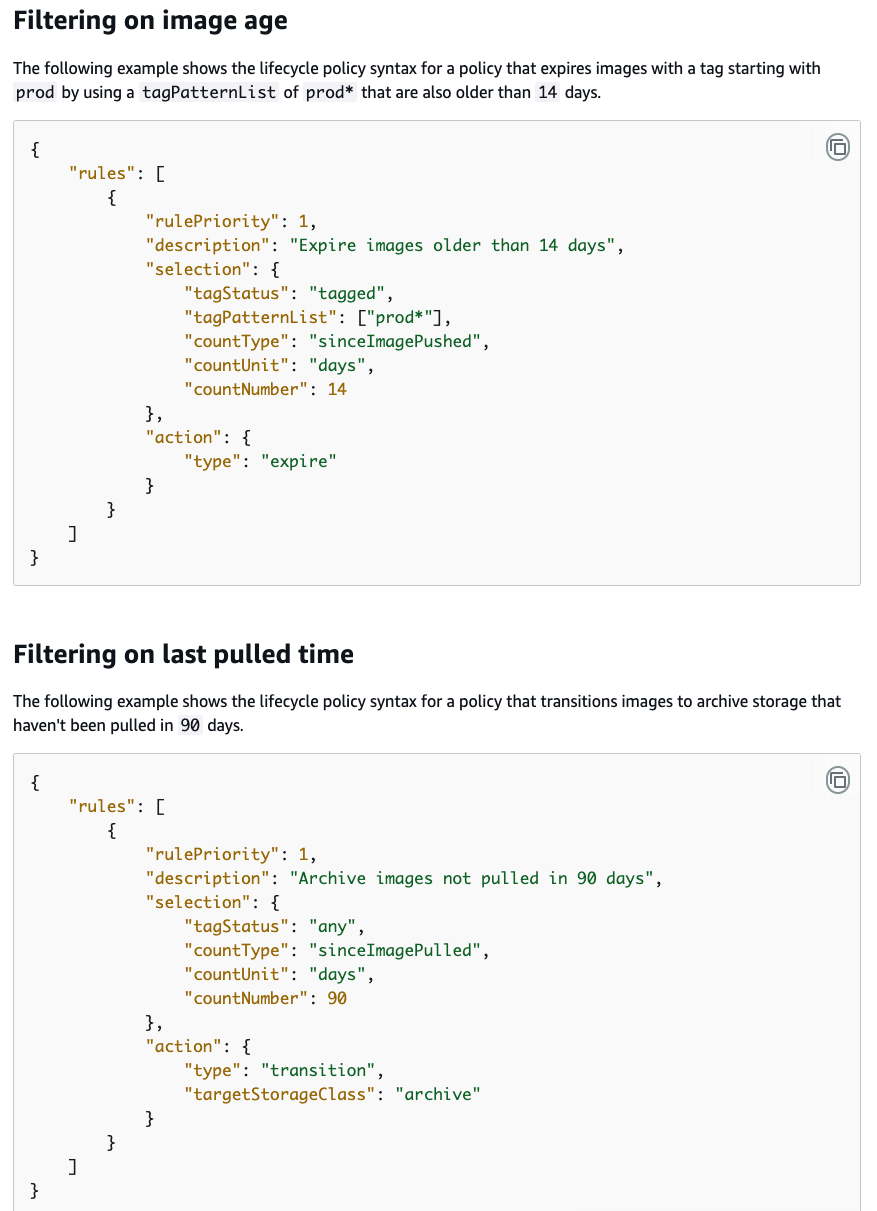
If the resource is provisioned automatically via IaC (such as CloudFormation or Terraform), update the corresponding code to reflect the changes.
Key Cost Optimization Strategies:
Set Retention Policies: By default, logs never expire. Change retention to 1 day, 1 week, or 30 days to avoid long-term storage fees for old logs.
Filter Log Levels: In production, change logging levels from DEBUG to WARN or ERROR to eliminate high-volume, low-value logs.
Utilize Infrequent Access Log Class: Use the Infrequent Access log class for log groups that are rarely viewed, which provides a 50% lower ingestion price compared to Standard.
Use Subscription Filters: Send high-volume log data to Kinesis Data Firehose or S3 for cheaper storage instead of storing it directly in CloudWatch Logs.
Implement Metric Filters: Instead of logs, extract specific metrics from logs and use those for alarms to avoid large-scale ingestion.
Audit Vended Logs: Optimize or disable VPC Flow Logs, Lambda logs, or Route 53 logs if they are not necessary for security compliance.
Subtitles are available in English, French and Spanish. Click here to get the full masterclass.
The IA log class has a 50 percent lower per GB ingestion price compared to the Standard log class. This blog post dives into how you can use the new IA log class for new log groups.
It is important to note that once a log group is created, you cannot change its existing class from Standard to IA or vice-versa. Therefore, make sure to only use the IA log class for a workload that doesn’t require advanced features provided by the Standard log class. Examples of use cases best suited for Infrequent Access:
Workloads that don’t require Standard log class advanced features such as Embedded metric format (EMF), Live Tail, Logs Anomaly Detection and Pattern analysis.
Debug logs or web server logs, as they are quite verbose and rarely require any of the advanced functionality.
Internet of Things (IoT) devices that send detailed logs that are typically only accessed for after-the-fact forensic analysis.
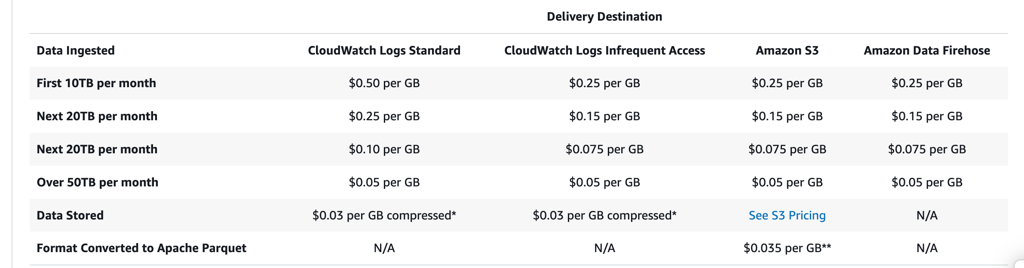
How to identify?
From our Cost Optimization Report , check the CloudWatch_Storage_Classes section.
- In AWS Console, go to the CloudWatch service, then select the Log groups section. Click on the Settings icon and add the Stored bytes column. Filter log groups by Stored bytes to identify high-cost log groups.
How to fix?
To set up retention period:
Ensure the logs are no longer needed.
Select the log groups you want to modify.
Click Actions > Edit retention setting(s).
Choose the new retention period and click Save.
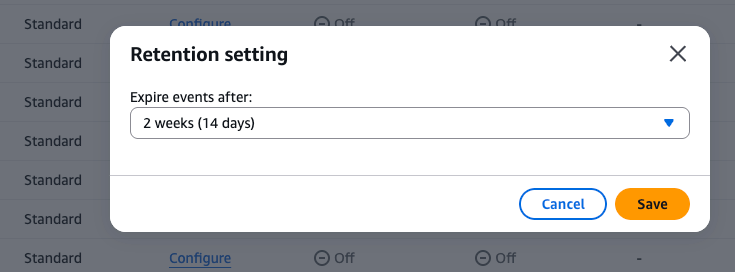
To Use Infrequent Access (IA) Log Class:
Create New Log Group: In the CloudWatch console, select Log groups -> Create log group.
Set Class: Under Log class, select Infrequent Access.
Migrate Data: Export old logs to S3, and delete the original Standard log group.
Update Configuration: Update your AWS services (e.g., EKS, Lambda) to use the new log group name.
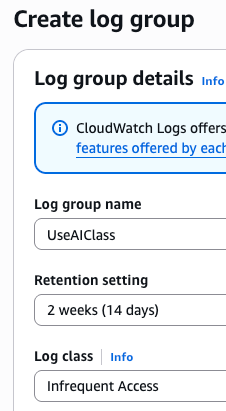
To Reduce Logs Quantity with CloudWatch Logs pattern analysis:
Use the CloudWatch Logs Anomaly Detection and Pattern Analysis to identify unusual events, and uncover trends and patterns across your logs. For example
Unhelpful logs – Error logs that just say “Error” without any context or actionable insights. In such situation, you can update your logs to capture the right level of detail to give you insights into your workload.
Unnecessary logs – In figure below, you can see that patterns 1 and 2 reflect the same set of data. The first one is a print statement and the second is a logged statement. Removing such logs which provide no additional value can help you save on logging costs.
Debug statements – In figure below, pattern three shows a Debug statement. Debug statements in a steady-state application could be producing more logs than needed. Check with your developers if debug statements in production logs are adding value to their real-time investigations. Otherwise if they are used for after the fact analysis, IA might be a great fit.
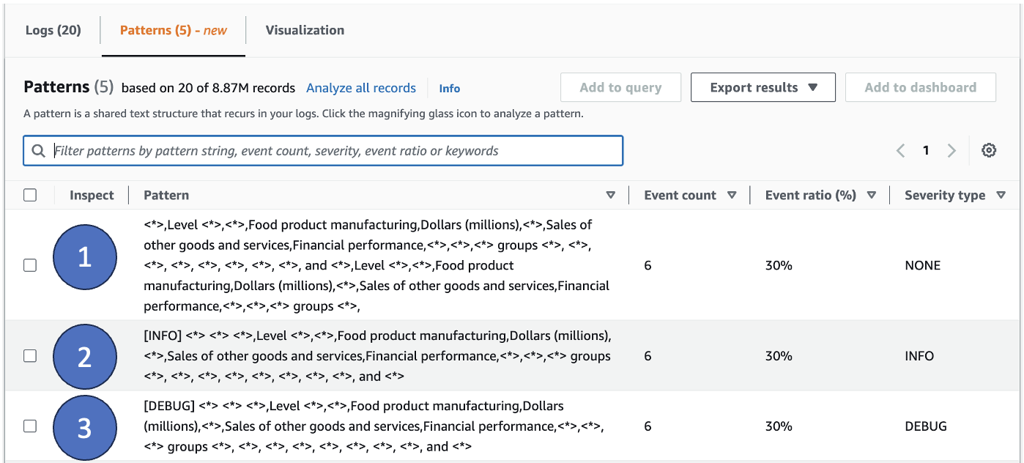
If the resource is provisioned automatically via IaC (such as CloudFormation or Terraform), update the corresponding code to reflect the changes.
Saving by Scheduling
Scheduling is the practice of managing your infrastructure efficiently by automatically scaling to meet changing demands. It’s a powerful cost-effective tool to handle workload patterns. It requires a deep understanding of your application’s workload patterns and performance metrics.
Overview
AWS Auto Scaling is a feature that allows you to automatically adjust the number of resources in use based on predefined conditions or in response to changing demand.
The primary goal of Auto Scaling is to ensure that you have the right number of resources available to handle the current workload efficiently and cost-effectively.
Subtitles are available in English, French and Spanish. Click here to get the full masterclass.
Benefits
Scalability: Auto Scaling helps you scale out (add resources) to handle increased load and scale in (remove resources) when the demand decreases.
High Availability: By automatically replacing unhealthy instances, Auto Scaling helps maintain the availability of your application.
Cost Efficiency: Auto Scaling helps optimize costs by ensuring that you only pay for the resources you need. It reduces the need for over-provisioning resources to handle peak loads.
Automatic Management: Auto Scaling can be configured to automatically manage the lifecycle of your resources, including launching, terminating, and maintaining a specified number of instances.
Example: Cover variable demand
Let’s consider a basic web application running on AWS.
During the beginning and end of the week, usage of this application is minimal.
During the middle of the week, the demand on the application increases significantly.

Option 1: Add enough servers so that the application always has enough capacity to meet demand.

Option 2: Have enough capacity to handle the average demand on the application.

Option 3: Add new instances to the application only when necessary, and terminate them when they're no longer needed.

Scaling Strategy: Dynamic Scaling
Dynamic scaling creates target tracking scaling policies for the resources in your scaling plan.
The intention is to provide enough capacity to maintain utilization at the target value specified.

E.g: You can configure your scaling plan to keep the number of tasks that your ECS service runs at 75% of CPU.
When the CPU utilization of your service exceeds 75%, then your scaling policy adds another task to help out with the increased load.

Scaling Strategy: Predictive Scaling
Predictive scaling uses machine learning to analyze each resource's historical workload and regularly forecasts the future load.
Using the forecast, predictive scaling generates scheduled scaling actions to make sure that the resource capacity is available before your application needs it.

E.g: You can enable predictive scaling and configure your scaling strategy to keep the average CPU utilization of your Auto Scaling group at 50%.
Your forecast calls for traffic spikes to occur every day at 8:00.
Your scaling plan creates the future scheduled scaling actions to make sure that your Auto Scaling group is ready to handle that traffic ahead of time.

Impacted Services
EC2 Instances
ECS
EKS
RDS
DynamoDB
SQS
Lambda
SageMaker
…
 AWS Auto Scaling
allows you to automatically adjust the number of resources in use based on predefined conditions or in response to changing demand.
AWS Auto Scaling
allows you to automatically adjust the number of resources in use based on predefined conditions or in response to changing demand.
The primary goal of Auto Scaling is to ensure you have the right number of resources available to handle the current workload efficiently and cost-effectively.

Subtitles are available in English, French and Spanish. Click here to get the full masterclass.

Amazon EC2 Auto Scaling helps maintain application availability and lets you automatically add or remove EC2 instances using scaling policies that you define.
Predictive Scaling: Adjusts capacity based on established demand patterns.
Dynamic Scaling: Adjusts capacity in real-time to meet changing demand.


An Auto Scaling group (ASG) contains a collection of EC2 instances that are treated as a logical grouping for the purposes of automatic scaling and management.

You define a desired capacity, min and max capacity, a launch configuration or launch template (recommended), scaling policies, cooldown periods and optional ELB.
An ASG can be integrated with Elastic Load Balancers (ELBs) to distribute incoming traffic across instances. The load balancer performs health checks and routes traffic only to healthy instances.

Desired capacity: Represents the initial capacity of the Auto Scaling group at the time of creation.
An Auto Scaling group attempts to maintain the desired capacity if there are no scaling policies or scheduled actions attached to the Auto Scaling group.
Minimum capacity: Represents the minimum group size.
When scaling policies are set, they cannot decrease the group's desired capacity lower than the minimum capacity.
Maximum capacity: Represents the maximum group size.
How to identify?
- In AWS Console, go to the EC2 service, then select the Auto Scaling Groups section.
How to fix?
In Amazon EC2 Dashboard, choose Launch Templates and specify: a name, an AMI, an instance type, network settings, a key pair and storage.

Navigate to the Auto Scaling Groups section in EC2 and start the creation process.
Choose a name.
Select your launch template.
Optionally, select or create a load balancer to attach.
Optionally, turn on ELB health checks.

Define Scaling Limits
Select Target tracking scaling policy.
Choose a metric type (Average CPU Utilization, Average network in or out, ALB request count per target, custom CloudWatch metric).
Choose a target value

If the resource is provisioned automatically via IaC (such as CloudFormation or Terraform), update the corresponding code to reflect the changes.
Incorrect configurations can lead to inefficiencies or failures.
Defining effective scaling policies requires a deep understanding of the application's workload patterns and performance metrics.
Determining the optimal cooldown period can be challenging and may require iterative adjustments.
ECS Auto Scaling
ECS Auto Scaling allows you to increase or decrease the desired number of tasks in your Amazon ECS service automatically.
Amazon ECS publishes CloudWatch metrics with your service’s average CPU and memory usage.
Use these metrics to scale out during high utilization or scale in during low utilization.


Auto Scaling Service
AWS Auto Scaling monitors your applications and automatically adjusts capacity to maintain steady, predictable performance at the lowest possible cost.
Easily set up application scaling for multiple resources across multiple services in minutes.
Supports scaling for:
Amazon EC2 instances and Spot Fleets
Amazon ECS tasks
Amazon DynamoDB tables and indexes
Amazon Aurora Replicas


 Spot Instances
enable you to take advantage of excess capacity in AWS, offering significant discounts compared to standard pricing. Instead of fixed pricing, Spot Instances let you use unused EC2 capacity at a variable price set by AWS.
Spot Instances
enable you to take advantage of excess capacity in AWS, offering significant discounts compared to standard pricing. Instead of fixed pricing, Spot Instances let you use unused EC2 capacity at a variable price set by AWS.
Subtitles are available in English, French and Spanish. Click here to get the full masterclass.
Spot Instances Overview
The pricing of Spot Instances is variable and determined by supply and demand.
When demand for computing resources is low, you can use these unused resources at a fraction of the standard price.
The trade-off for this discount is that AWS may reclaim Spot Instances with two minutes' notice if the capacity is needed for On-Demand instances.
Spot Instances are best suited for workloads that can handle interruptions and are not time-sensitive, stateless, and fault-tolerant.
If AWS needs the capacity back, your workload will be interrupted (with a 2-minute warning).
Use Cases

Common use cases for Spot Instances include:
Workloads that can be interrupted and don’t need to be completed within a specific time frame.
Work that can be easily restarted or reprocessed.
High-performance computing and batch processing.
Dev and test/sandbox environments.
Large stateless applications.

You can save up to 90% on On-Demand prices.
It’s a purchasing option that allows users to take advantage of EC2 spare capacity at a low price (determined by long term trends in supply and demand).
BUT it could be reclaimed for other workloads with just a two-minute notice.
Also, if the price goes above your maximum set price, your workload will also be interrupted.
This means that workloads need to be specifically designed for fault tolerance, even if AWS claims that spot instances are interrupted less than 5% of the time.
How to identify?
In AWS Console, go to the EC2 service, then select the Spot Fleets section.
Spot Fleets are collections of instances, including Spot Instances and optionally On-Demand Instances.
When provisioning a Spot Fleet, you can set a target capacity for the fleet, and the request will be fulfilled if there is available capacity.
Mitigate cost risks by setting a maximum cost per hour for the entire fleet.
How to fix?
Ensure your workload is fault-tolerant.
Prepare your workload to restart or reprocess if interrupted.
In AWS Console, go to the EC2 service and create a Spot Fleet Request.
Define a target capacity and a maximum cost.
Optionally, specify that Amazon EC2 hibernates your Spot Instances when interrupted (memory is saved to the root EBS volume and reloaded when the instance resumes).
If the resource is provisioned automatically via IaC (such as CloudFormation or Terraform), update the corresponding code to reflect the changes.

Instance pricing is usage-based, meaning you pay by the hour only when the instance is allocated and running.
Stopping instances during nights and weekends can save 66% compared to running them full-time.
This practice should be implemented in Non-Prod and Sandbox environments.
Many servers don’t need to run 24/7. You can stop these machines during off-hours, putting them in a state where they can be operational within minutes when needed. You only pay for disk storage when the instances are stopped.
Subtitles are available in English, French and Spanish. Click here to get the full masterclass.
How to identify?
You can identify instances suitable for scheduling using the following methods:
From our Cost Optimization Report , check the EC2_Weekend_Shutdown_NonProd section.
In AWS Console, go to the EC2 service, then select the Instances section.
How to fix?
AWS does not provide a direct solution per instance. But you can find multiple solutions:
Hibernating EC2 Instances in Response to a CloudWatch Alarm | Amazon Web Services
Stop and Start Amazon EC2 instances at regular intervals using Lambda
How to stop/start EC2 instance on a scheduled basis to save cost by using Boto3 and Lambda
Using EventBridge Scheduler
EventBridge Scheduler allows you to schedule millions of tasks that can invoke more than 270 AWS services and over 6,000 API operations.
Create schedules using CRON and rate expressions for recurring patterns or configure one-time invocations.
Set up flexible time windows for delivery, define retry limits, and set the maximum retention time for failed triggers.


Basically, they’re all mostly giving the same solution:
Add necessary IAM permissions
Create a lambda, with boto3 python code - We recommend Hibernate instead of Stop. Insert a filter by tag.
ec2_filter=[{'Name': 'tag:schedule_ec2_instance', 'Values': ['True']}] ec2.instances.filter(Filters=ec2_filter).hibernate()
Use EventBridge to trigger the Lambda function based on a CRON schedule.
Tag your EC2 instances appropriately.
If the resource is provisioned automatically via IaC (such as CloudFormation or Terraform), update the corresponding code to reflect the changes.

Database pricing is usage-based, meaning you pay by the hour only when the RDS instance is allocated and running.
Stopping RDS instances during nights and weekends can save 66% compared to running them full-time.
This practice should be implemented in Non-Prod and Sandbox environments.
Many RDS databases don’t need to run 24/7. You can stop these instances during off-hours, putting them in a state where they can be operational within minutes when needed. You only pay for storage and backups when the instances are stopped.
Subtitles are available in English, French and Spanish. Click here to get the full masterclass.
Exceptions for Reserved Instances (RI)
If your RDS database is covered by a Reserved Instance, you might not want to shut them down under two conditions:
If the RI cannot flow into another database (due to differences in region, engine, or instance type).
If you can only shut them down on weekends (30% savings) and not nights (66% combined savings).
How to identify?
You can identify RDS instances suitable for scheduling using the following methods:
From our Cost Optimization Report , check the RDS_Weekend_Shutdown_NonProd section.
In AWS Console, go to the RDS service, then select the Databases section.
How to fix?
AWS does not provide a direct solution per instance. But they provide an architectural solution .

After implementing this solution, you only need to add the appropriate tags to your RDS instances.
Note: A stopped RDS instance will automatically start after 7 days.
If the resource is provisioned automatically via IaC (such as CloudFormation or Terraform), update the corresponding code to reflect the changes.

Understand your application's workload patterns and performance metrics.
Define effective scaling policies.
Use Auto Scaling Service to setup application scaling for multiple resources across multiple services.
Subtitles are available in English, French and Spanish. Click here to get the full masterclass.
List of services:
ECS Auto Scaling
RDS Auto Scaling
EKS Auto Mode
DynamoDB Auto Scaling
SQS Metrics
Lambda Scaling
Auto Scaling Service
ECS Auto Scaling
ECS Auto Scaling allows you to increase or decrease the desired number of tasks in your Amazon ECS service automatically.
Amazon ECS publishes CloudWatch metrics with your service’s average CPU and memory usage.
Use these metrics to scale out during high utilization or scale in during low utilization.


Auto Scaling Service
AWS Auto Scaling monitors your applications and automatically adjusts capacity to maintain steady, predictable performance at the lowest possible cost.
Easily set up application scaling for multiple resources across multiple services in minutes.
Supports scaling for:
Amazon EC2 instances and Spot Fleets
Amazon ECS tasks
Amazon DynamoDB tables and indexes
Amazon Aurora Replicas


Saving by Investigating
Optimize every service to the maximum potential!

VPC Flow Logs
VPC Flow Logs are a feature that enables you to capture information about the IP traffic going to and from network interfaces in your VPC.
You can create a flow log for a VPC, subnet, or network interface.
If you create a flow log for a subnet or VPC, each network interface in that subnet or VPC is monitored.

To create a flow log, you specify:
The resource for which to create the flow log,
The type of traffic to capture (accepted traffic, rejected traffic, or all traffic),
The destinations to which you want to publish the flow log data (CloudWatch Logs, S3 or Amazon Data Firehose).
After creating a flow log, you can retrieve and view the flow log records. Flow logs can help you with several tasks, such as:
Diagnosing overly restrictive security group rules,
Monitoring the traffic that is reaching your instance,
Determining the direction of the traffic to and from the network interfaces.
If you publish the Flow Log to CloudWatch Logs, you can query it using Log Insights.

Subtitles are available in English, French and Spanish. Click here to get the full masterclass.
How to identify?
Use Log Insights to find cost anomalies. VPC Flow Logs can be a valuable resource for identifying and addressing cost anomalies in your AWS environment. Here are some examples:
Unused or Underused Resources: Check if there is any network traffic to and from these resources. If not, they might be candidates for termination or resizing.
Excessive Data Transfer: Detect high volumes of data transfer between availability zones or regions, which can incur additional costs.
Unauthorized or Malicious Traffic: Identify unusual traffic patterns that may indicate unauthorized access or malicious activity, such as data exfiltration.
High Traffic from Specific IPs or Services: Identify specific IP addresses or services generating a disproportionate amount of traffic, which might indicate inefficient application design.
How to fix?
Create a VPC Flow Logs group and publish it on CloudWatch Logs.
Use the sample queries provided by AWS to investigate the traffic.
Understand your workload’s traffic usage and find the anomalies.
Contact AWS Support to help you understand excessive costs.

Small AWS accounts or orphaned accounts can remain unused, costing thousands every month for no reason.
Decommissioning unused AWS accounts is a crucial practice for optimizing costs and maintaining security and efficiency within your AWS Organization.
Unused accounts may still incur charges for services like AWS Config, which continues to monitor and record configurations even if the account is not actively used.
Unused accounts can become targets for unauthorized access or attacks. Decommissioning them reduces the potential attack surface.
Fewer accounts mean simpler management, making it easier to monitor and manage the remaining active accounts.
Subtitles are available in English, French and Spanish. Click here to get the full masterclass.
How to identify?
In AWS Console, go to Billing and Cost Management, then select the Bills section.
Review how much money you are spending on the account.
Ask your colleagues if the account is still in use.
How to fix?
- Ensure the account is not needed anymore.
- Backup any resource you want to keep and nuke the rest.
- In AWS Organization Console (Root Account), find the account and click on Close.
- Any member account that you close will display a SUSPENDED label next to its account name in the AWS Organizations console.
- After 90 days (Post-closure period), the member account will be permanently deleted.

Serverless computing allows you to build and run applications and services without managing servers. Modern applications are increasingly built with a serverless-first strategy, prioritizing the adoption of serverless services.
Subtitles are available in English, French and Spanish. Click here to get the full masterclass.
How to identify?
AWS developed serverless services for all three layers of your stack:
Compute: Lambda, Fargate
Application Integration: EventBridge, Step functions, SQS, SNS, API Gateway, Appsync
Data Store: S3, EFS, DynamoDB, RDS Proxy, and following serverless DB/option: Aurora, Redshift, Neptune, OpenSearch, ElastiCache

Example 1: Lambda VS EC2
If you use EC2 instances, you are likely not always using 100% of the compute capacity. Many customers only use 10–20% of the available capacity at any point in time. This average is also affected by high availability and Disaster Recovery requirements, which often result in idle servers waiting for failover traffic.
In the on-demand AWS Lambda compute model, you are charged based on the number of requests and the execution time of your code. This can be more cost-effective than running servers 24/7.

AWS Lambda is ideal for event-driven, variable workloads where you want minimal operational overhead and cost-efficiency for intermittent usage.
Amazon EC2 offers the most control and flexibility, making it suitable for consistent high-demand workloads or legacy applications requiring specific configurations.

Example 2: ElastiCache Serverless
|
Feature |
Serverless caching |
Self-designed clusters |
|
Pricing model |
Pay-per-use, based on data stored and requests. |
Pay-per-hour, based on cache node usage. |
|
Cache setup |
Create a cache with just a name in under a minute. |
Provides fine-grained control over cache cluster design. |
|
Supported ElastiCache version |
Valkey 7.2 and higher, Redis OSS version 7.1 and higher, Memcached 1.6.21 and higher |
Valkey 7.2 and higher, Redis OSS version 4.0 and higher, Memcached 1.4 and higher |
|
Multi-AZ |
Data is replicated asynchronously across multiple AZs for higher availability and improved read latency. |
Provides an option to design the cluster in a single AZ or across multiple AZs. |
|
Encryption in transit & at rest |
Always enabled. |
Option to enable or disable. |
|
Global Data Store |
Not supported |
Supported |
|
Data Tiering |
Not supported |
Supported |
Choose serverless caching if:
You are creating a cache for new or unpredictable workloads.
You have unpredictable application traffic.
You want the easiest way to get started with a cache.
Choose to design your own ElastiCache cluster if:
You are already running ElastiCache Serverless and want finer-grained control over node type, number of nodes, and placement.
You expect predictable application traffic and want control over performance, availability, and cost.
You can forecast your capacity requirements to control costs.
How to fix?
Going serverless on AWS can significantly optimize costs by eliminating the need to manage and pay for idle server capacity.
Build your architecture with a serverless-first strategy.
Predict your workload’s usage and traffic.
Update your existing infrastructure to leverage serverless services.
If resources are provisioned automatically via IaC (such as CloudFormation or Terraform), update the corresponding code to reflect the changes.

AWS has changed the pricing model for Cognito Machine-to-Machine (M2M) Client Credentials. Since May 2025, the service is no longer free of charge.
Subtitles are available in English, French and Spanish. Click here to get the full masterclass.
New Prices:
Token Generation Pricing
|
Token Requests per Month |
Description |
Range Price |
New Price |
INCREASED Unit Price |
|---|---|---|---|---|
|
Tier 1 |
USD 0.00 per client credential flow (M2M) token request in tier 1 |
1-250,000 Tokens |
$2.25 per 1000 tokens |
0.002250 |
|
Tier 2 |
USD 0.00 per client credential flow (M2M) token request in tier 2 |
250k-5M Tokens |
$1.5 per 1000 tokens |
0.001500 |
|
Tier 3 |
USD 0.00 per client credential flow (M2M) token request in tier 3 |
5M+ Tokens |
$1.125 per 1000 tokens |
0.001125 |
App Client Pricing
|
App Client |
Description |
Range |
New Price |
|---|---|---|---|
|
Tier 1 |
USD 0.00 per client credential flow app client, pro-rated by the second, in tier 1 |
1-100 Clients |
$6 per app client |
|
Tier 2 |
USD 0.00 per client credential flow app client, pro-rated by the second, in tier 2 |
101-500 Clients |
$3 per app client |
|
Tier 3 |
USD 0.00 per client credential flow app client, pro-rated by the second, in tier 3 |
500+ Clients |
$1.5 per app client |
How to identify?
In AWS Console, go to the Bills service, select May 2025, then the Cognito section. Compare with previous month.
From our Cost Optimization Report , check the COGNITO_New_Costs section.
How to fix?
Reuse Cognito Tokens to reduce the number of token requests.

Set caching keys to minimize token generation.

With API Gateway token caching, your app can scale in response to events larger than the default request rate quota of Amazon Cognito OAuth endpoints. Read Develop Guide.
If the resource is provisioned automatically via IaC (such as CloudFormation or Terraform), update the corresponding code to reflect the changes.

Amazon CloudWatch dashboards are customizable home pages in the CloudWatch console. They allow you to monitor your resources in a single view, even across different AWS Regions. Metric data is retained for 15 months, enabling you to analyze both real-time and historical data.
How to identify?
You can check the alarms using the DescribeAlarms API call.
aws cloudwatch describe-alarms --alarm-names "myalarm"
aws cloudwatch describe-alarms --state INSUFFICIENT_DATA
Use AWS Config Managed rule “cloudwatch-alarm-action-check” to check that the Alarms have at least one alarm action.
How to fix?
Reducing Dashboard Costs
Charges apply when you exceed three dashboards (with up to 50 metrics each).
Free Tier: Up to 3 dashboards for up to 50 metrics per month (API calls via the console do not count against the Free Tier; SDK or CLI calls do).
Delete unnecessary dashboards to stay within the Free Tier limits.
Optimizing Alarms
Check for unused alarms: Alarms may remain even after the associated resource is deleted. A good indicator is an alarm in the INSUFFICIENT_DATA state.
Ensure alarms have at least one alarm action using AWS Config.
Enable high-resolution alarms only for mission-critical use cases.
Alarm Types
Metric Alarm: Monitors a single metric.
Composite Alarm : Uses a rule expression to evaluate the state of multiple alarms (states: OK, ALARM, INSUFFICIENT_DATA).
Use the DescribeAlarms API call to check alarm status and take action as needed.

Moving a database from Multi-AZ to Single-AZ can significantly lower costs, as Multi-AZ instances typically cost approximately twice as much as Single-AZ instances for the same compute capacity.
Multi-AZ should be only allowed for production (prod) accounts.
Sandbox and NonProd accounts should only use Single-AZ instances.
That 50% Savings is achieved because you remove the standby replica instance and associated inter-AZ data transfer costs.
Subtitles are available in English, French and Spanish. Click here to get the full masterclass.
How to identify?
From our Cost Optimization Report , check the NonProd Multi-AZ instances section.
In AWS Console, Navigate to RDS service > Database section > Filter by Multi-AZ.
How to fix?
Update your Infrastructure as Code (IaC): Modify the database instance configuration in your IaC templates (e.g., Terraform, CloudFormation) to use Single-AZ instead of Multi-AZ.
On the AWS Console, navigate to RDS Service, select one database and click on Modify to remove the standby instance.

Why This Matters
Compliance: Ensures non-production environments follow cost-saving policies.
Cost Efficiency: Reduces unnecessary spending on high-availability features where they aren’t required.
 One Zone storage classes
store data redundantly within a single Availability Zone (AZ), offering a 47% lower price compared to Standard (Multi-AZ) storage classes. This option is ideal for workloads that do not require multi-AZ resilience.
One Zone storage classes
store data redundantly within a single Availability Zone (AZ), offering a 47% lower price compared to Standard (Multi-AZ) storage classes. This option is ideal for workloads that do not require multi-AZ resilience.
Regional (Multi-AZ) is only allowed for production (prod) accounts.
Regional file systems provide the highest levels of availability and durability by storing file system data and metadata redundantly across multiple geographically separated Availability Zones within a Region. They are designed to provide continuous availability to data, even when one or more Availability Zones in an AWS Region are unavailable.
Sandbox and NonProd accounts must use One Zone (Single-AZ) storage.
One Zone file systems redundantly store data within a single Availability Zone (AZ) and are ideal for applications that do not require the Multi-AZ availability and durability offered by Amazon EFS Regional file systems. They are designed to provide continuous availability to data within a single AZ in an AWS Region.
One Zone file systems provide continuous availability within a single AZ and are perfect for applications that do not need the Multi-AZ availability and durability of Amazon EFS Regional file systems.
Using One Zone storage classes can reduce costs by up to 47% and may also improve performance, as data does not need to replicate across multiple AZs.
Subtitles are available in English, French and Spanish. Click here to get the full masterclass.
EFS Pricing Page: EFS Pricing
Tips: Workshop Studio
How to identify?
From our Cost Optimization Report , check the EFS_MultiAZ_NonProd section.
In AWS Console, navigate to Amazon EFS > Check the Availability Zone column. If you see "Regional", it means the file system is Multi-AZ.

How to fix?
To change an Amazon EFS file system from multi-AZ (Regional) to single-AZ (One Zone), you cannot directly modify the existing file system's configuration. Instead, you must create a new One Zone file system and migrate your data to it. Here’s how you can do it:
Create a Backup: Before making any changes, ensure you have a backup of your existing EFS file system. You can use AWS Backup to create a backup of your current Regional file.
Create a New One Zone File System: Set up a new EFS file system with the One Zone storage class in your desired Availability Zone.
Migrate Data: Copy your data from the existing Regional file system to the new One Zone file system. You can use AWS DataSync or other data migration tools to facilitate this process.
Update Mount Targets and Client Configurations: Since One Zone file systems only support a single mount target in the same Availability Zone as the file system, update your EC2 instances or other clients to mount the new One Zone file system instead of the old Regional.
Test and Switch: After migration, thoroughly test the new file system to ensure everything works as expected. Once confirmed, you can decommission the old Regional file system if it is no longer needed.
Why This Matters
Compliance: Ensures non-production environments follow cost-saving policies.
Cost Efficiency: Reduces unnecessary spending on high-availability features where they aren’t required.
Bonus: Check out IA and Archive storage classes to save even more money.
Single-AZ Redis clusters run primary nodes only - no replicas, no cross-AZ replication - cutting cluster cost by 50%+ compared to Multi-AZ setups.
This option is ideal for workloads that do not require automatic failover e.g. Dev/Sandbox envs.
Multi-AZ (with replicas) should only be allowed for production (prod) accounts.
How it works
Multi-AZ Redis clusters replicate data from the primary to one or more replicas in separate Availability Zones.
If the primary fails, ElastiCache automatically promotes a replica and updates the primary endpoint, providing continuous availability, without loss of connectivity or data
Sandboxes and Non-Prod accounts must use Single-AZ (no replicas).
Single-AZ clusters cost a fraction of Multi-AZ and are ideal for dev/test workloads where data can be rebuilt or repopulated if a node is lost.
Savings scale with the replica-to-total-node ratio: a sharded cluster with 1 primary + 1 replica per shard saves ~50% when replicas are removed; a non-sharded 1-primary + 2-replica cluster saves ~66%.
The application should tolerate cache loss - without replicas, AWS maintenance events, AZ disruption, or node failure will make the cache temporarily unavailable until the node recovers. Cache-aside patterns and workloads that can fall back to the database are good fits.
How to identify?
- From our Cost Optimization Report, check the ElastiCache_MultiAZ_NonProd section.
- In AWS Console, navigate to Amazon ElastiCache > Redis caches > check the Multi-AZ column. If it shows "Enabled", the cluster has cross-AZ replicas. Any cluster with replicas > 0 in a non-prod account is a candidate.
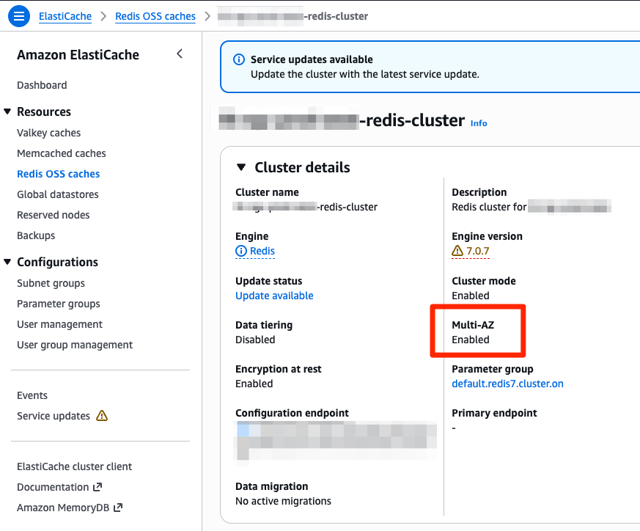
How to fix?
ElastiCache lets you reduce replica count and disable Multi-AZ in place - no recreation needed in most cases.
Create a Backup: Take a manual snapshot of the cluster (ElastiCache > Backups > Create backup) before making changes.
Disable Multi-AZ: Modify the replication group and set Multi-AZ to Disabled.
Reduce Replicas to Zero:
Use the console's Modify action
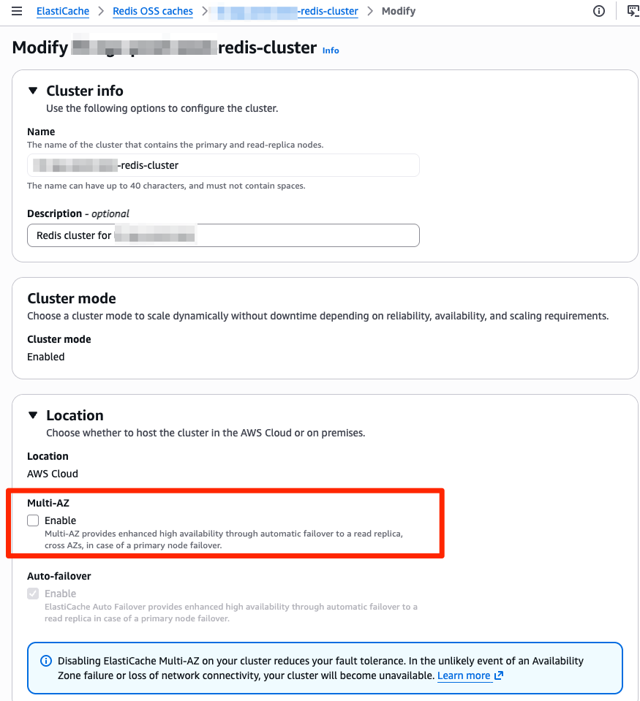
b. Run aws elasticache decrease-replica-count --replication-group-id <id> --new-replica-count 0 --apply-immediately. For sharded clusters this applies uniformly across all shards.
c. Update Terraform config to the desired settings, Terraform should allow for the in-place update of the cluster
4. Update Client Configurations: Any client using a reader endpoint must be repointed at the primary endpoint.
5. Test and Switch: Validate the application against the reduced cluster before considering the change complete.
If in-place modification isn't supported on an older cluster, create a new Single-AZ cluster, restore from snapshot, update connection strings, then decommission the old one.
Why This Matters
Compliance: Ensures non-production environments follow cost-saving policies.
Cost Efficiency: Reduces unnecessary spending on high-availability features where they aren't required.
Bonus: Also consider right-sizing node families, reserved nodes for steady-state non-prod, or Serverless ElastiCache for spiky workloads.
Bedrock batch inference processes large sets of prompts asynchronously, at a lower price than on-demand inference. Review on-demand workloads that can run asynchronously: the report estimates approximately 50% savings, but batch inference is only suitable for supported models and workloads that can tolerate delayed results. Validate current model pricing, latency needs and application fit before migrating.
How to identify?
You can identify Bedrock workloads eligible for batch inference using the following methods:
From our Cost Optimization Report, check the Bedrock On-Demand to Batch section.
The recommendation identifies the account and Region based on Bedrock input/output token usage. Review the application workloads in that account and Region to find requests that do not require an immediate response (e.g., document processing, classification, summarization, evaluations or embeddings generation).
How to fix?
Confirm the model and Region support batch inference (see supported models and Regions). Batch inference does not support provisioned models, tool calling, structured output or interactive multi-turn workloads.
Prepare the requests in the required JSONL format and upload the input files to S3. Choose an S3 location for the results and configure the required Bedrock service role and permissions.
In AWS Console, go to the Amazon Bedrock service, then select the Batch inference section and click Create job. Select a supported model, choose the matching invocation format (InvokeModel or Converse), specify the S3 input and output locations, then submit the job.
Monitor the job and retrieve its results from S3. Switch the application to batch processing only after validating result handling and end-to-end behavior; keep on-demand inference for latency-sensitive requests.
Update the application configuration or infrastructure-as-code (IaC) so the batch workflow is maintained.
Note: the report’s ~50% savings is an estimate, not a guarantee. Verify current pricing for the selected model and Region before migrating. See the AWS documentation on batch inference, supported models and Regions and creating a batch job.
Subtitles are available in English, French and Spanish. Click here to get the full masterclass.
How to identify?
- Look at your Migration Plan contract to see terms and conditions. You should see a Credit Percentage (MAP Services Formula), e.g. 20%, eligible to specific services, e.g. EC2.
- Tag your migrated resources with the correct value, e.g. map-migrated = mig00000000.
- Wait until you reach the minimum threshold, e.g. 20K.
- The Credits should be automatically added to your account.
- There is also a maximum amount, e.g. 100K and a duration for the MAP, e.g. 2 years.
How to fix?
- Tag your resources directly in your IaC tool with tag map-migrated and correct value.
- Use Tag Editor directly in AWS Console to tag the rest of untagged resources.

AWS commits to offer Service Level Agreements (SLAs) for all paid, generally available services .
An SLA is a contract that outlines the level of service a supplier promises to deliver to the customer, including metrics such as uptime, delivery time, response time, and resolution time. It also specifies the penalties or service credits if the provider fails to meet the agreed standards.
Service credits are deducted when AWS fails to meet the standards set out in the SLA.

Subtitles are available in English, French and Spanish. Click here to get the full masterclass.
One Example with Lambda:

10% credits for services with availability between 99% and 100%.
|
Monthly Uptime Percentage |
Monthly Downtime |
|---|---|
|
100% |
1 second |
|
99.999% |
26.1 seconds |
|
99.99% |
4.3 minutes |
|
99.95% |
21.6 minutes |
|
99.9% |
43.2 minutes |
|
99.0% |
7.2 hours |
|
98.0% |
14.4 hours |
|
95.0% |
36 hours |
If your Lambda function is unavailable for more than 36 hours in a month, you can receive 100% credits back.
If your Route 53 service is down for 1 second, you can receive 10% credits.
How to identify?
Review your impacted services during outages.
Check the AWS Service Health Dashboard for details on service availability and incidents.

How to fix?
To receive Service Credits, you will need to submit a claim by opening a case in the AWS Support Center . To be eligible, the credit request must be received by AWS by the end of the second billing cycle after which the incident occurred and must include:
The words "SLA Credit Request" in the subject line.
The billing cycle and AWS regions with respect to which you are claiming Service Credits, together with the Monthly Uptime Percentage for that AWS region for the billing cycle and the specific dates, times, and Availabilities for each 5-minute interval with less than 100% Availability in that AWS region throughout the billing cycle;
Your Request logs that document the Errors for your claimed outage (any confidential or sensitive information in these logs should be removed or replaced with asterisks).